Creating a Game Room: Part 24 - Moving Things Forward
A solid year of improvements
Well, it’s been about a year since I’ve written one of these, and I’ve actually done a surprising amount of work on the room in that time. It didn’t seem like much while I was doing it, but stacked up against the pictures in the last one of these posts, it’s really been coming along.
The biggest undertaking was probably the paint job.
A Dash of Game Boy Gray
I’ve always hated the color of this basement. The baby food yellow made the place look way more dingey than it had to, especially considering that it’s a basement. It doesn’t need help in the dingey department.
I didn’t want to go with plain white because I didn’t want the place to look cheap, if that makes any sense. There’s just something about painting the walls stark white that rubbed me the wrong way. I wanted some sort of color, and I landed on gray. Game Boy gray to be specific. I went to my local paint shop and had them color match one of my Game Boy units, and the result was fantastic.
The whole room feels so much brighter now, and I even managed to get my old X-Men poster attached to the closet door. Score!
Great Stuff Behind the Door
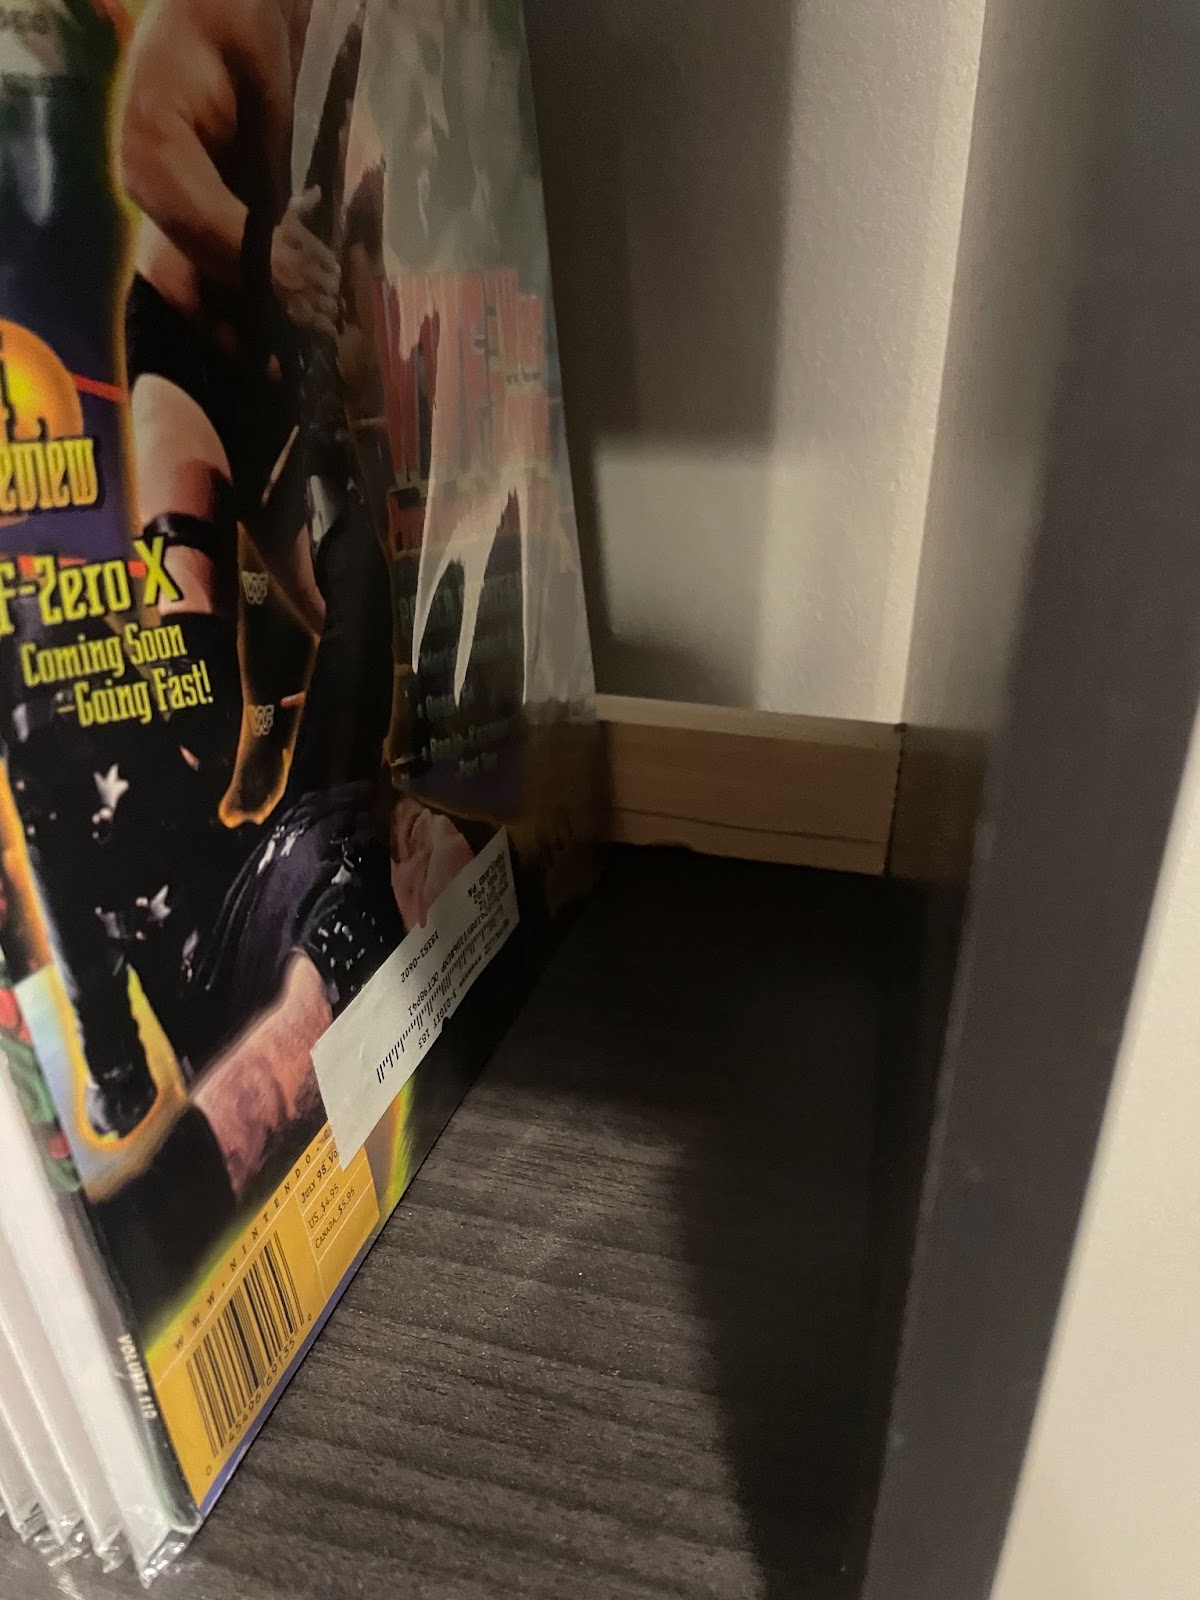
Speaking of the last post though, I’ve done some rearranging in the closets. Have a look.
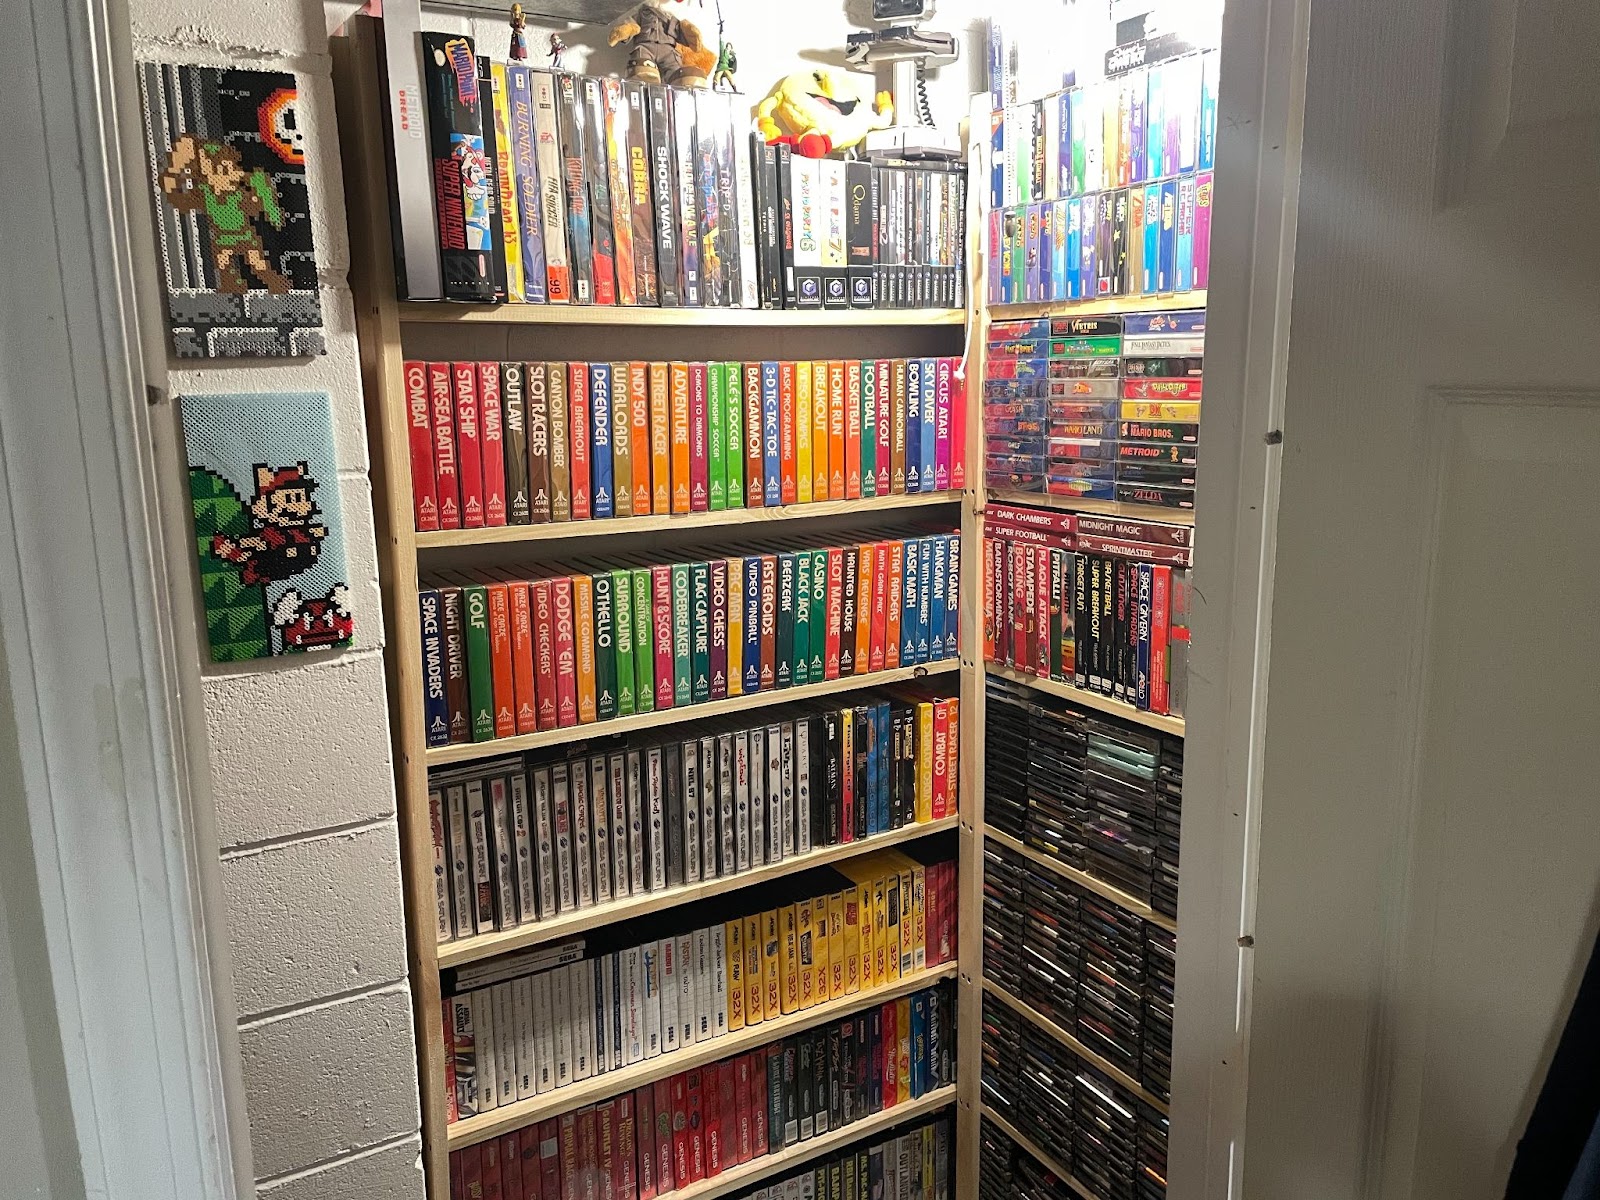
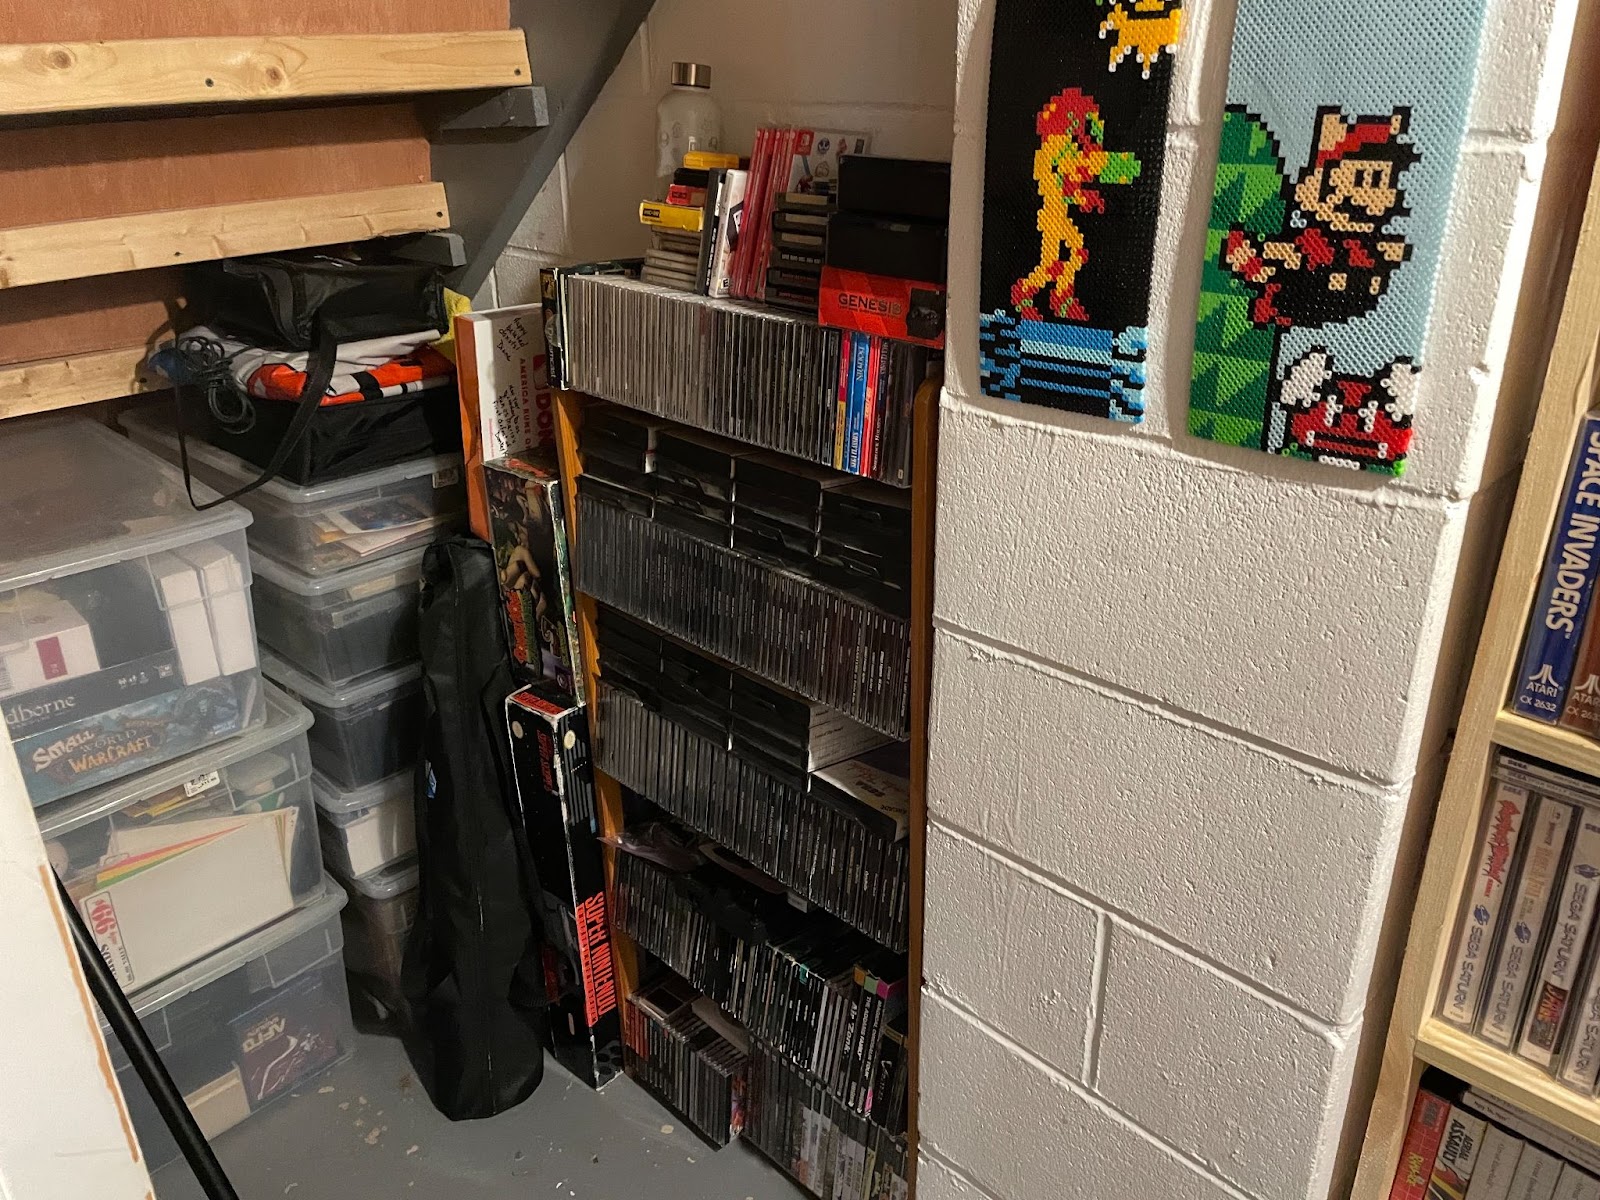
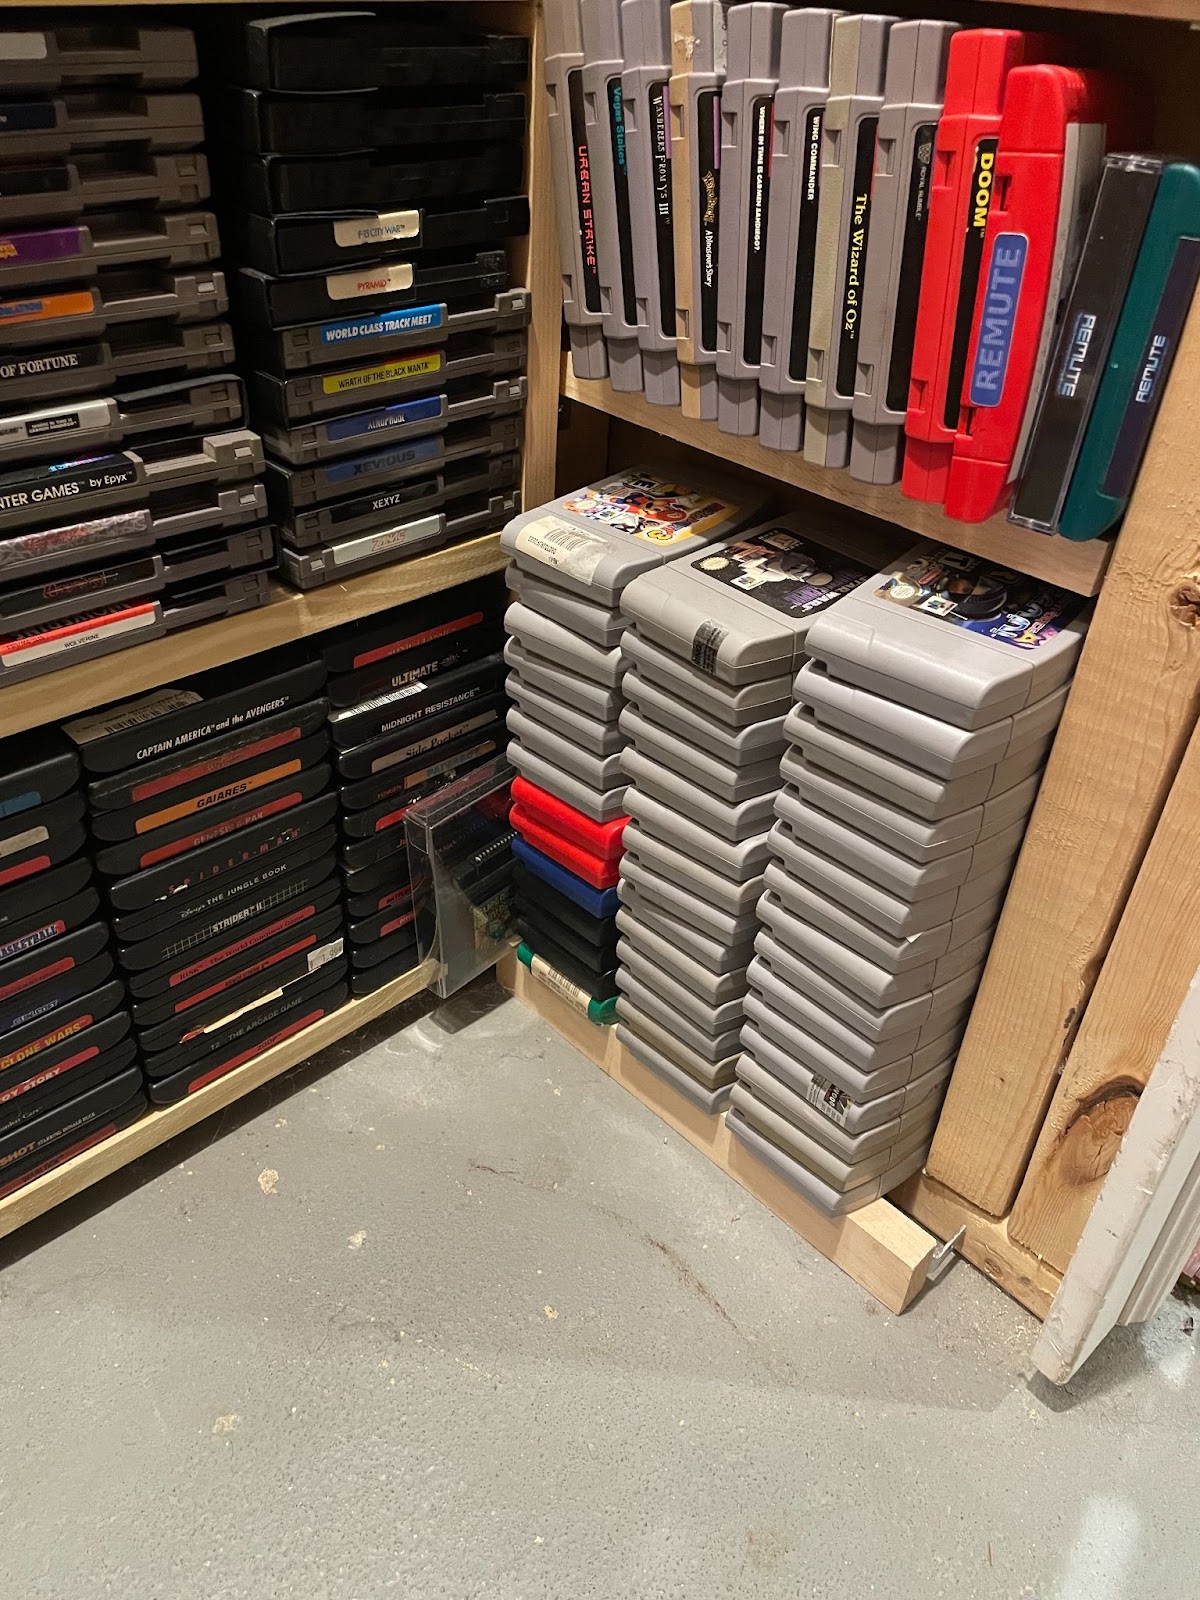
As you can see, the CD-based games are much more organized than they were, and I’ve managed to clear out a bunch of the extra stuff I just didn’t need in here anymore. There have been a lot of refinements in terms of clearing out stuff I don’t actually want and making room for the stuff that I do. I wound up selling a whole mess of stuff at a local game convention a month or so ago, and I hope to do it again sometime soon. It feels really good to unload some of the stuff I simply have no more use for.
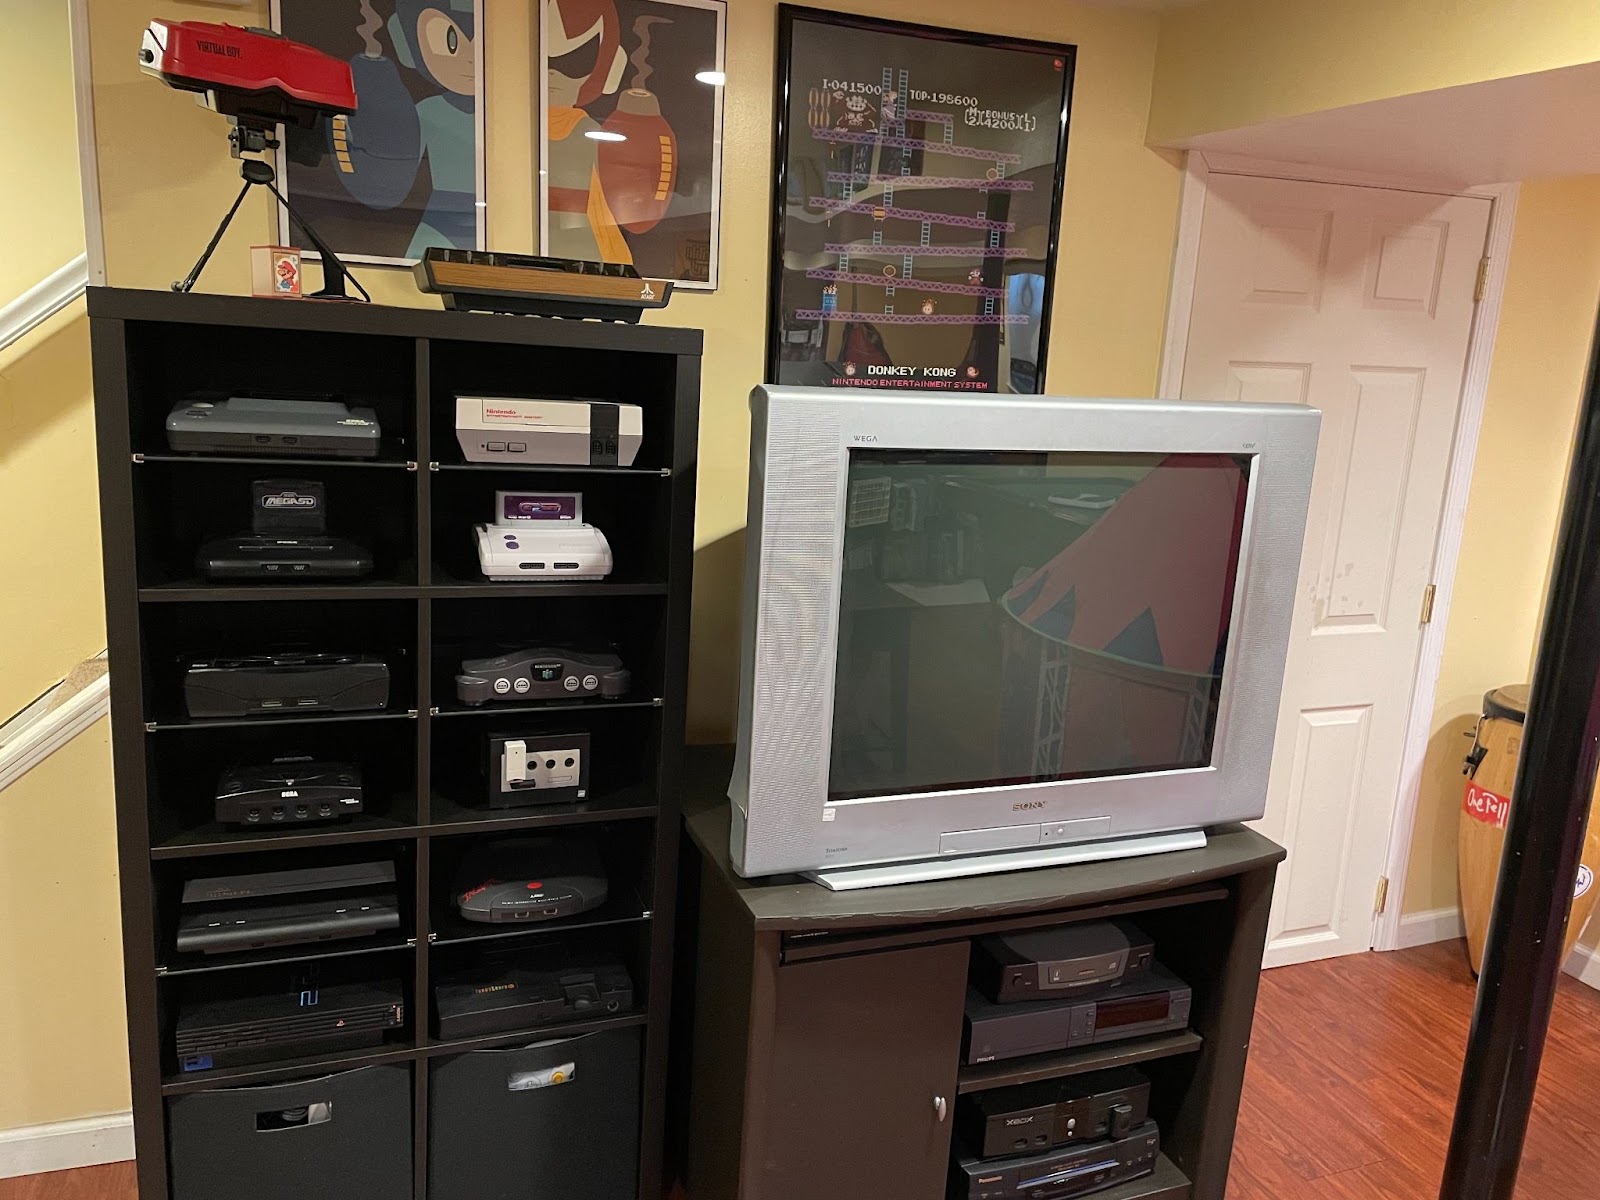
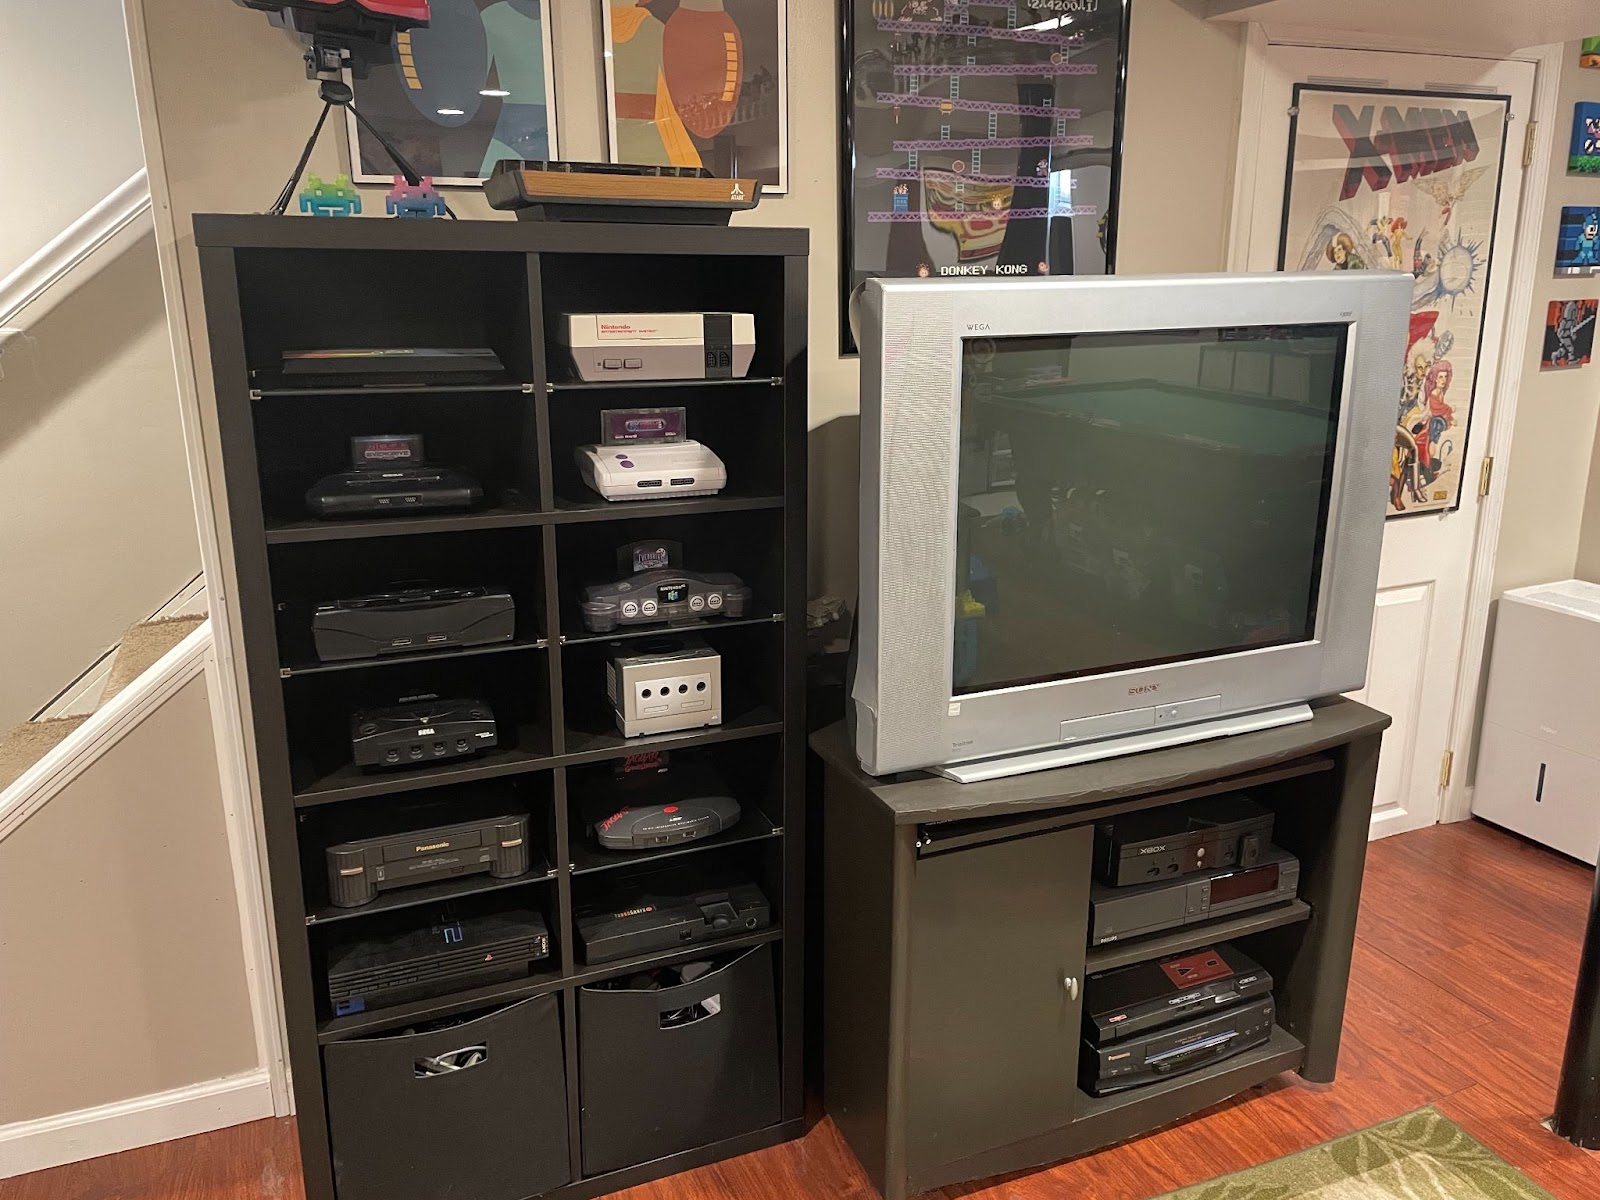
You may also notice that Game Boy is in here now, which I’m not too crazy about, but more on that in a bit.
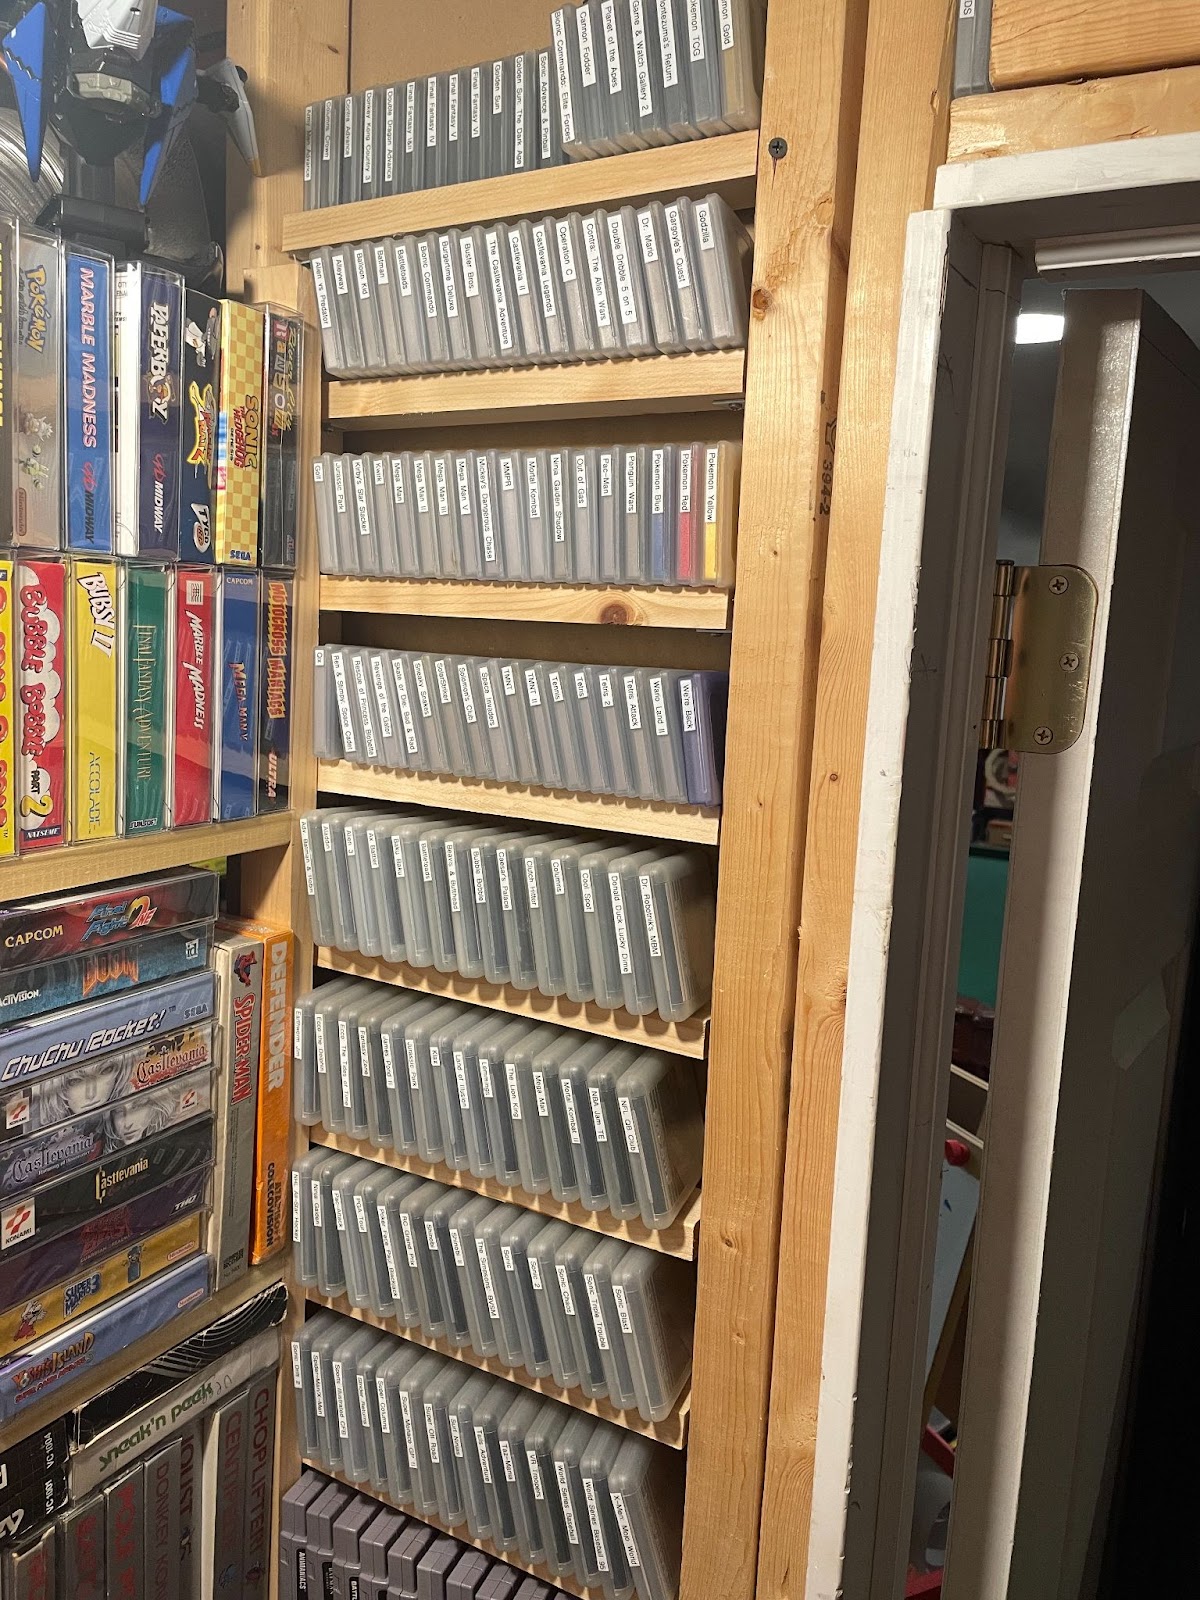
On the topic of Game Boy, I did wind up making labels for the GB and Game Gear stuff that was loose in here. It makes finding things so much easier. I still need to come up with a proper solution for loose Nintendo 64, but that doesn't honestly come up very much, so it’s hardly a priority.
Playing with Power
Another project that changed things down here for the better was a new home for my Nintendo Power collection, which had previously proven somewhat problematic. I’ve been pretty paranoid about keeping them in my basement since that’s where I kept them in my old apartment, and that’s where they were subsequently severely water damaged by a flood. My paranoia is somewhat unwarranted where I live now because my area is on top of a hill, and as the home inspector said when we bought the place, if my basement is flooding it’s either because of a burst pipe or it’s the end of the world. So I decided to bite the bullet and start thinking of a way to get them displayed and accessible in the game room.
I use the magazines relatively frequently for research purposes and general relaxation and stuff, so having them somewhere more accessible to me is a legitimate concern. One of the bigger hurdles though is that the magazines themselves aren’t super easy to display in an attractive manner, and making things look nice is of the utmost importance to me in this basement. Fortunately, I stumbled across a piece of furniture that I already owned which managed to be the perfect place to keep them.
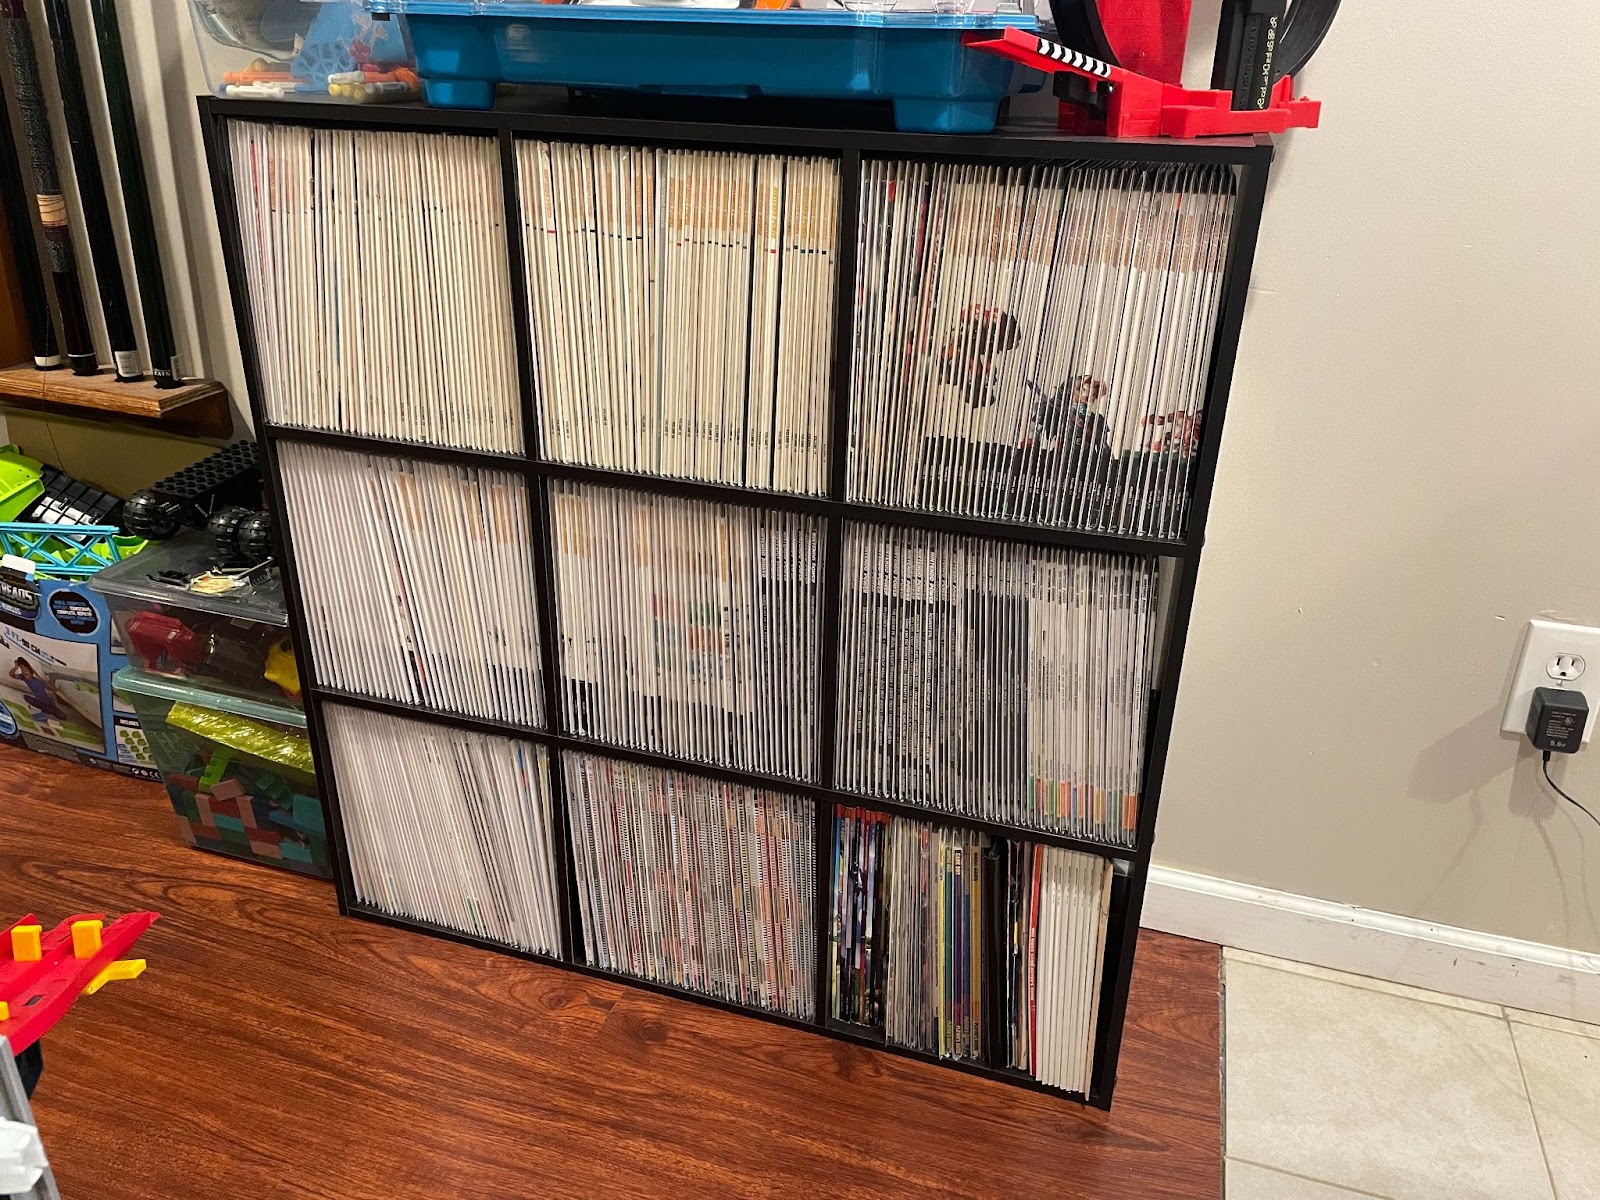
Well, almost perfect. The full set of magazines fits wonderfully here, except for the fact that they exceed the weight limit by a significant amount. It’s not terrible, but it could easily cause a problem if left unchecked for too long. I have a plan for reinforcing the shelves, but I have yet to implement it. Hopefully I get to it before it becomes an issue. (Get it? Issue? Magazines? I’ll see myself out…)
The other issue (HA!) with the furniture was much easier to solve, and that was how to keep the magazines sitting straight on the shelves. Much like the ones under my TV stand, I simply nailed some pieces of scrap wood across the back of the cubes, and voila!
They fit like a charm, and they look great to boot. I made a video a little while back about the magazines themselves, if you want to check that out.
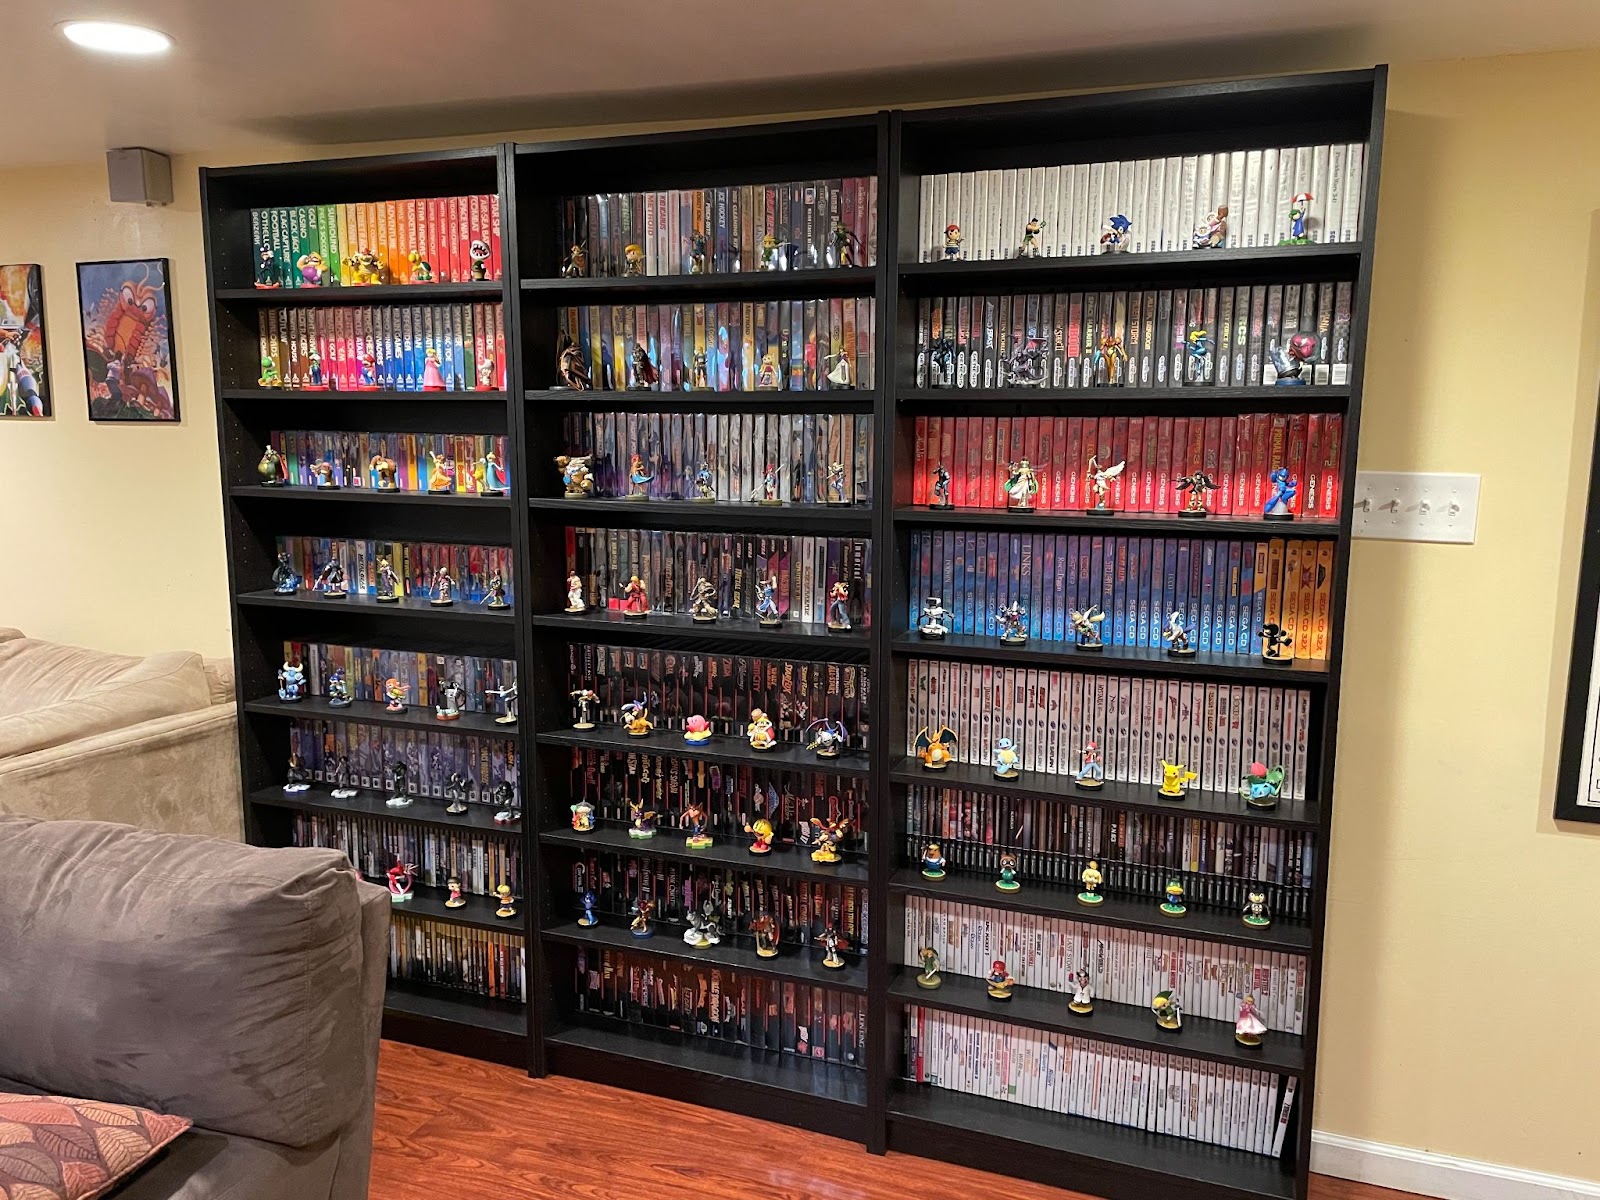
Pushing Game Shelves Forward
There’s one more thing that’s been bothering me though, and I’ve been struggling with what to do about it since I first got this room properly put together. It has to do with the Billy bookshelves from IKEA. They’re great, and they allowed me to do what I’ve always wanted, to have the games lined up on the shelves and have my amiibo lined up in front of them.
That always seemed like a terrific idea in my head, but in practice it always wound up looking a little too busy for my liking. I thought I'd get used to it, but I didn’t. It looked cool, but it bugged me. I’d have Kid Icarus figures in front of the Genesis games and whatnot because there are obviously a ton of Nintendo amiibo and not very many Sega ones, but Sega is a large portion of the games on display, and I’m a nut so it bothered me.
Yet another thing that hasn’t been sitting well with me is the fact that I have a large portion of my NES and SNES collections in the closet. Having them split like that seemed like a good idea at first because it allowed me to get more platforms on display. Over time though, it’s become less important to me. I love the Master System, but those boxes are ugly. I LOVE my Game Boy and Virtual Boy stuff, but they leave so much empty space on the shelves. I decided to take Game Boy, GameBoy Color, Game Boy Advance, and Master System off in favor of getting all my NES and SNES games out, and I can honestly say I’m much happier.
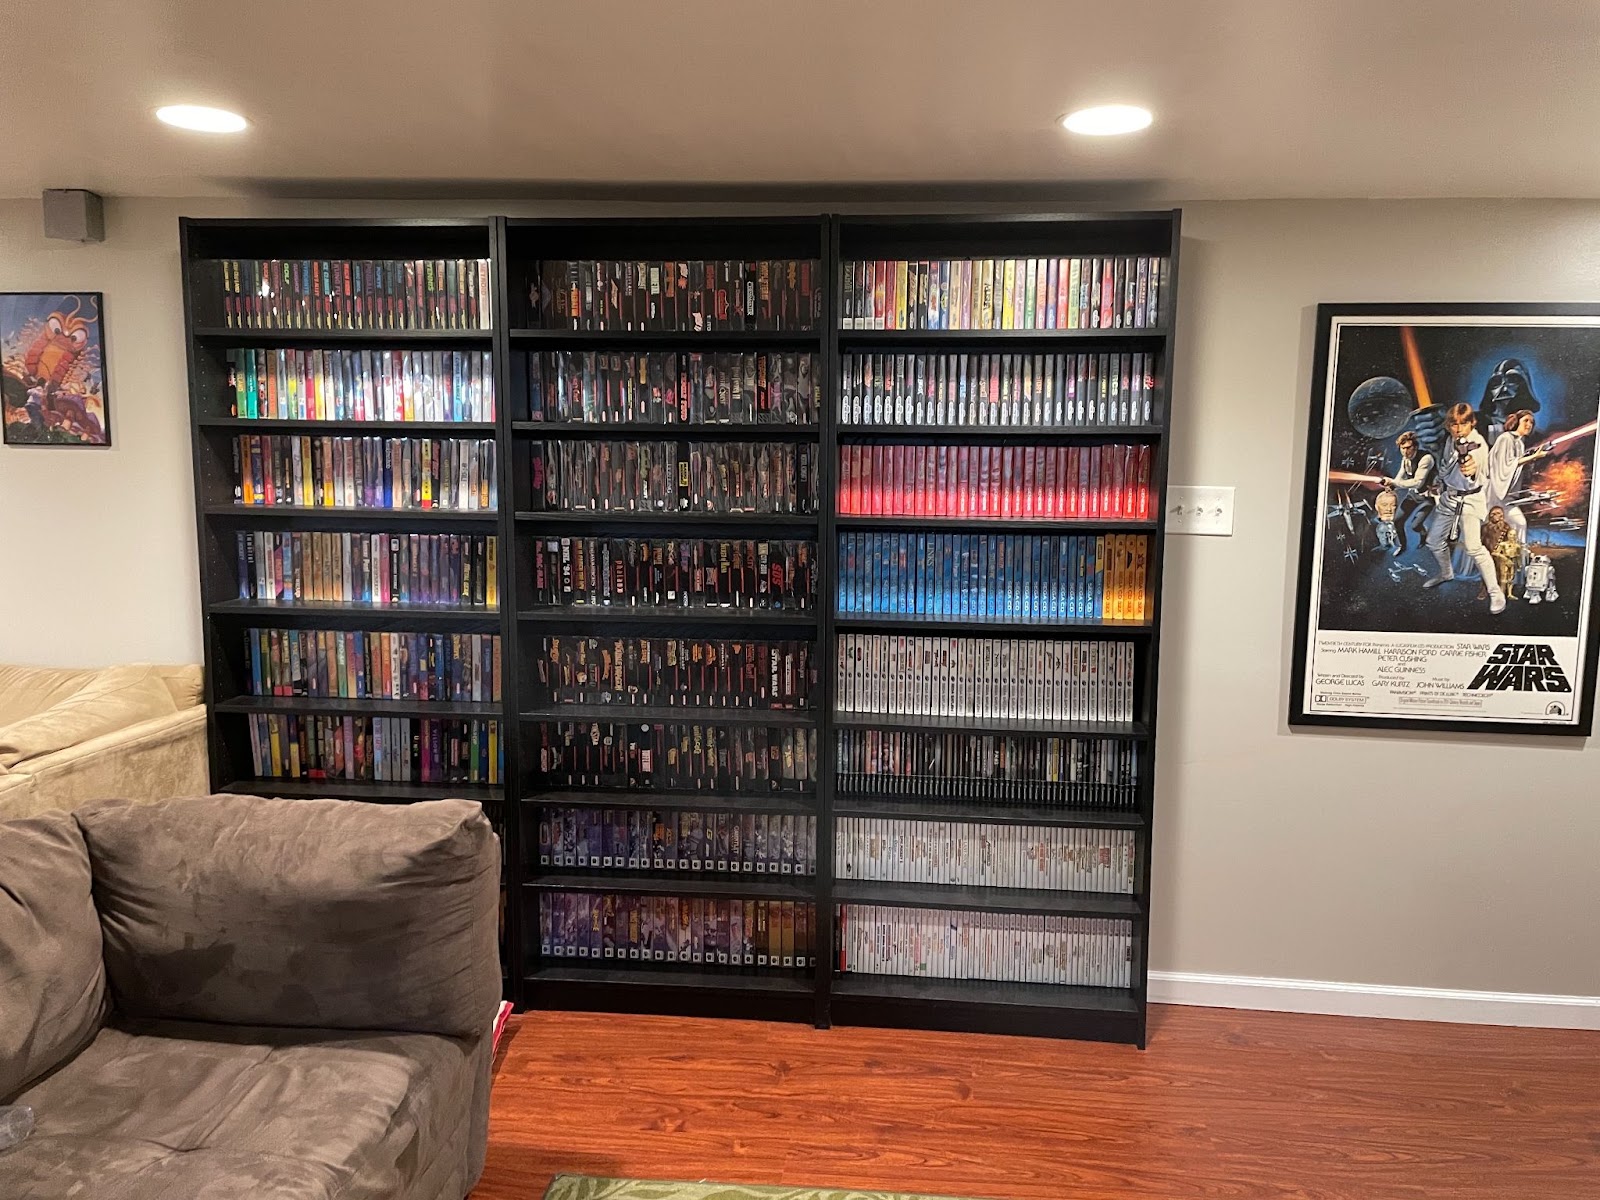
Yes, the Game Boy boxes are in the closet, but I don’t think that’s a permanent solution. I’d like to figure out a way to get them on display somewhere more prominent, but I’m at a loss for now. Regardless, this is an improvement, and I’m happy.
There was still the amiibo problem though. Pushing the games forward on the shelves wouldn’t be quite as easy as the other ones because this is a much larger scale project, and I don’t have nearly enough scrap wood to cover all these shelves. Then, I made a discovery.
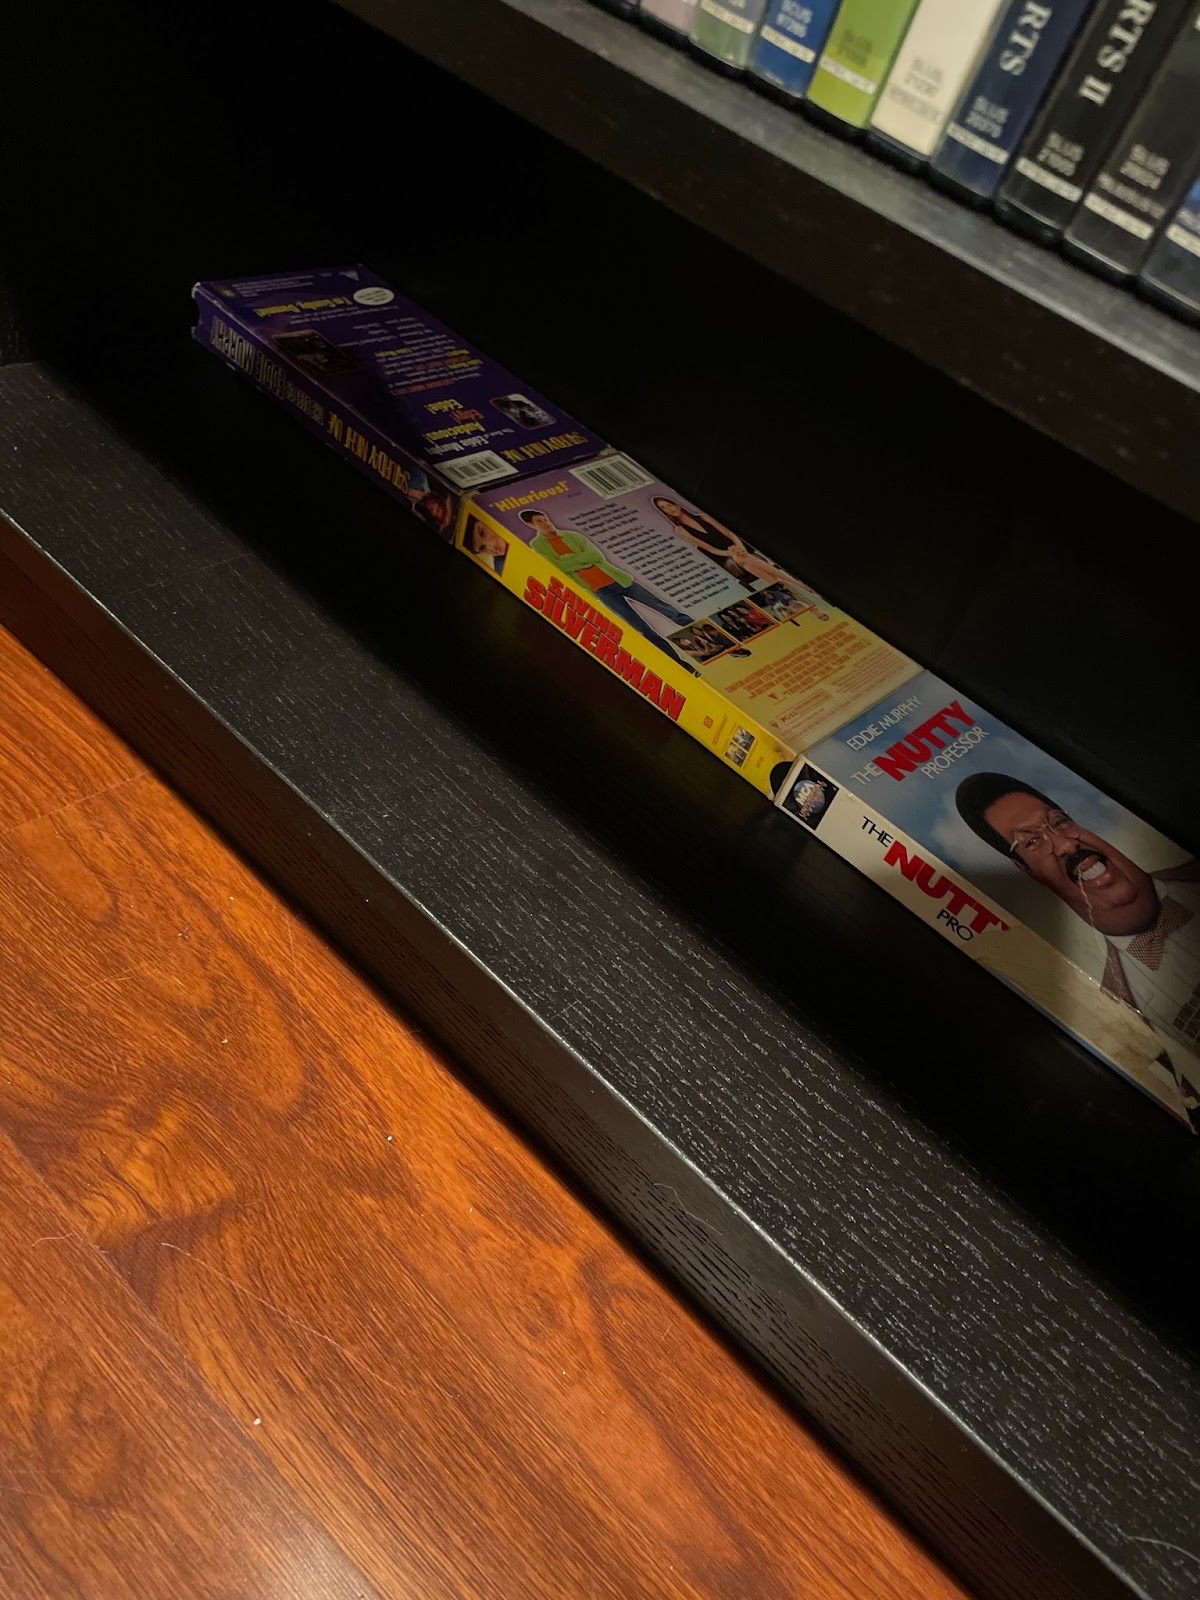
VHS tapes make the perfect shelf spacers for Billy bookshelves. Seriously, they fit 4 across flawlessly, and they push the game right up to about an inch away from the edge. This would mean finding a new home for all my amiibo, but after some tests, it became apparent that this was absolutely the right way to go.
The trouble was, I didn’t have nearly enough VHS tapes. But as luck would have it, I hopped on Facebook marketplace and quickly found someone selling about 90 VHS tapes for $15 right down the street from me. We met up at the local ShopRite, and the tapes were mine. The result speaks for itself.
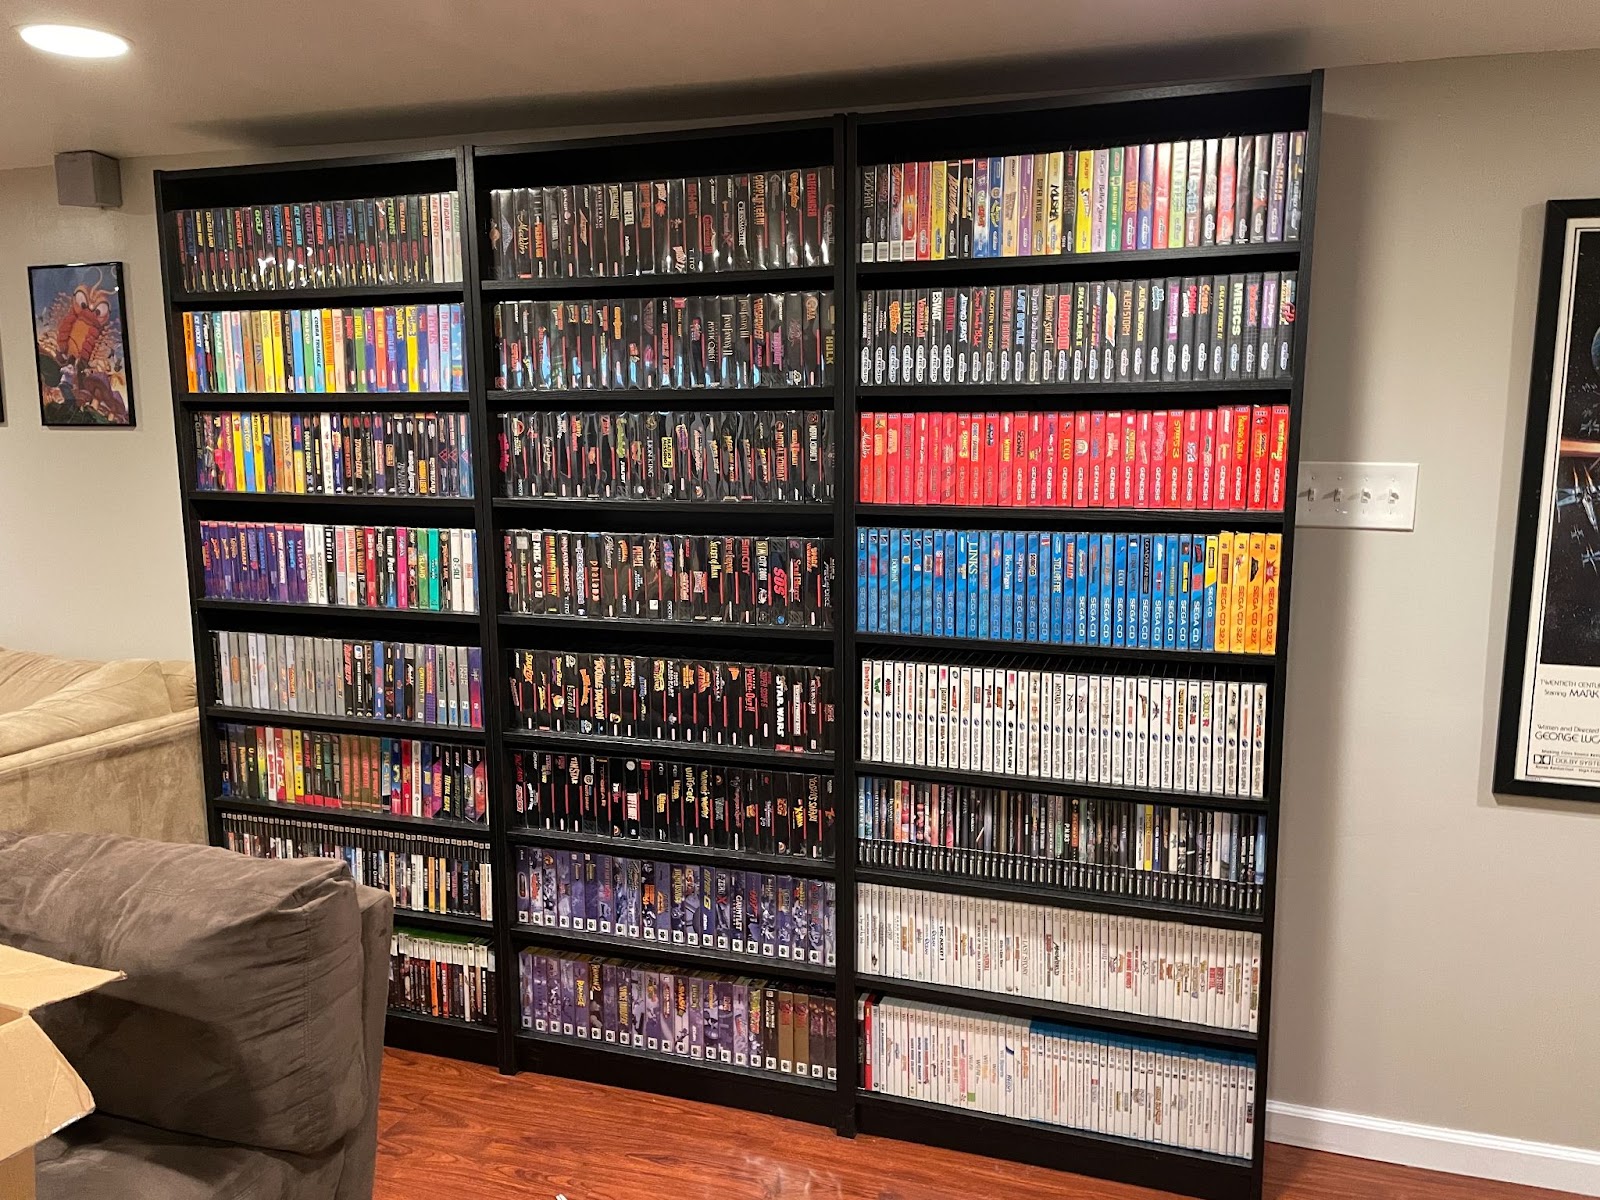
This is such a better presentation. The games are what I want to look at, and now they’re front and center. I love my amiibo collection, but they were just getting in the way. This looks fantastic! I did have some trouble messing with the order of my NES games, organizing them by publisher and stuff, but honestly, when they’re lined up like this, them being in alpha order doesn’t bother me nearly as much as it did before. I’m probably going to continue to keep all the Nintendo published stuff together for now, but all in all, this is a great look.
The next thing to tackle is the amiibo, of which I have a LOT. I think it’s somewhere in the 120 range. Those shelves were a great spot for them, but not at the expense of the games themselves. I think I have a plan though, so if I can manage to pull it off, I’ll write about it once it’s complete.
Until next time…
The Game Room story so far
Creating a Game Room: Part 23 - Filling in the Gaps
Creating a Game Room: Part 22 - The Closet Conundrum
Creating a Game Room: Part 21 - Decorating and Procrastinating
Creating a Game Room: Part 20 - Console Consolidation
Creating a Game Room: Part 19 - So Long, Temporary Solutions!
Creating a Game Room: Part 18 - And Everything Inbetween
Creating a Game Room: Part 17 - Atari to Xbox
Creating a Game Room: Part 16 - Making Nintendo Look Good
Creating a Game Room: Part 15 - Overdoing it on Organizing
Creating a Game Room: Part 14 - At Long Last, SHELVES
Creating a Game Room: Part 13 - Adventures in Consolidation
Creating a Game Room: Part 12 - On the Blink
Creating a Game Room: Part 11 - Reclamation at Last
Creating a Game Room: Part 10 - Paint it Black
Creating a Game Room: Part 9 - Inspiration From Above
Creating a Game Room: Part 8 - A Nice Place to Sit
Creating a Game Room: Part 7 - Two Steps Forward…
Creating a Game Room: Part 6 - Love (HDMI) Connection
Creating a Game Room: Part 5 - CRTs are Heavy
Creating a Game Room: Part 4 - Arcade Dreams
Creating a Game Room: Part 3 - Shelf-Satisfaction