Creating a Game Room Part 10: Paint it Black
Wow. It’s been about 6 months since my last entry. While it may not look like too much has changed down here in my basement, there’s actually been a lot of things moving around. Let’s start with the heaviest thing.
Not too long ago I decided it was time to part with some of the things I just don’t need in my collection. I went on quite the digging expedition and managed to put together a sizeable selection of things to sell off. Bought myself a new dishwasher with some of the profits too! Anyway, for a quick side step here, a long time ago I used to be a musician. I was a drummer. I love playing the drums. The plan when I moved into this house was eventually to be able to set up my drum kit in my garage once I was able to set up proper shelving downstairs for all my games. Since I haven’t been able to make my ceiling shelves happen (yet), this seemed like something that wasn’t likely to happen for a very long time. Then I got to thinking, and I decided to see just how much room I could make in my garage in hopes of maybe carving out a small space to fit my drum set. After working for a few days in there, I realized that I had a bit more room than I had originally thought, and not just in the garage.
Another part of this whole garage thing was consolidating a bunch of stuff in the house to a single location. Some of these things were in the laundry room, some of them were in the basement closet, and some were just floating around in random locations. I like things to be organized and centralization is key to that, so it was time to get all that business together in one place, and the garage was the perfect home. So I started by emptying out the basement closet and wouldn’t you know, after looking a bit more closely at it, it seemed a bit more spacious than I remembered. Taking away the stuff that I wanted to sell off, I estimated that it might be possible for my entire collection in the secure, climate controlled basement closet. I immediately got to work on the idea and thankfully, it all fit!


I know, it’s tight. But like I said, this space is climate controlled, which my garage is most certainly not. Most of my more expensive items were in this closet already anyway, but it’s nice to have it all here now. It’s slightly less accessible than it was in the garage, but that’s just more motivation for me to get moving on those ceiling shelves. Also, I came up with a nice spot for my drum kit. So big win all around!
This also lead me to another small victory, which unexpectedly incorporated the bar. My Vectrex is one of my very favorite things in my collection. I have a multicart so almost the whole library is available to me anytime I want to play, but I haven’t been able to figure out a good place to put the thing. Then it hit me: It’s perfect for the bar! It’s just the right size, and once we get some bar stools in the house, that will be an amazing place to sit and play some Vectrex. It will live right in this corner as to not encroach too much on my wife’s bar. (I don’t drink. She does. Thus, it’s her bar.) In fact, it really adds to the setup, I think. I love it, and she’s cool with it, too. It’s so nice having a home on display for this guy.

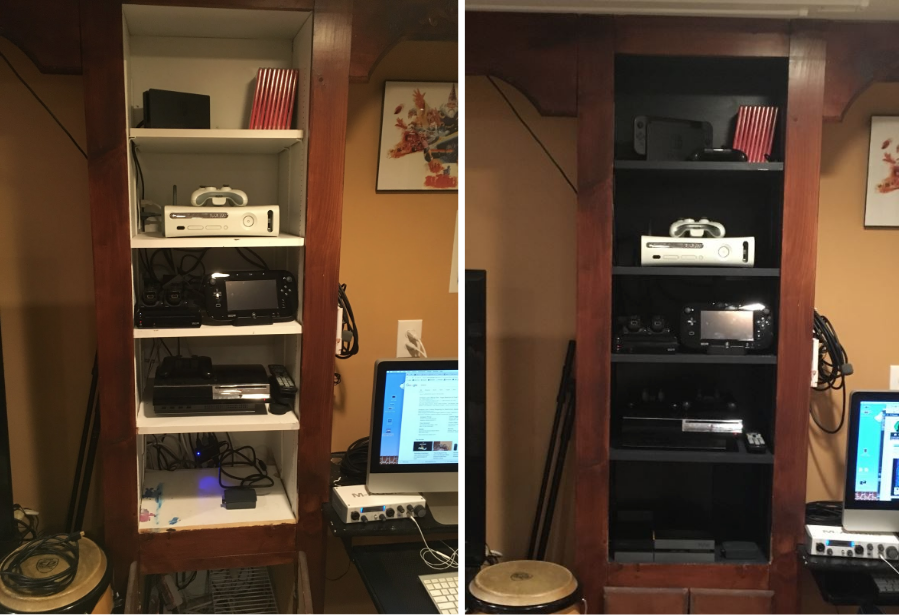
The most recent project though involved some paint. I’ve included plenty of pictures of these built in shelves before, but here’s one more in case you need a refresher.

There’s a lot to love about these shelves, but something about this setup has bugged me since we moved in and I was never able to put my finger on exactly what that is. Something about these shelves just seemed off. I was never really able to hide the massive amount of cords involved in hooking all these things up, and there’s a bunch of weird paint splats on the bottom shelf, but even fixing those would still leave me feeling weird about the shelves. Then a few weeks ago, I figured out what it was.

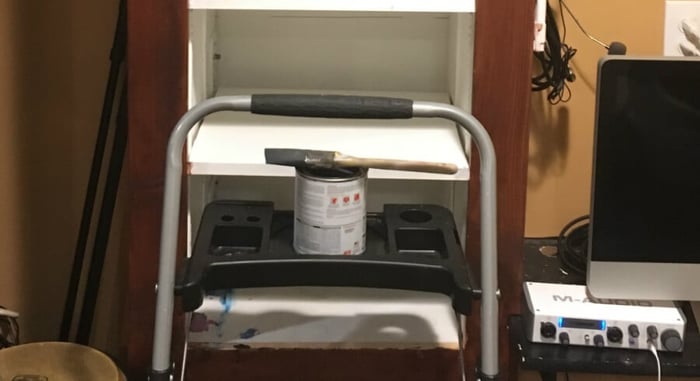
An extremely generous listener of the Stone Age Gamer Podcast sent me a Playstation 4 to call my own. When I set it up, the problem became glaringly obvious. All the systems I have set up there (with the exception of the Xbox 360) are black. The shelves are stark white. Almost nothing else in the basement, not even the ceiling, is white. There’s some white trim by the floor, but that’s about it. That’s why it looks so wrong! It doesn’t match anything, and all the black systems look weird on these slightly cheap-looking/ever so slightly discolored shelves. I thought that considering the computer desk to the right and TV stand to the left are black, the shelves would look much better in black too, but I couldn’t visualize it. At the end of the day, I figured it couldn’t possibly look worse, so I took a trip to the hardware store and bought some paint.
I went with a really dark gray called Twilight Zone because I liked the name, and I wanted it to match the black TV stand my big ol’ plasma was sitting on. When I started taking everything off the shelves so I could wipe them down, I realized that the Wii U is a freaking monstrosity. The amount of wires and plugs hanging off of this thing and its various peripherals is bordering to a Sega Genesis/CD/32X setup. The system itself needs to be plugged in, as does the GamePad stand. Then I have 2 rechargeable Wii remotes, and both of those stands need to be plugged in too. Then there’s the stupid sensor bar wire that needs to be fed through a hole so it can sit on top of the TV. That’s 4 AC adapters to keep my Wii U set up properly. Not even the Xbox 360 and its massive power brick takes up that much space.

Speaking of monstrosities, look at this behemoth. This is an OG 60GB PS3. I love it for the backward compatibility. I hate it for darn near everything physical about it, especially this ridiculous high gloss finish. This guy needs some serious polishing and a paper towel isn’t going to do the trick. Normally I wouldn’t bother, but it looks so hideous without it. And it’s not like this PS3 has seen hard times. It’s basically just sat on shelves and moved locations a few times. I’ve always taken good care of it, but the once or twice I’ve tried to clean it before in addition to some fingerprints and dust have rendered it looking like it’s seen some very hard times. I’ll add that to my list of things to do.
The other guy who needs some serious TLC is my Xbox 360. It’s now the only console on this shelf that isn’t some shade of dark gray or black and honestly, the white is starting to turn anyway. I lent this unit to a friend for a year or so and when it was the main console on the market I played a TON of this thing. But it’s really starting to show its age. Not only is the color starting to look kind of cruddy, the disc drive has been having a hard time motivating itself to actually read discs. That’s problematic. I should look into replacing the thing before that becomes a much more difficult task.

Anyway, back to the task at hand, I painted the crap out of the shelves and I gotta say, I think they look fantastic. They seem so much more natural in that space than they did before. They just fit so much better now. They required more than one coat thanks to the brush I was using and the overly smooth surface I was painting over, but I’d say when all is said and done it came out great. Still, for as much as this all looks better, it still leaves me with a wire problem. There’s still going to be a ton of power strips and cords dangling all down the back of this thing. While they won’t look quite so obvious on a black backdrop as they did on white, they’re still going to be ugly. Fortunately for me, I recently bought some shelves from Target. Check this out.
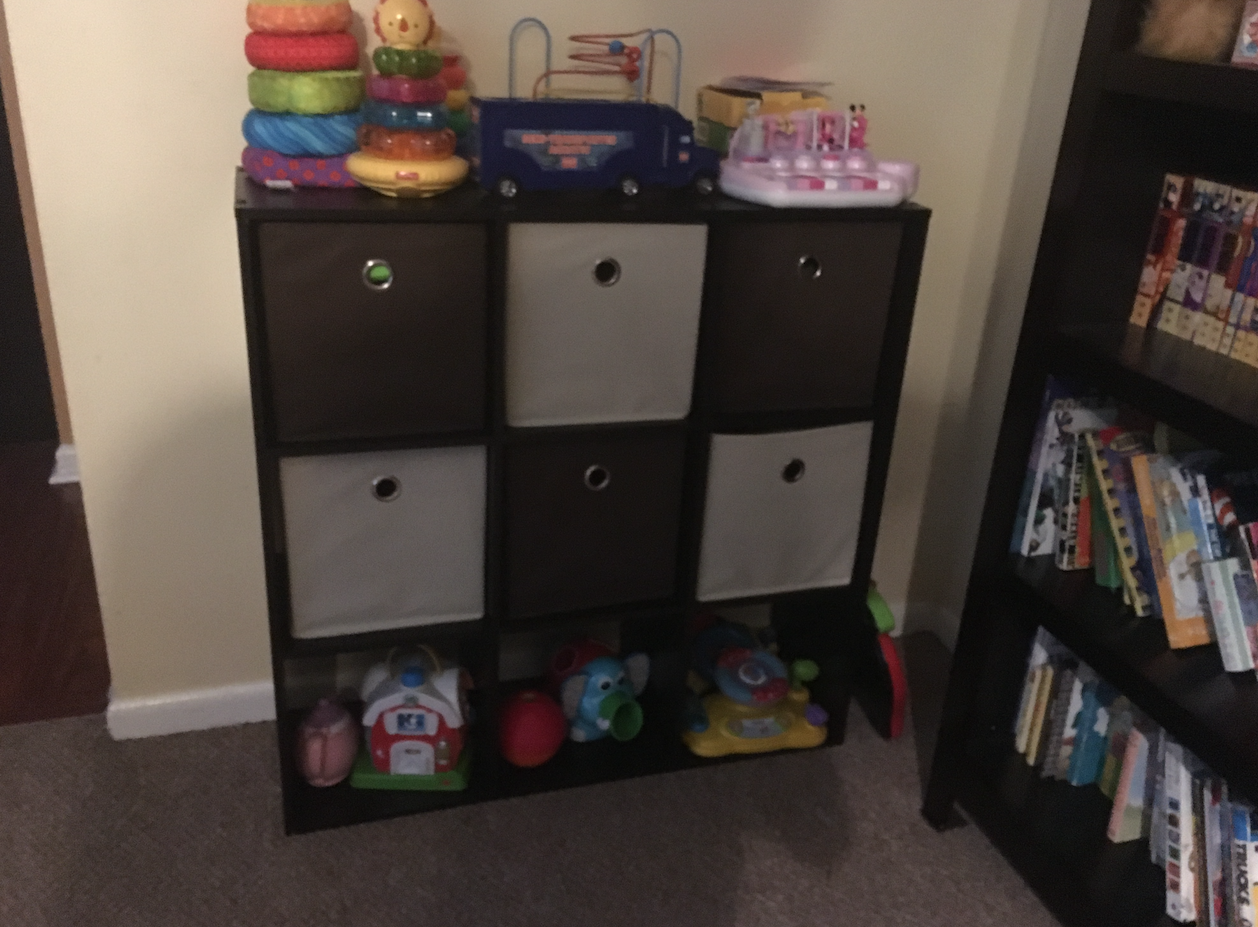
See these guys? They’re a lifesaver with kids around. Just dump all their toys in these bins and the living room is clean. No need for actual organization! These shelves also come with some faux wood backers, which I didn’t use because we were putting baskets in the cubbys anyway, but I did hang on to them. And they’re black. Perfect!

I tried to set up all the systems and wires in a more intelligent fashion this time around and I did pretty well. There aren’t as many things dangling around by their own weight anymore, and the HDMI selector is now located in the cabinet under the shelves so the blue light isn’t shining for all the world to see. With all the wires in place, I grabbed the backers from the Target shelves and set them up as a sort of shield for the wires. Everything is still more or less accessible if need be, and it all looks so clean! I was going to use some velcro to apply the boards to the backs of the shelves, that way I could take them off if I ever need to get to any of the wires, but it turned out that I didn’t even have to. The weight of the wires themselves against the shelves allowed me to just sort of jam the backers in there and cover everything up flawlessly. I was quite fortunate to have them all fit as well as they do too. It’s actually pretty ridiculous how well this worked out.
Now that that’s all behind me, the next thing for me to do is really to get the ceiling shelves cooking. It’s still a pretty daunting project, but I have a few ideas floating around, and a couple of friends who are excited at the prospect of helping make this dream a reality. I’m still a year or two away from actually being able to set up my game consoles where I want them, but these small steps go a long way in making it feel just right. Perhaps I should spend some time polishing up my consoles in the meantime. Plastic polish can’t be that expensive, and it would be nice to see my PS3 all pretty and shiny again. Anyway, on to planning the ceiling shelves!
The Game Room story so far:
Creating a Game Room: Part 9 - Inspiration From Above
Creating a Game Room: Part 8 – A Nice Place to Sit
Creating a Game Room: Part 7 – Two Steps Forward…
Creating a Game Room: Part 6 – Love (HDMI) Connection
Creating a Game Room: Part 5 – CRTs are Heavy
Creating a Game Room: Part 4 – Arcade Dreams
Creating a Game Room: Part 3 – Shelf-Satisfaction