Creating a Game Room: Part 20 - Console Consolidation
Console Choices
Now, it’s time to fill these shelves! I’ve been looking forward to this. I love collecting games, but I love collecting game consoles even more. They’re all just so cool-looking, even the wacky ones.
Sega vs. Nintendo
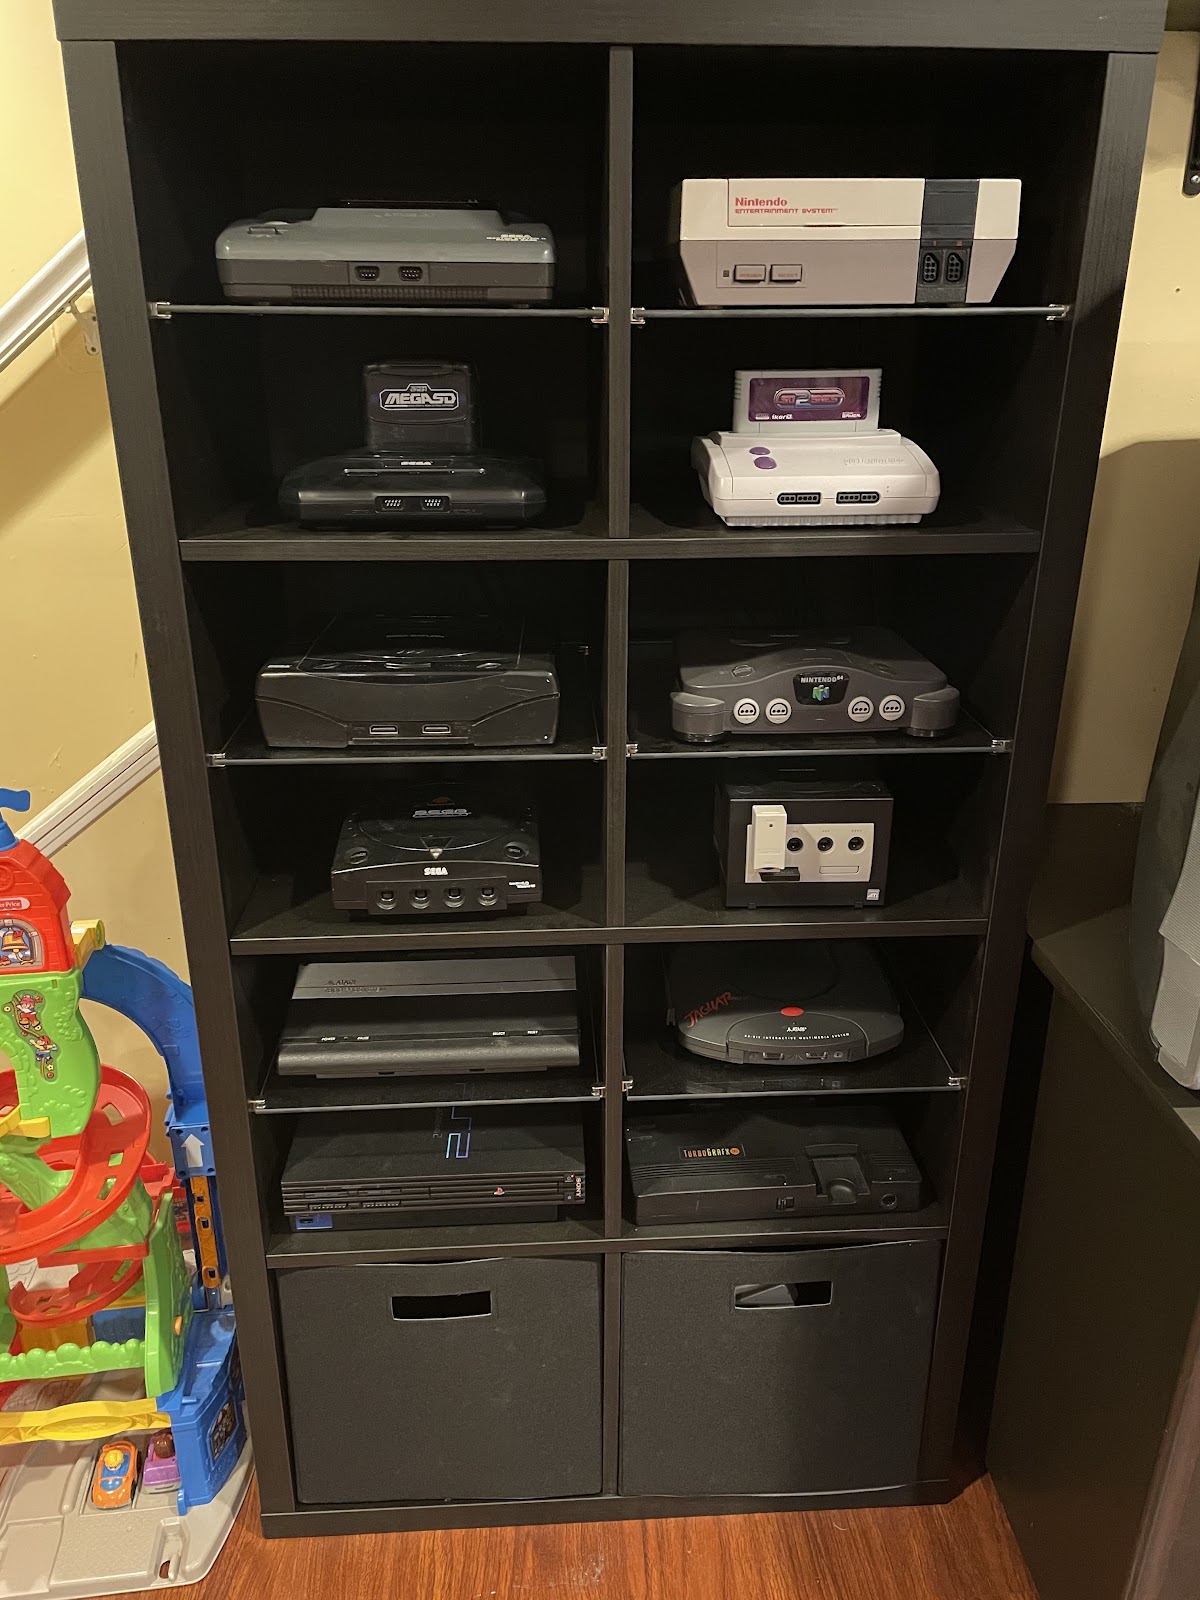
In my previous setup, I started at the top with Sega on the left and Nintendo on the right, oldest at the top. I was particularly fond of that whole Nintendo vs. Sega thing shelf by shelf, so keeping that was pretty important to me. I grabbed my Master System and as expected, it’s way too wide to fit in the top shelf. This will not do.
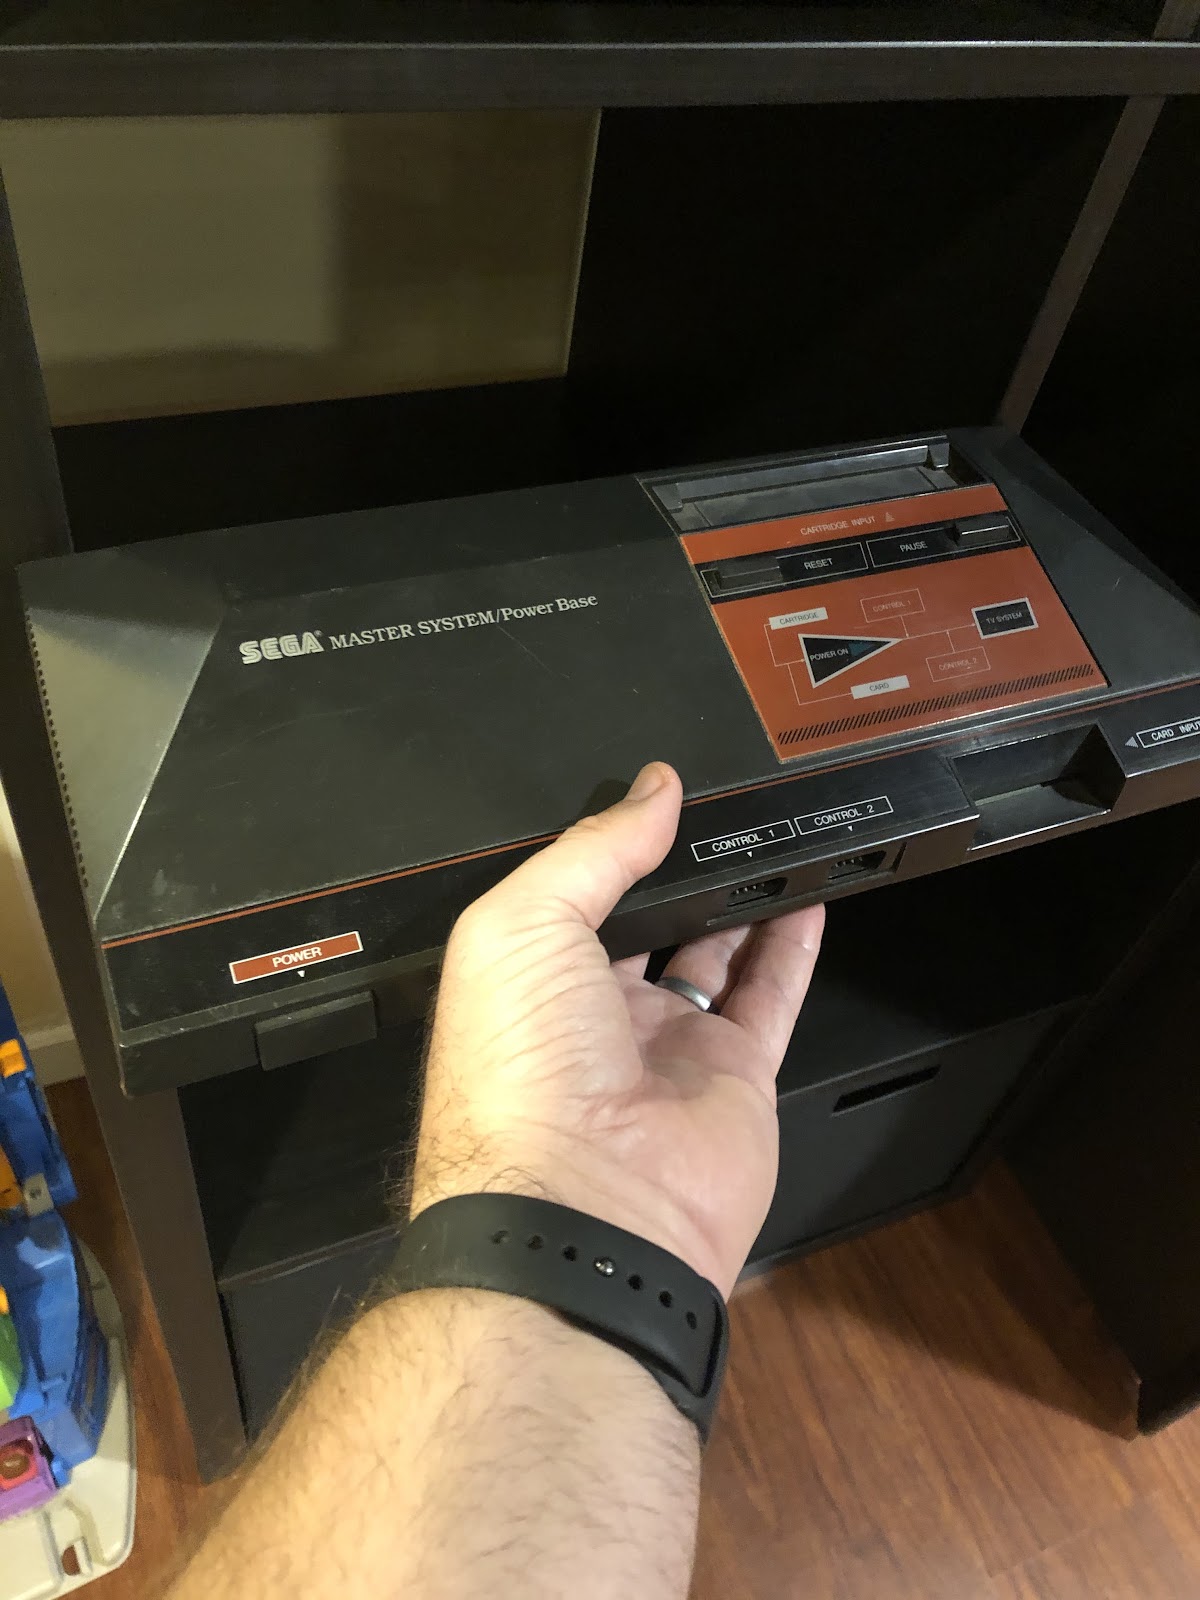
On the old wire shelves, I was able to sort of bend them to make the console fit, but that’s not an option here. So what are my options? It would be pretty cool to have my Atari up there, but it wouldn’t really fit with the motif. Even if I were to use my 7800, it still wouldn’t feel like an NES contemporary. Plus, it messes up the Sega/Nintendo thing. I could put the Master System somewhere else, but not having it next to the NES would just bug me forever. The only other option I had would be to bust out the ol’ Master System II.
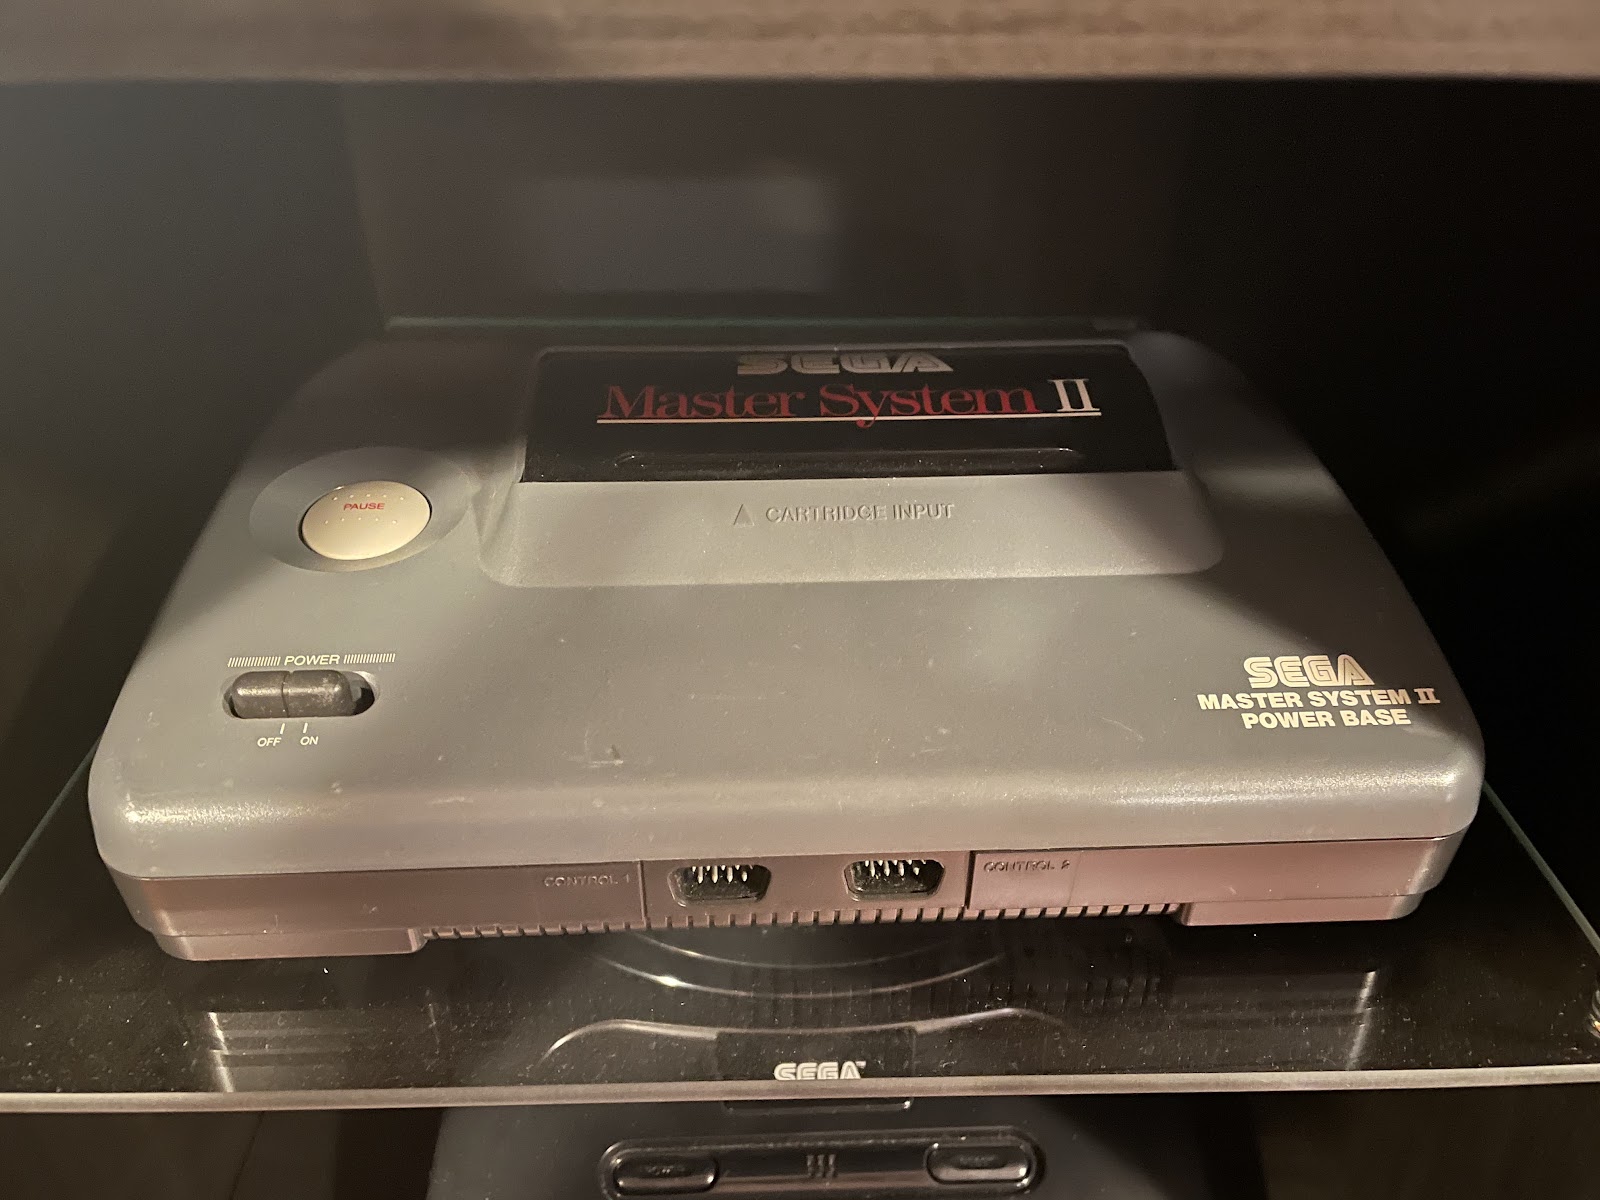
This presents a couple of issues. (And when I say issues, I don’t mean anything other than me being a nutcase.) For one, the SMS2 doesn’t have the same AV out as the original SMS. For two, it’s gray instead of black, which really defies that perfect black Sega color scheme. For three, it doesn’t feature the classic Master System startup screen, which is honestly one of my absolute favorite parts of playing SMS games on original hardware. But, it does fit on the shelf…
After some consideration, I decided that was the one I’d go with, but with one caveat: I wouldn’t hook it up. This little guy is purely decorative. Yes, that’s completely absurd, but hear me out. If I’m going to play Master System games, I’m going to boot them up on my Mega SD. That means that having a Master System hooked up at all was always going to be more or less pointless. I do, however, really like my Master System, and will occasionally want to play on original hardware with original carts and that sweet startup screen. So in that case, I’ll just grab my original SMS out of the closet and hook it up with my TV’s front AV jacks. This keeps the nifty Nintendo vs Sega lineup on the top set of shelves, and gets Master System representation on display, which is important to me. I also love the SMS 2’s design. It’s not as cool as the red and black original model, but it’s a neat little oddity and I think it looks great up here.
I suppose before I go any further I should mention exactly how I plan on hooking all these platforms up. I already covered this more or less a while ago when I created those wire shelves, and for better or worse, that isn’t going to change. These will all be connected to an old Sony Trinitron CRT, and I can’t find any kind of proper component system selector solution, so the best I can do with any sort of consistency here is good old fashioned AV cables. Which I’m honestly fine with. The games don’t look as amazing as they possibly could on a CRT this way, but they don’t look bad in the least. It’s a nice TV after all. Okay, back to business.
Master System is all figured out, so next is the NES. This one was easy. I love my top loader, but it isn’t AV upgraded, and with the carts sticking out of the top it would be way too tall for the shelves anyway, so front loader with AV out it is. No problem.
Welcome to the Next Level
Next shelf down is 16-bit consoles, Genesis and Super NES. Genesis 3 is out because it’s a Genesis 3. It’s fascinating for sure, but hardly the best way to play a Genesis game. The real choice was between Genesis 1 and 2. The Genesis 1 is, from what I understand, the slightly better choice for sound, but if I’m being honest with myself, I’ve always liked the look of the Genesis 2 better. It’s such a slick design. I’ve always been way more of a Nintendo fan than a Sega one, but the Genesis 2 is easily one of the best looking game consoles ever made in my opinion. So that decision is made.
Over on the Nintendo side of things, the original SNES seems like the obvious answer, but there’s one problem. The color.
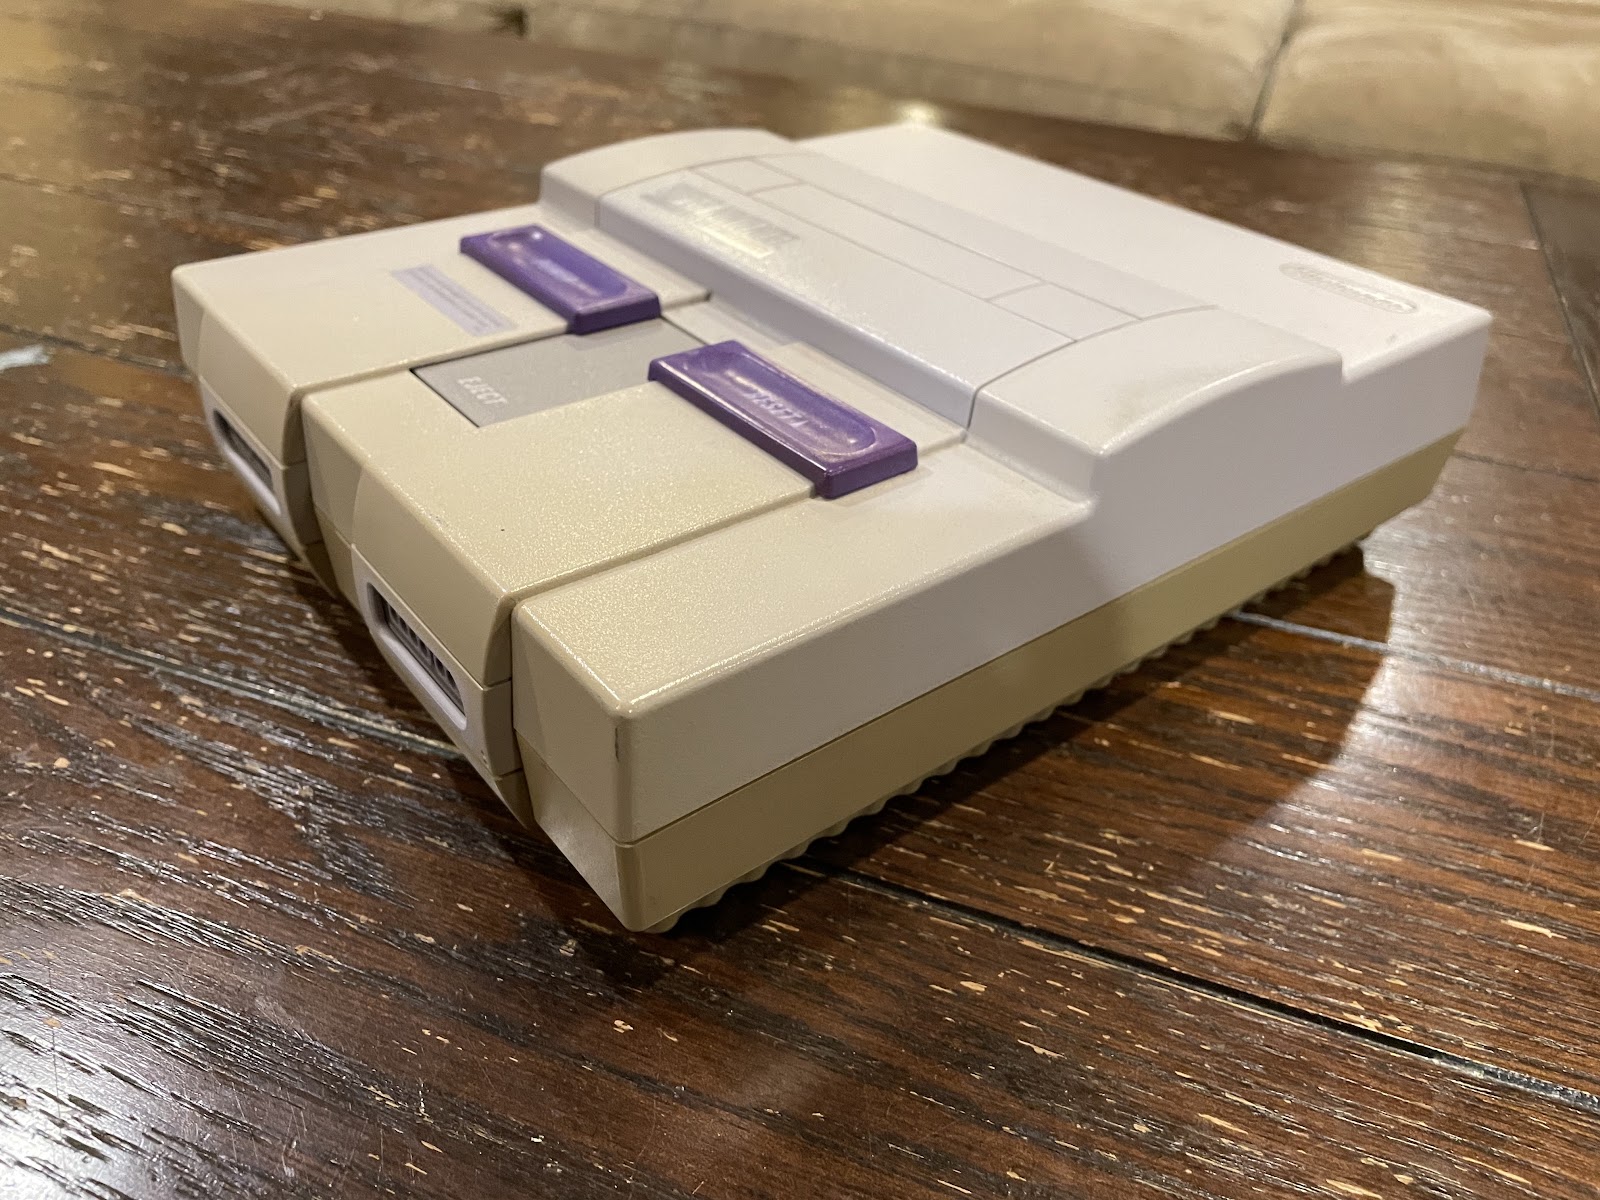
I haven’t gone through and retrobrighted anything myself before, so my SNES is still yellowed and ugly. I put the Genesis 2 up there, so I decided to crack open a box I haven’t opened in a VERY long time. My SNES 2.
Lo and behold, this thing isn’t discolored in the least! It’s a pretty nice-looking console in its own right too. I do miss the LED that tells you the console is on, and that eject button is still one of the coolest console features of all time, but this perfect gray, especially against the black shelving unit, is too good to pass up. So the SNES 2 gets the position, and I’m honestly pretty happy with it.
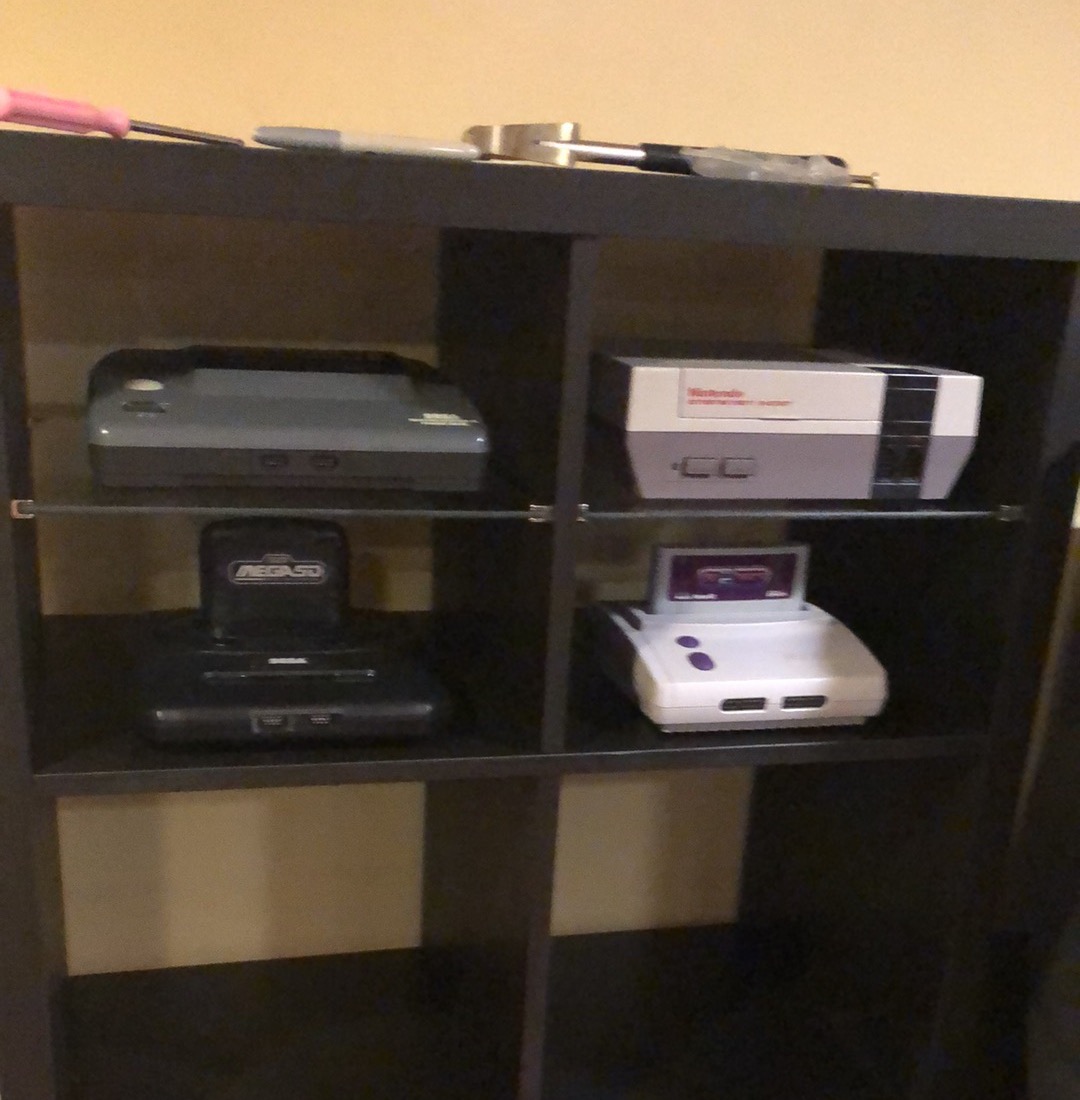
Next shelf down gets a Saturn and Nintendo 64. Easy peasy. I suppose I could put my Smoke Gray Nintendo 64 there, but it wouldn’t really match the setup. Plus, this black one is my original unit from launch day, so I’m sticking with it. As for Saturn, I like the oval buttons more than the circle ones.
Next shelf comes Dreamcast and GameCube. My white Dreamcast has the same problem as my SNES, plus I’ve always liked the black Sega Sports console WAY more, so that one gets the position.
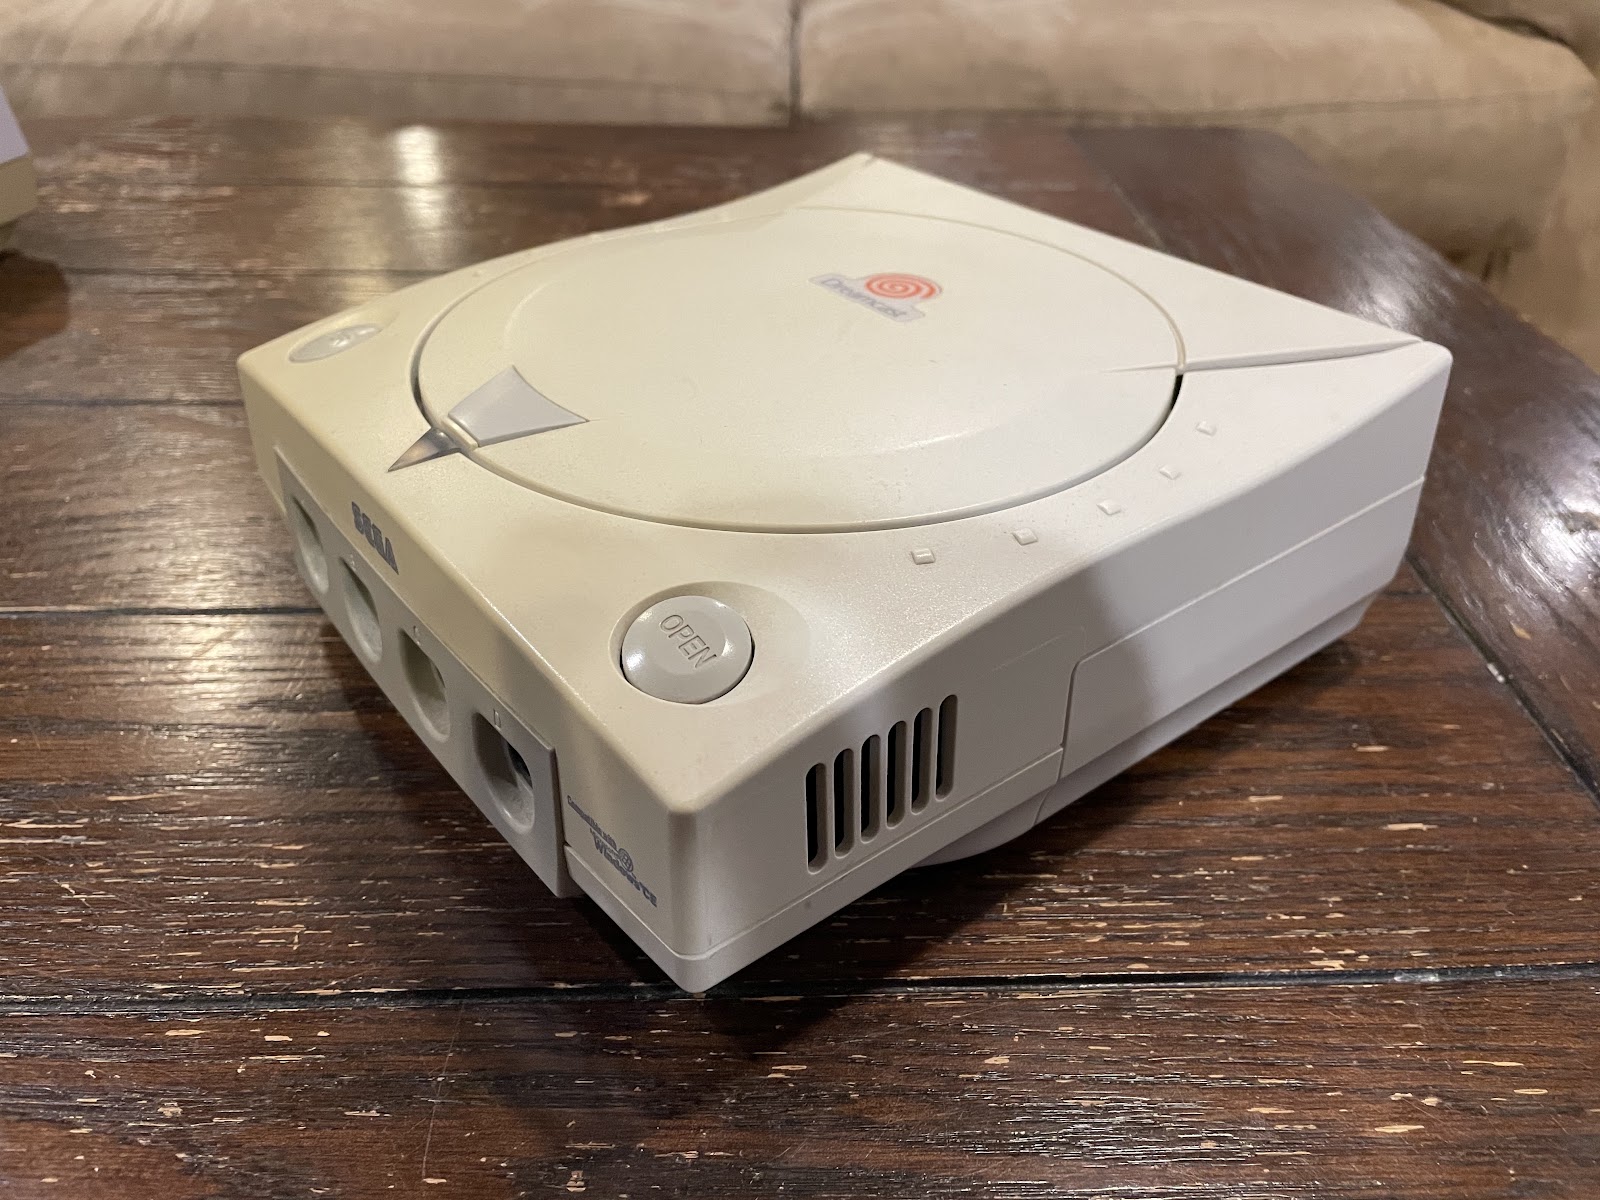
There’s something wrong with the laser though, and the system sounds like a lawn mower when it starts up, but I plan on fixing it up with a MODE unit in the not too distant future, and that black look is just way too good to pass up. And the black GameCube is my favorite model, as well as the console I bought on launch day, so that was another easy choice.
That’s Nintendo vs. Sega done. That leaves four shelves in the KALLAX unit.
Atari and Sony and Microsoft, oh my!
Still plenty of systems to choose from, but only a couple that are able to actually fit on these things. I’m a huge Atari fan, and thankfully I have an AV upgraded Atari 7800, so onto the next shelf that goes. The 5200 and XE units I have are super cool, but I don’t have nearly as much of a connection to those consoles, and since the 7800 covers me for 2600 games as well, it’s the perfect thing to go there
Next to it is the Atari Jaguar. Not the best system in the world, but a source of fascination for me, and since I finally got myself some AV cables for the thing, it will be nice to have it hooked up for regular play. I have a Jag CD unit as well, but I don’t think it works, and it makes the system a little tall for the space it’s in. With the upcoming Jaguar GameDrive supposedly incorporating CD support anyway, that makes leaving the Jaguar in original form just fine.
PlayStation is pretty important to me, but as much as I want to have both a PSX and a PS2 up there, the PS2 is fully backwards compatible, whereas the Jaguar is wholly unique. It sucks to lose that amazing startup screen, but like my Master System, I’ll just keep an original PlayStation at the ready to hook up with front AV jacks whenever I want. The system being gray throws off the whole shelf anyway.
And last but not least, we have TurboGrafx.
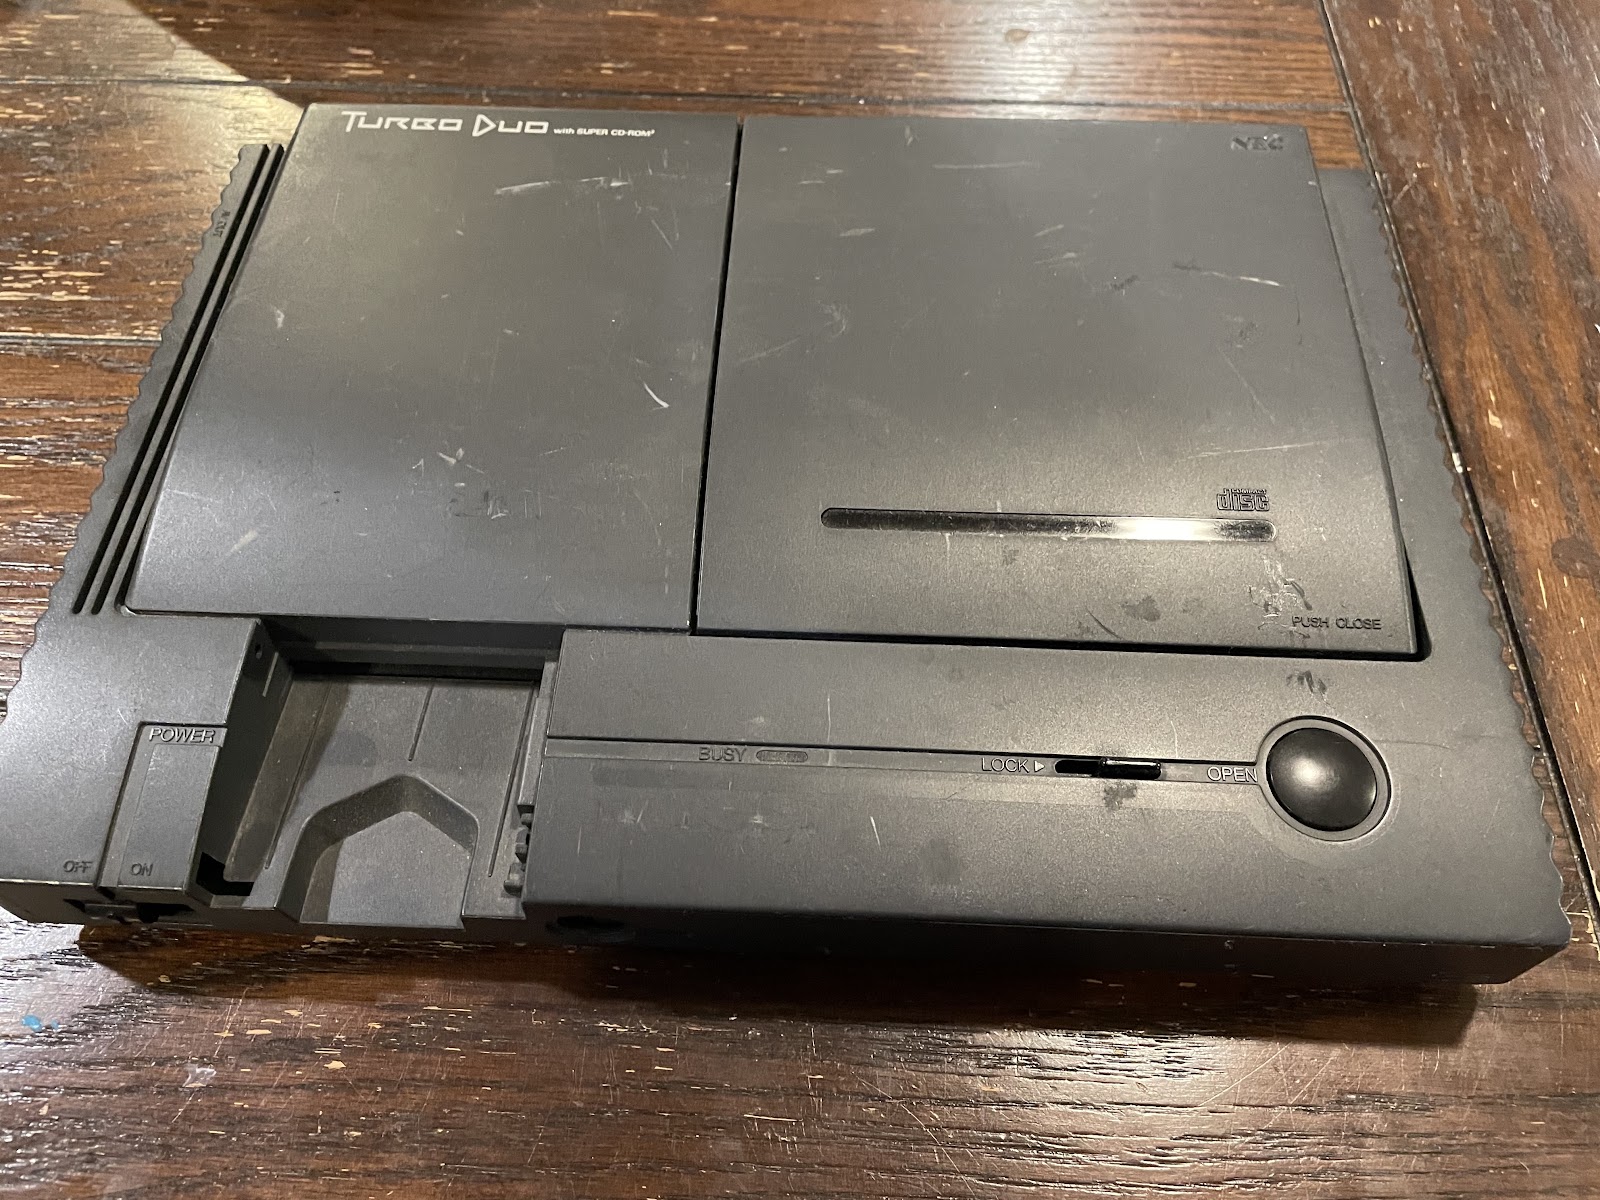
The bad news here is that I connected my TurboDuo and it doesn’t work. I’ll have to have it repaired one of these days, but that's not exactly an inexpensive proposition. The good news is, my TurboGrafx-16 works just fine, and with the addition of a fresh Super SD System 3, I have access to all the CD games without the need of a CD unit anyway. Now I just need a controller extension because those TG16 controller cables aren’t nearly long enough for me.
The bottom two shelves are for controllers in baskets, and viola! We have a full KALLAX unit! (Excuse the colorful toy. I still have small children, after all.)
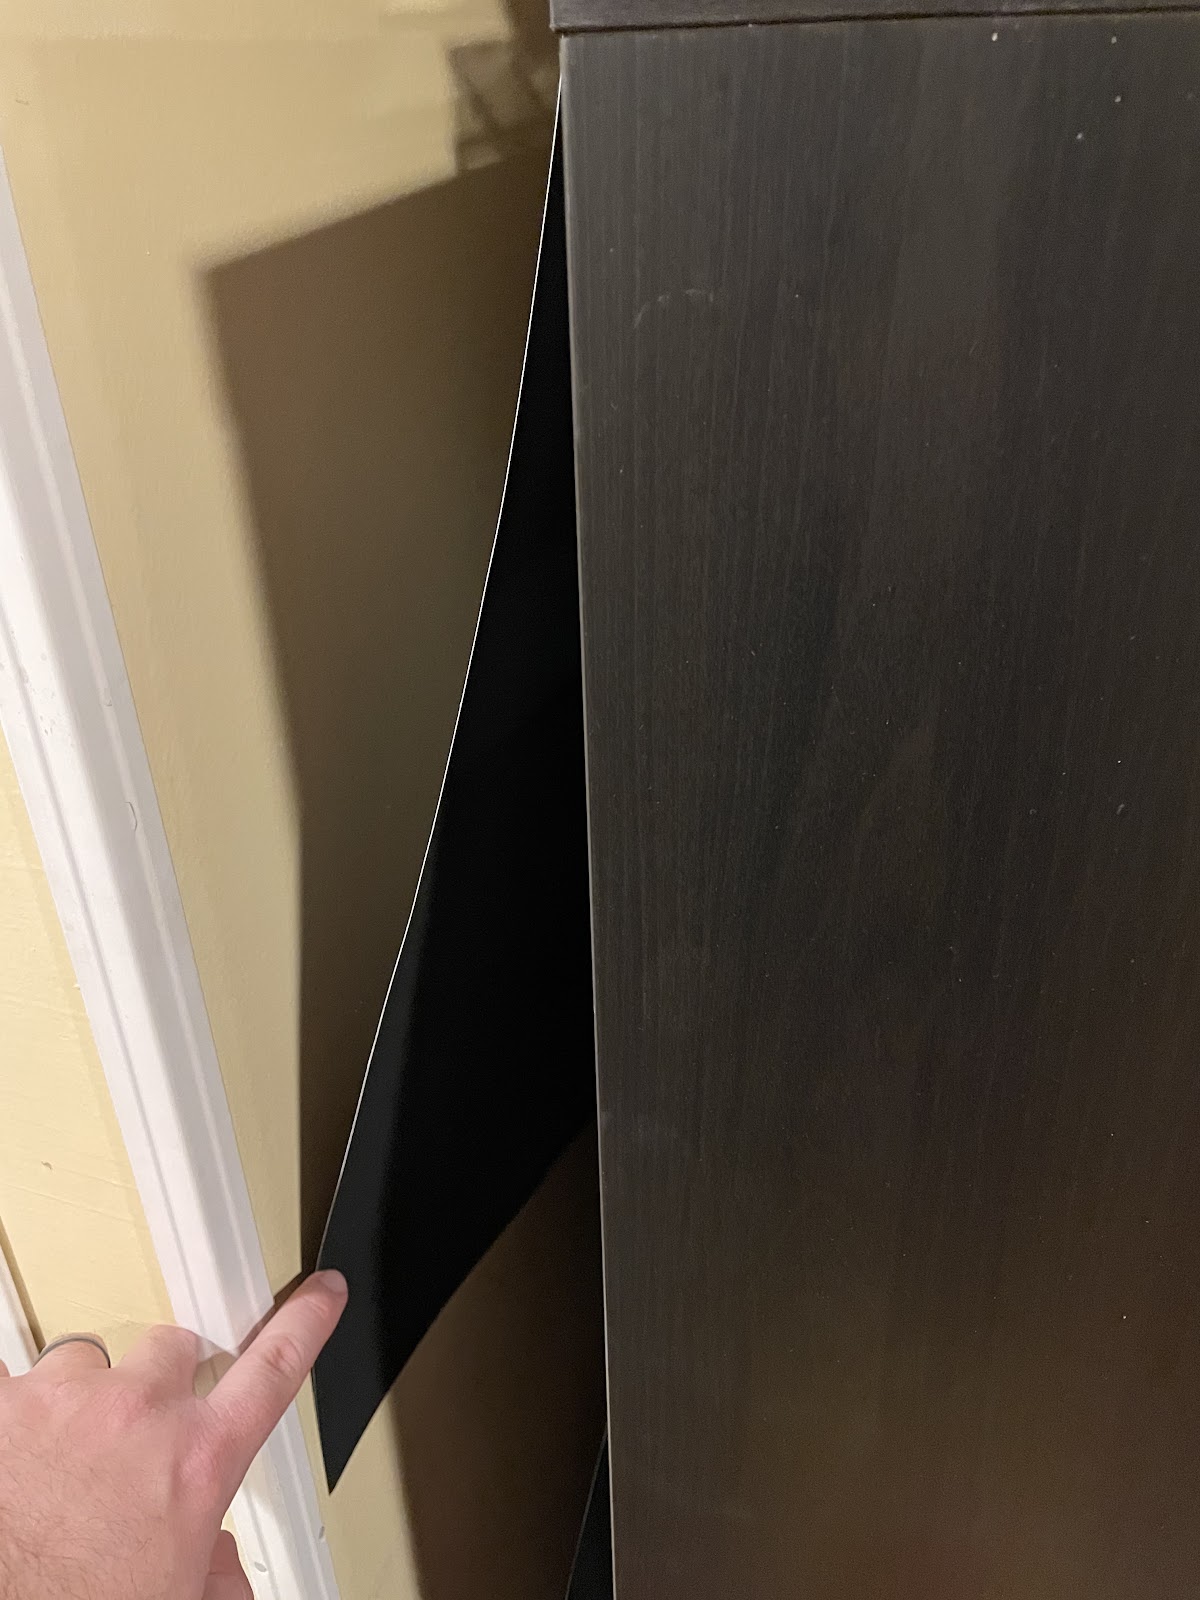
But wait, how am I hiding all the wires? Turns out, that was way simpler than I could have imagined. I literally went to the dollar store and bought 2 pieces of black poster board. Attached some velcro, and it’s like the wires aren’t even there. The wires sit in front of the poster board, but you can’t see them. I literally can not believe that worked.
But wait again, there’s more! Not only do I have some extra inputs on my system selectors, but I have some shelves open on my freshly painted TV stand.
Obviously I need to have an original Xbox on there. That big guy was a little too big for the KALLAX anyway, but he looks great on here. We also have a real opportunity to put a couple of my other favorites here that I couldn’t have before. These shelves were filled with childrens toys after all, and now they’re mine again!
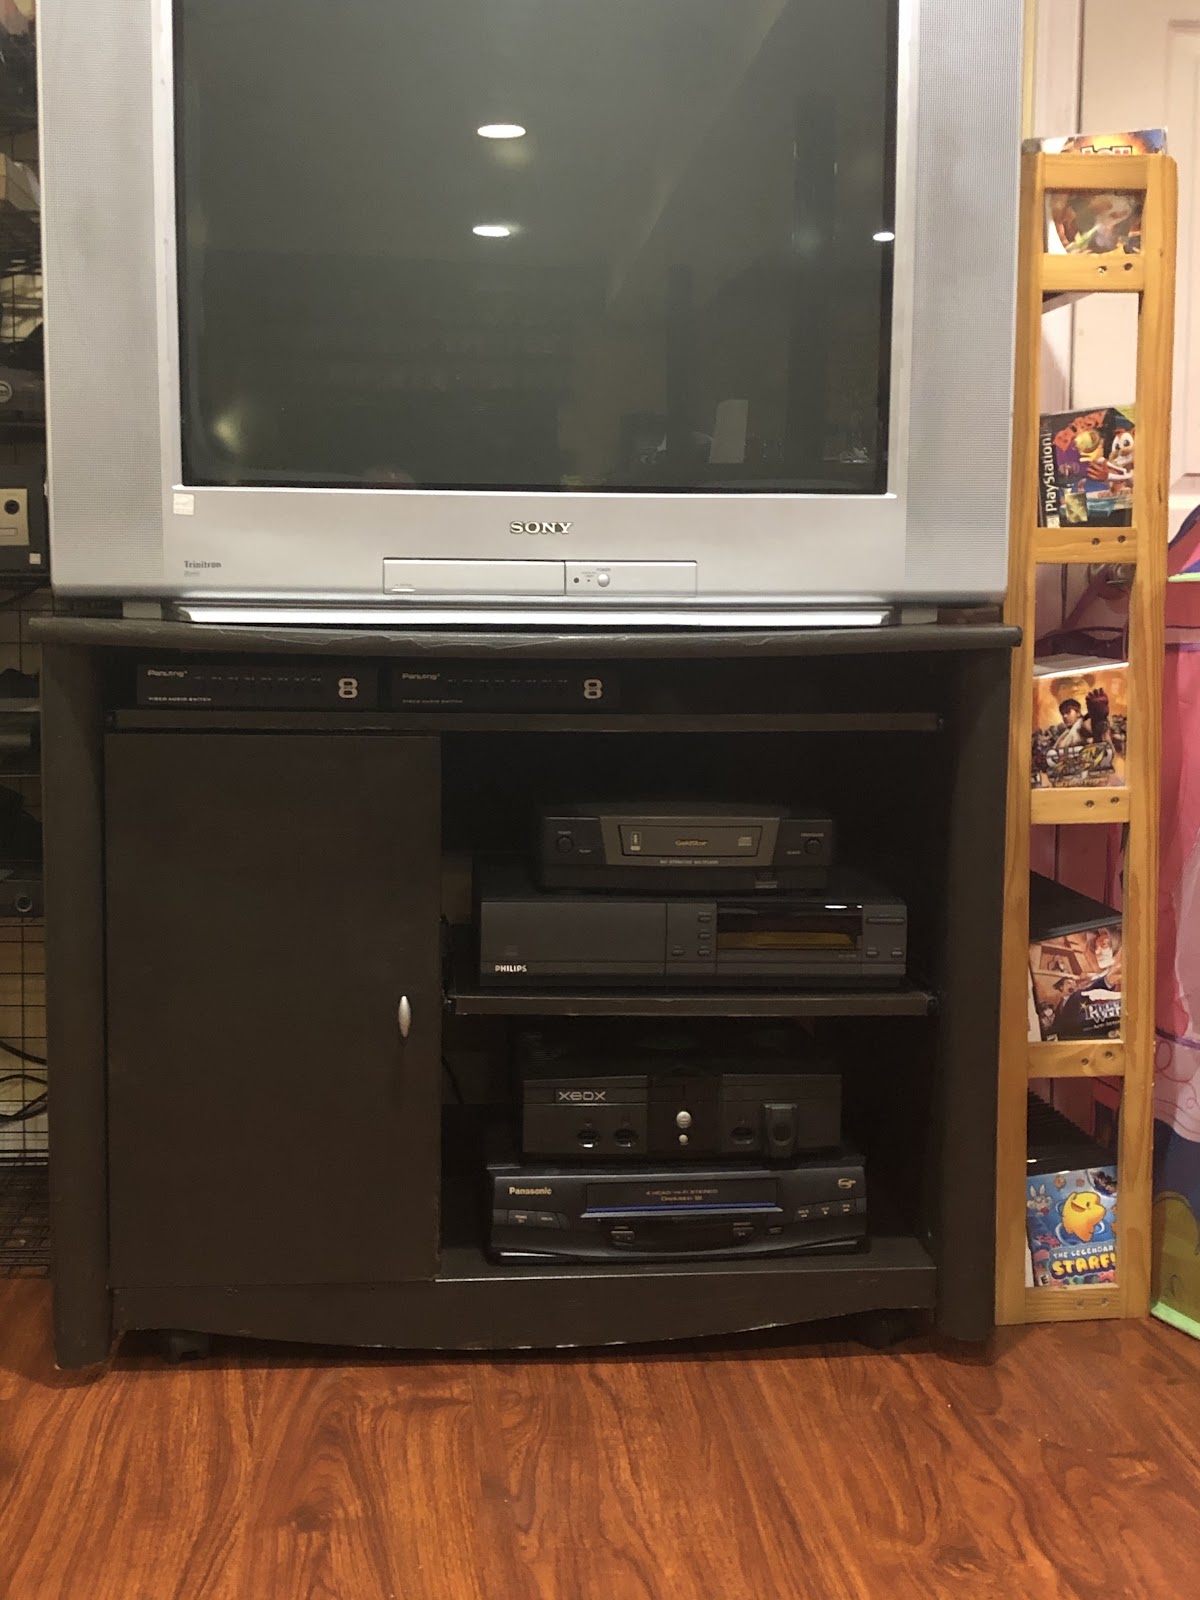
In order to do this right, I’d have to focus on what’s stackable, and what looks best stacked up. I couldn’t be happier with what I came up with. That’s a Goldstar 3DO (I’m rarely going to play the thing, and I like the way this one looks better than the Panasonic one I have), a CD-i (because I will always love that stupid system no matter what), and Xbox (for obvious reasons) and a freaking VCR! I know it isn’t exactly video game related, but if I want to pop in my original Star Wars tapes and watch them on a CRT, I can do that! And my Nintendo Power tapes, my old copies of Liquid Television I recorded back in the day, so much good stuff!
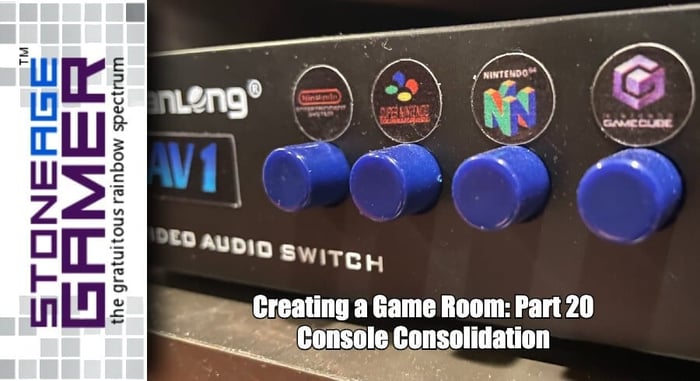
That just left the finishing touch. I found these stickers on eBay and just look at them!
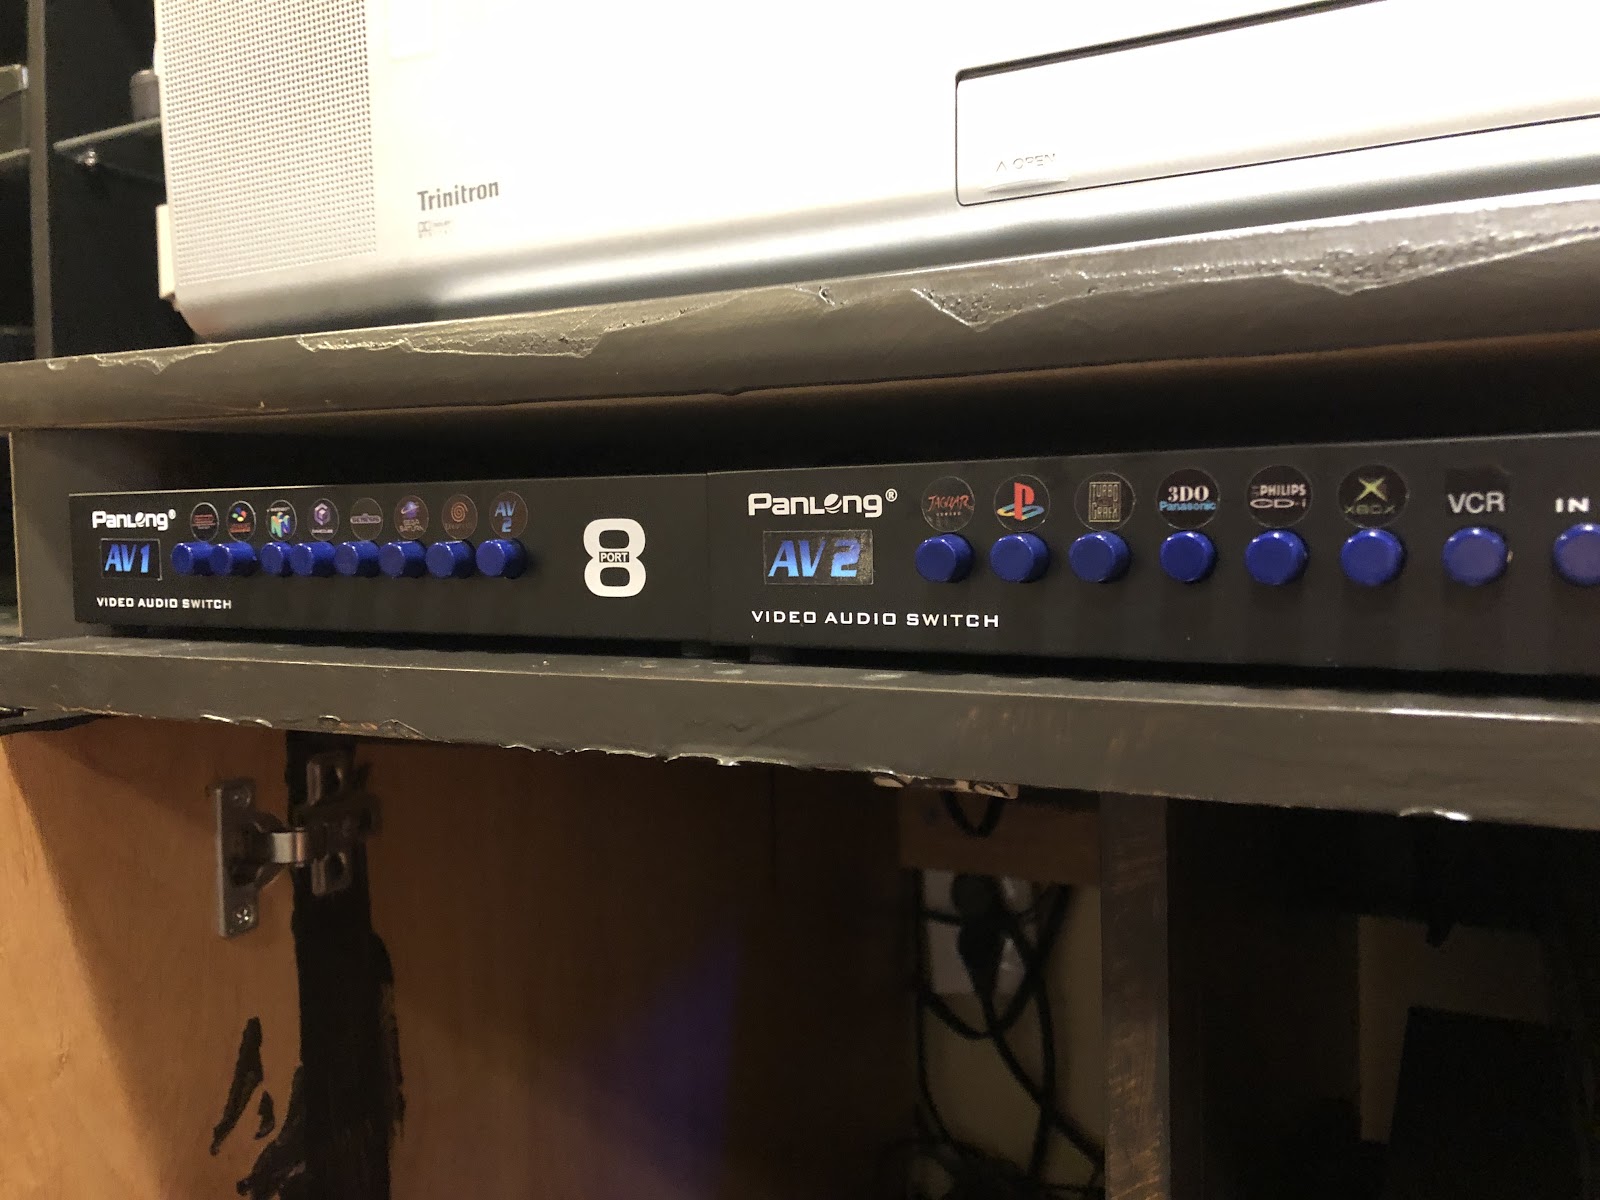
They’re actually specifically designed to fit these exact system selectors, and I’m in love. I actually went and used a label maker before I found these, and it looked nice, but not as nice as this!
There are no words for how happy this setup makes me. And that’s the bulk of the infrastructure done. Now we have to find a way to fit all the things that just don’t fit.
The Game Room story so far:
Creating a Game Room: Part 19 - So Long, Temporary Solutions!
Creating a Game Room: Part 18 - And Everything Inbetween
Creating a Game Room: Part 17 - Atari to Xbox
Creating a Game Room: Part 16 - Making Nintendo Look Good
Creating a Game Room: Part 15 - Overdoing it on Organizing
Creating a Game Room: Part 14 - At Long Last, SHELVES
Creating a Game Room: Part 13 - Adventures in Consolidation
Creating a Game Room: Part 12 - On the Blink
Creating a Game Room: Part 11 - Reclamation at Last
Creating a Game Room: Part 10 - Paint it Black
Creating a Game Room: Part 9 - Inspiration From Above
Creating a Game Room: Part 8 - A Nice Place to Sit
Creating a Game Room: Part 7 - Two Steps Forward…
Creating a Game Room: Part 6 - Love (HDMI) Connection
Creating a Game Room: Part 5 - CRTs are Heavy
Creating a Game Room: Part 4 - Arcade Dreams
Creating a Game Room: Part 3 - Shelf-Satisfaction