

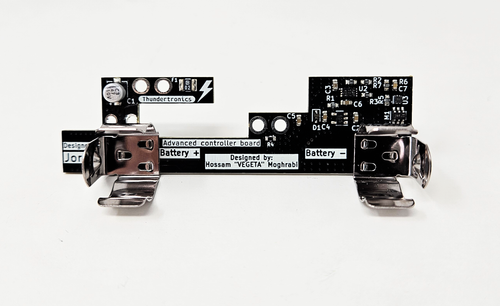


Sega Dreamcast Advanced Controller Board
Please Note: Battery is not included and must be purchased separately. You will need a Li-ion 18650 battery for this upgrade.
This upgrade board is installed on top of the original controller board which adds the following:
- Replacing original battery with Li-ion 18650 battery, with professional charging and protection circuitry.
- Replaces all old components like capacitor, resistor, and fuse which is now re-settable fuse.
This battery board will solve the problem of CMOS time keeping issue once and for all. The used battery should give more than enough charge.
Our test showed charging the battery for an hour will charge its voltage up by about 70-100 mV which our tests showed this amount could be enough for more than 6 months!
As above figure is showing, the battery follows the typical discharge rate and it passed 6 months and didn’t even go below 4v. This means extremely long battery life especially knowing the battery tested was an old Chinese knockoff so using a good original brand will show even better performance.
Installation tutorial
https://www.youtube.com/watch?v=b6MgvUBDSU8&embeds_referring_euri=https%3A%2F%2Fthundertronics.net%2F&feature=emb_imp_woyt
Quick installation guide
This serves as a quick guide to install the upgrade.
1- Desolder the original battery from the controller board, as well as, desoldering the fuse, capacitor, and resistor.
2- Put the pins in their places (in place of resistor, capacitor, and fuse) while having the black plastic on top of the controller board, then solder them one by one. After that, trim the pins from bottom to be flush. Check to make sure no shorts or excess solder bridging stuff.
3- Put the upgrade board on top of the 6 pins and solder it firmly. If you think the assembly will be tall and won’t fit when shell installed, then cut the black plastic before putting the upgrade board and soldering it. This saves you extra length but overall won’t be necessary.
4- Now the assembly is ready. install the ribbon cable on Dreamcast then carefully slide it in the boards assembly and install it. It is a tight fit but it fits perfectly fine.
5- Secure the board assembly with screws and install the battery, make sure of polarity to be correct which is very important.
6- Now everything is done, the rest is just to trim a plastic piece of top cover as shown in this image. this is to make sure cover closes perfectly fine and won’t push the battery. operation, look and feel won’t’ be affected at all. the spring will not be affected since the cut will be next to it, not where it hooks.
7- Close the shell and power on the console, set the time and wait for a minute or so. Now turn it off, then turn it on to verify that it retained the time. All done now.
Visit the creator's discord: https://discord.gg/tfyHBXGS or website for support and more information.


