Creating a Game Room: Part 8 – A Nice Place to Sit
I didn’t think it would happen this soon, but we finally got a chance to go out and buy new living room furniture! And as I said in my last Game Room post, that was the lynch pin in helping this whole process start moving forward again. It’s really starting to look like something cool, and while I’m still a long way from having the setup I’ve always wanted, the skeletal structure is there now, and I can finally really picture where it’s going. Here’s how it happened.
Since this is our first year in our new house, it occurred to my wife and I that hosting Thanksgiving for our families was something we could finally potentially do. We talked about it and agreed that it could be fun, so we reached out to our potential invites, and lo and behold, everyone can come. And if anything can motivate folks to make their homes look as nice as they can, it’s the prospect of having their families over for a nice, big holiday dinner. With a little planning and some well-timed babysitting from my Mom, my wife and I spent an afternoon at Ashley Furniture and bought a new living room. Big comfy couch, recliner, TV stand, totally awesome coffee table that lifts up, the works. That means our existing couches get to be redistributed throughout the house, and one of those buggers headed straight to the game room.

Finally, a place to sit.
This black Ikea couch has been with me for a very long time. Way before I was married, I lived alone in an absurdly tiny apartment. I picked up a loft bed from Ikea and this couch was designed to fit right underneath it. It’s a tad on the small side, but it’s very comfortable, and clearly very durable. This area in my basement has become the prime playing spot, but until now, there wasn’t any place for me to sit while the kids play except on the other couch, which faces the opposite direction. This guy’s placement is perfect for a couple of reasons. First, having a nice place to sit where I can also easily keep an eye on the kids is clutch. Second, it’s right across from my CRT, meaning I finally have a place to chill while I play on my Trinitron.
An unexpected side effect of the furniture escapade was that more than just the couch got to move down to the basement. Our old living room set also included a pair of end tables and a coffee table. Having these down in the basement is fantastically useful!
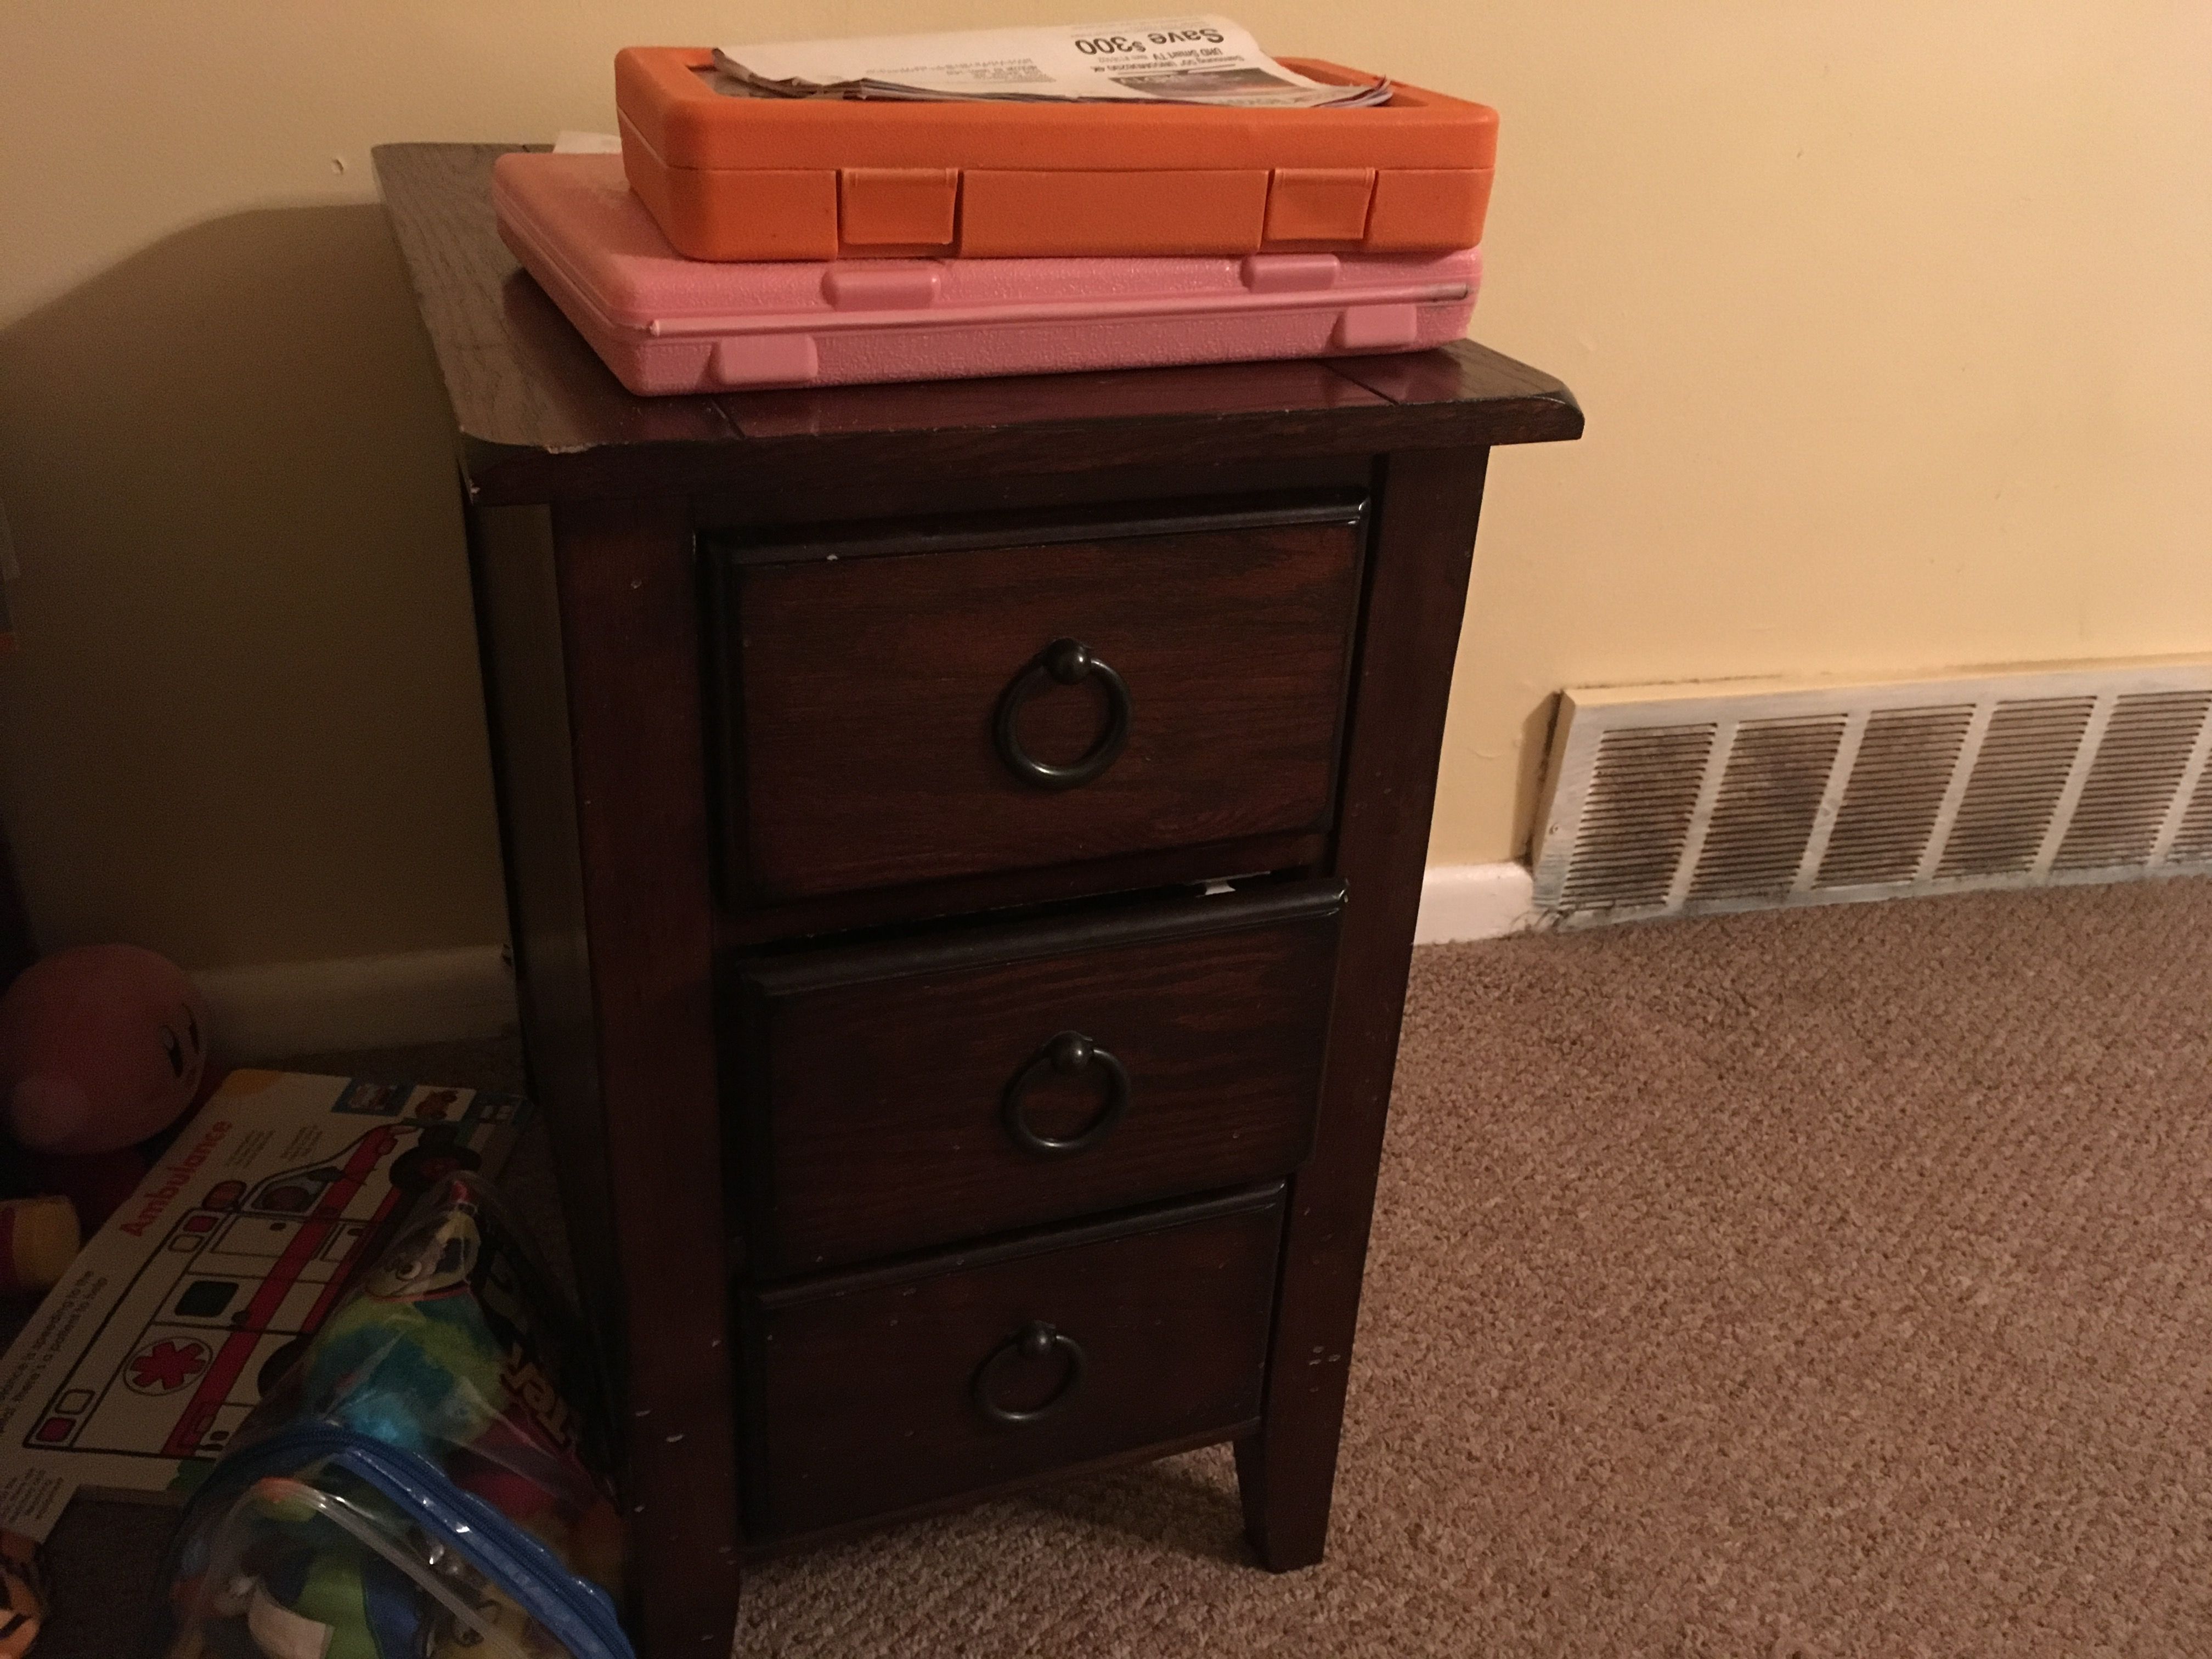
My pretty pink toolbox is awesome.
This little number is great because it’s perfect for keeping remotes and controllers. I’ve child-proofed the drawers so Ellie can’t get into them (she loves eating remotes.) Unfortunately, the piece we bought to replace this guy isn’t coming in for another week, so it’s staying upstairs for the time being, but it’s not hard to imagine it fitting in nicely once it’s brought down. The little table fits perfectly on the other side, and it makes for a great extra flat surface for toys/drinks/what have you.
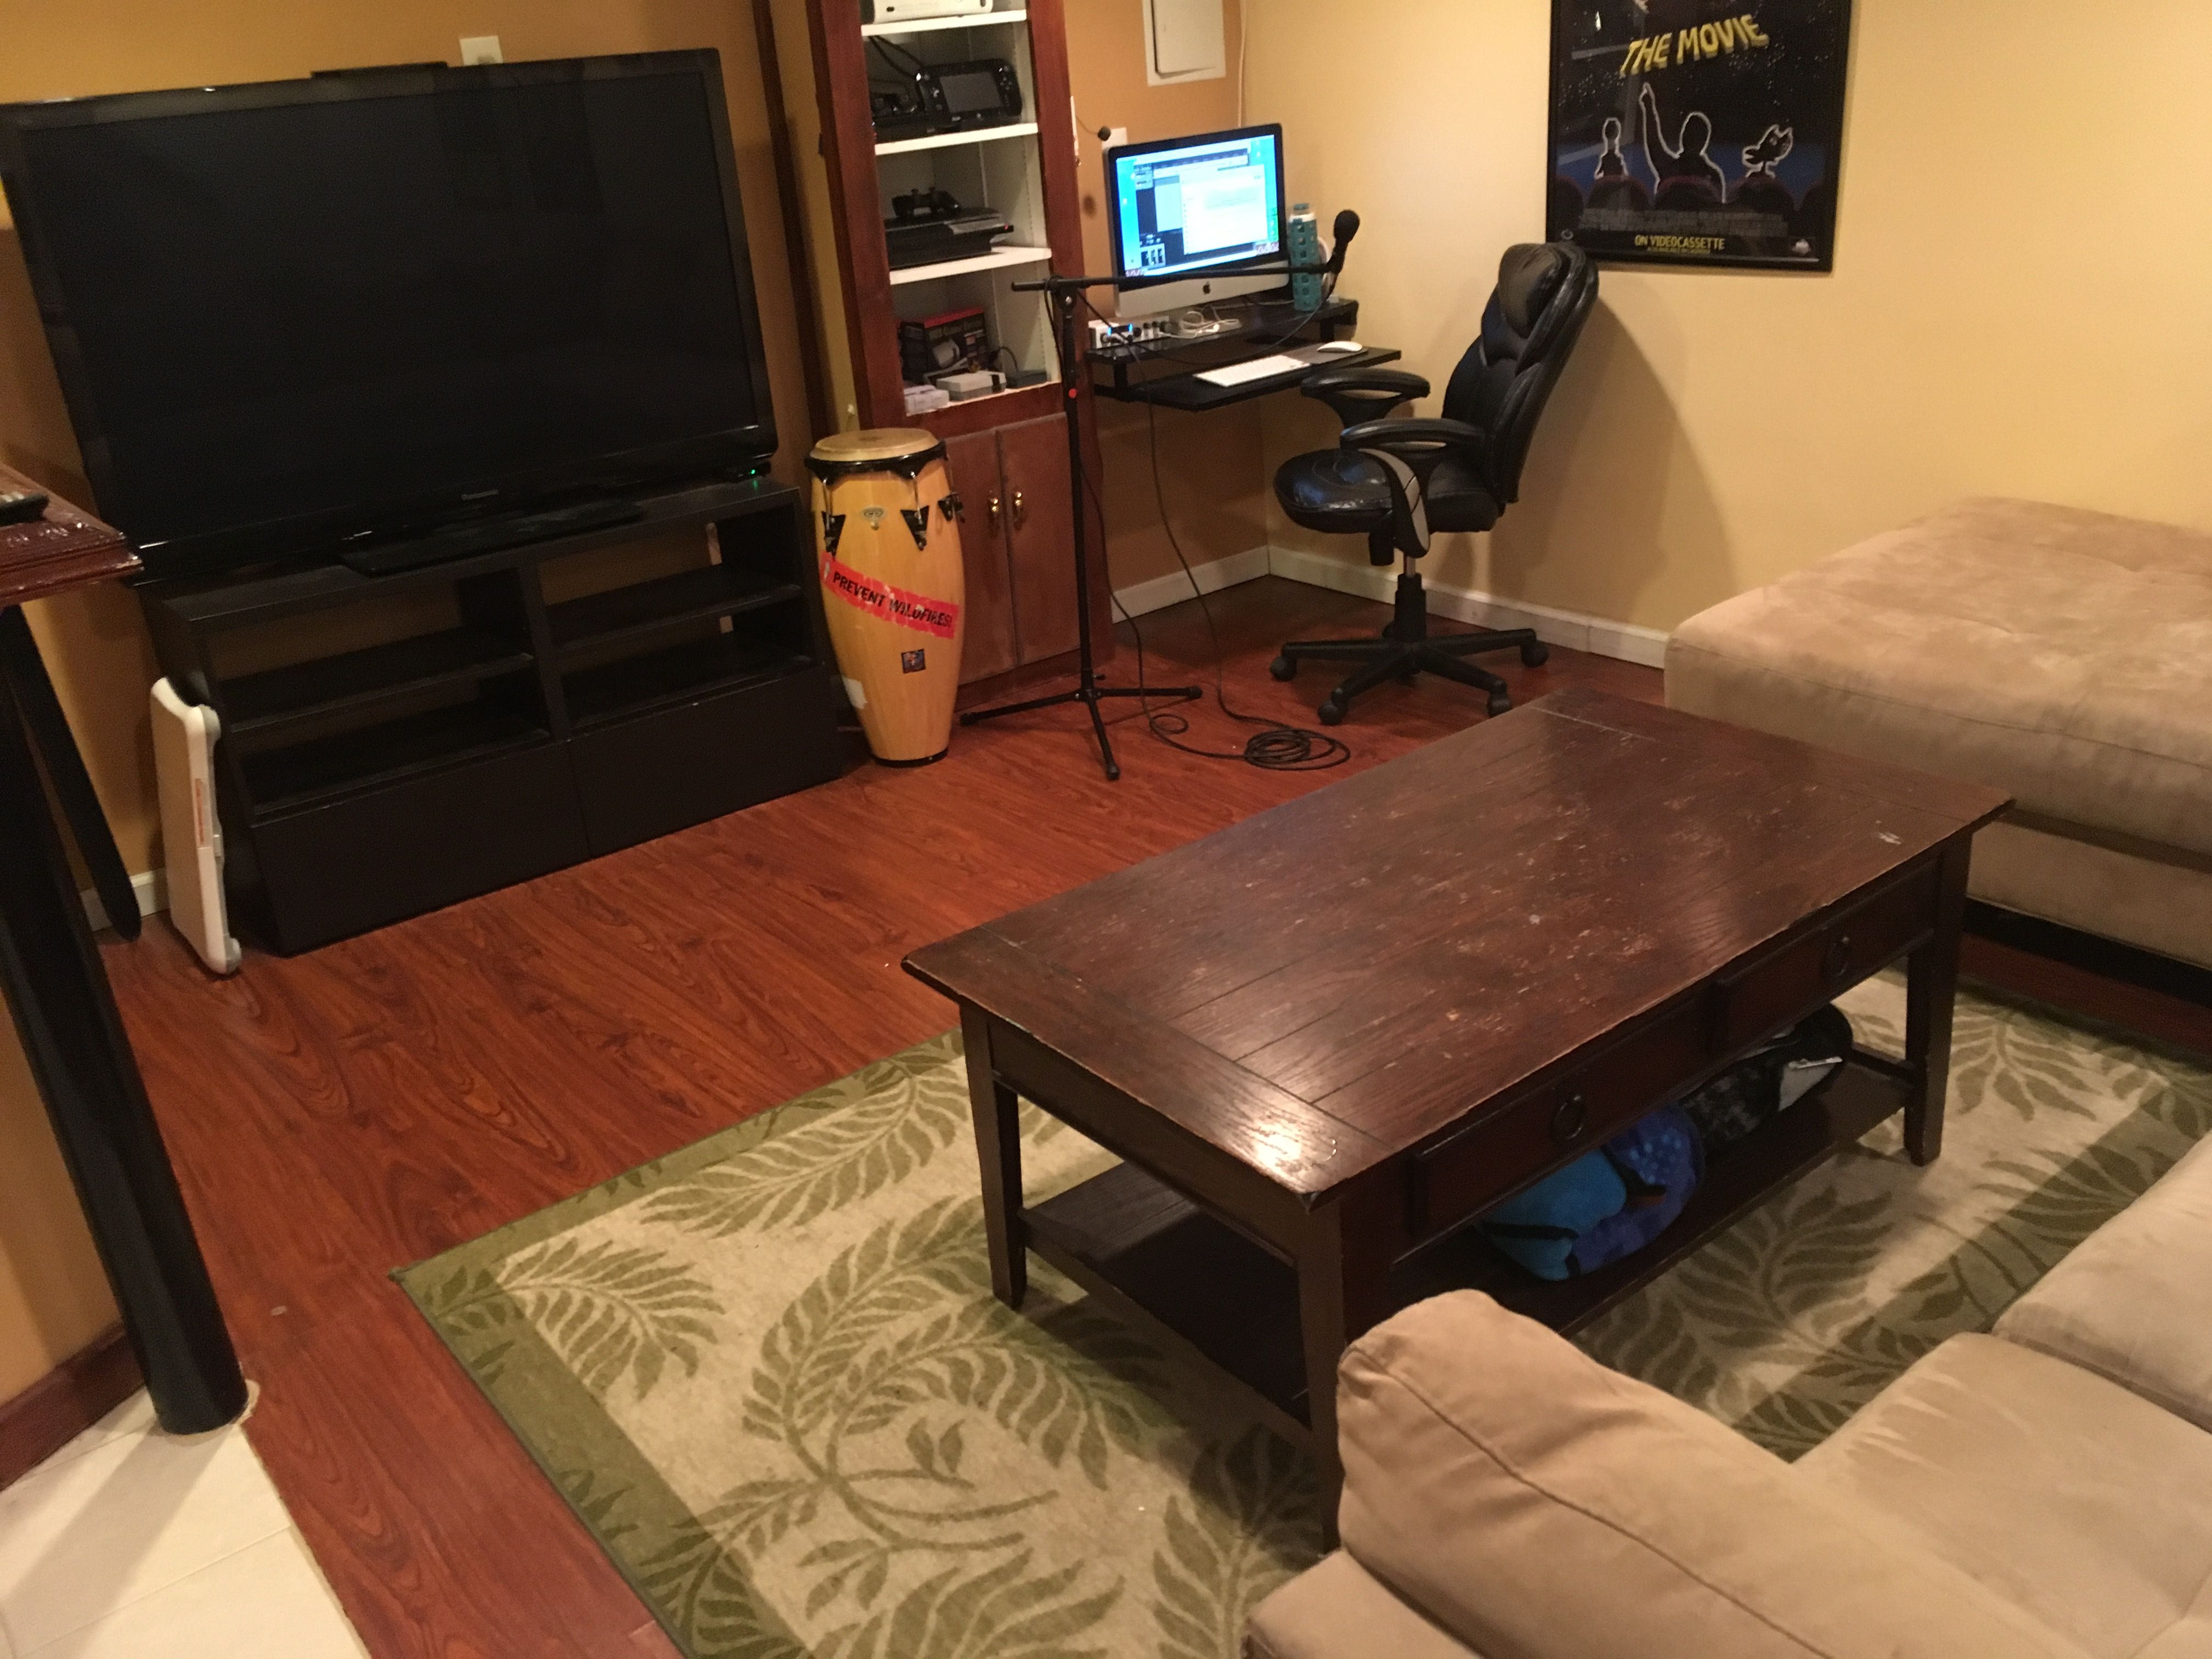
The coffee table’s got drawers too for more controller storage!
The coffee table wound up on the other side by the big TV with the modern consoles on it. It eats a little into the playable space there for the kids, and it makes my wanting to get back into Wii Fit that much harder, but it also makes that area a much more functional gaming space. The biggest issue with that spot has always been a lack of flat surface to put a drink or something on while playing. Putting a glass of water on the floor is always a risky move when kids are afoot. This is also where my wife and I do our podcasting, so having this table to put a laptop or show notes on while we work is going to be a really nice change.
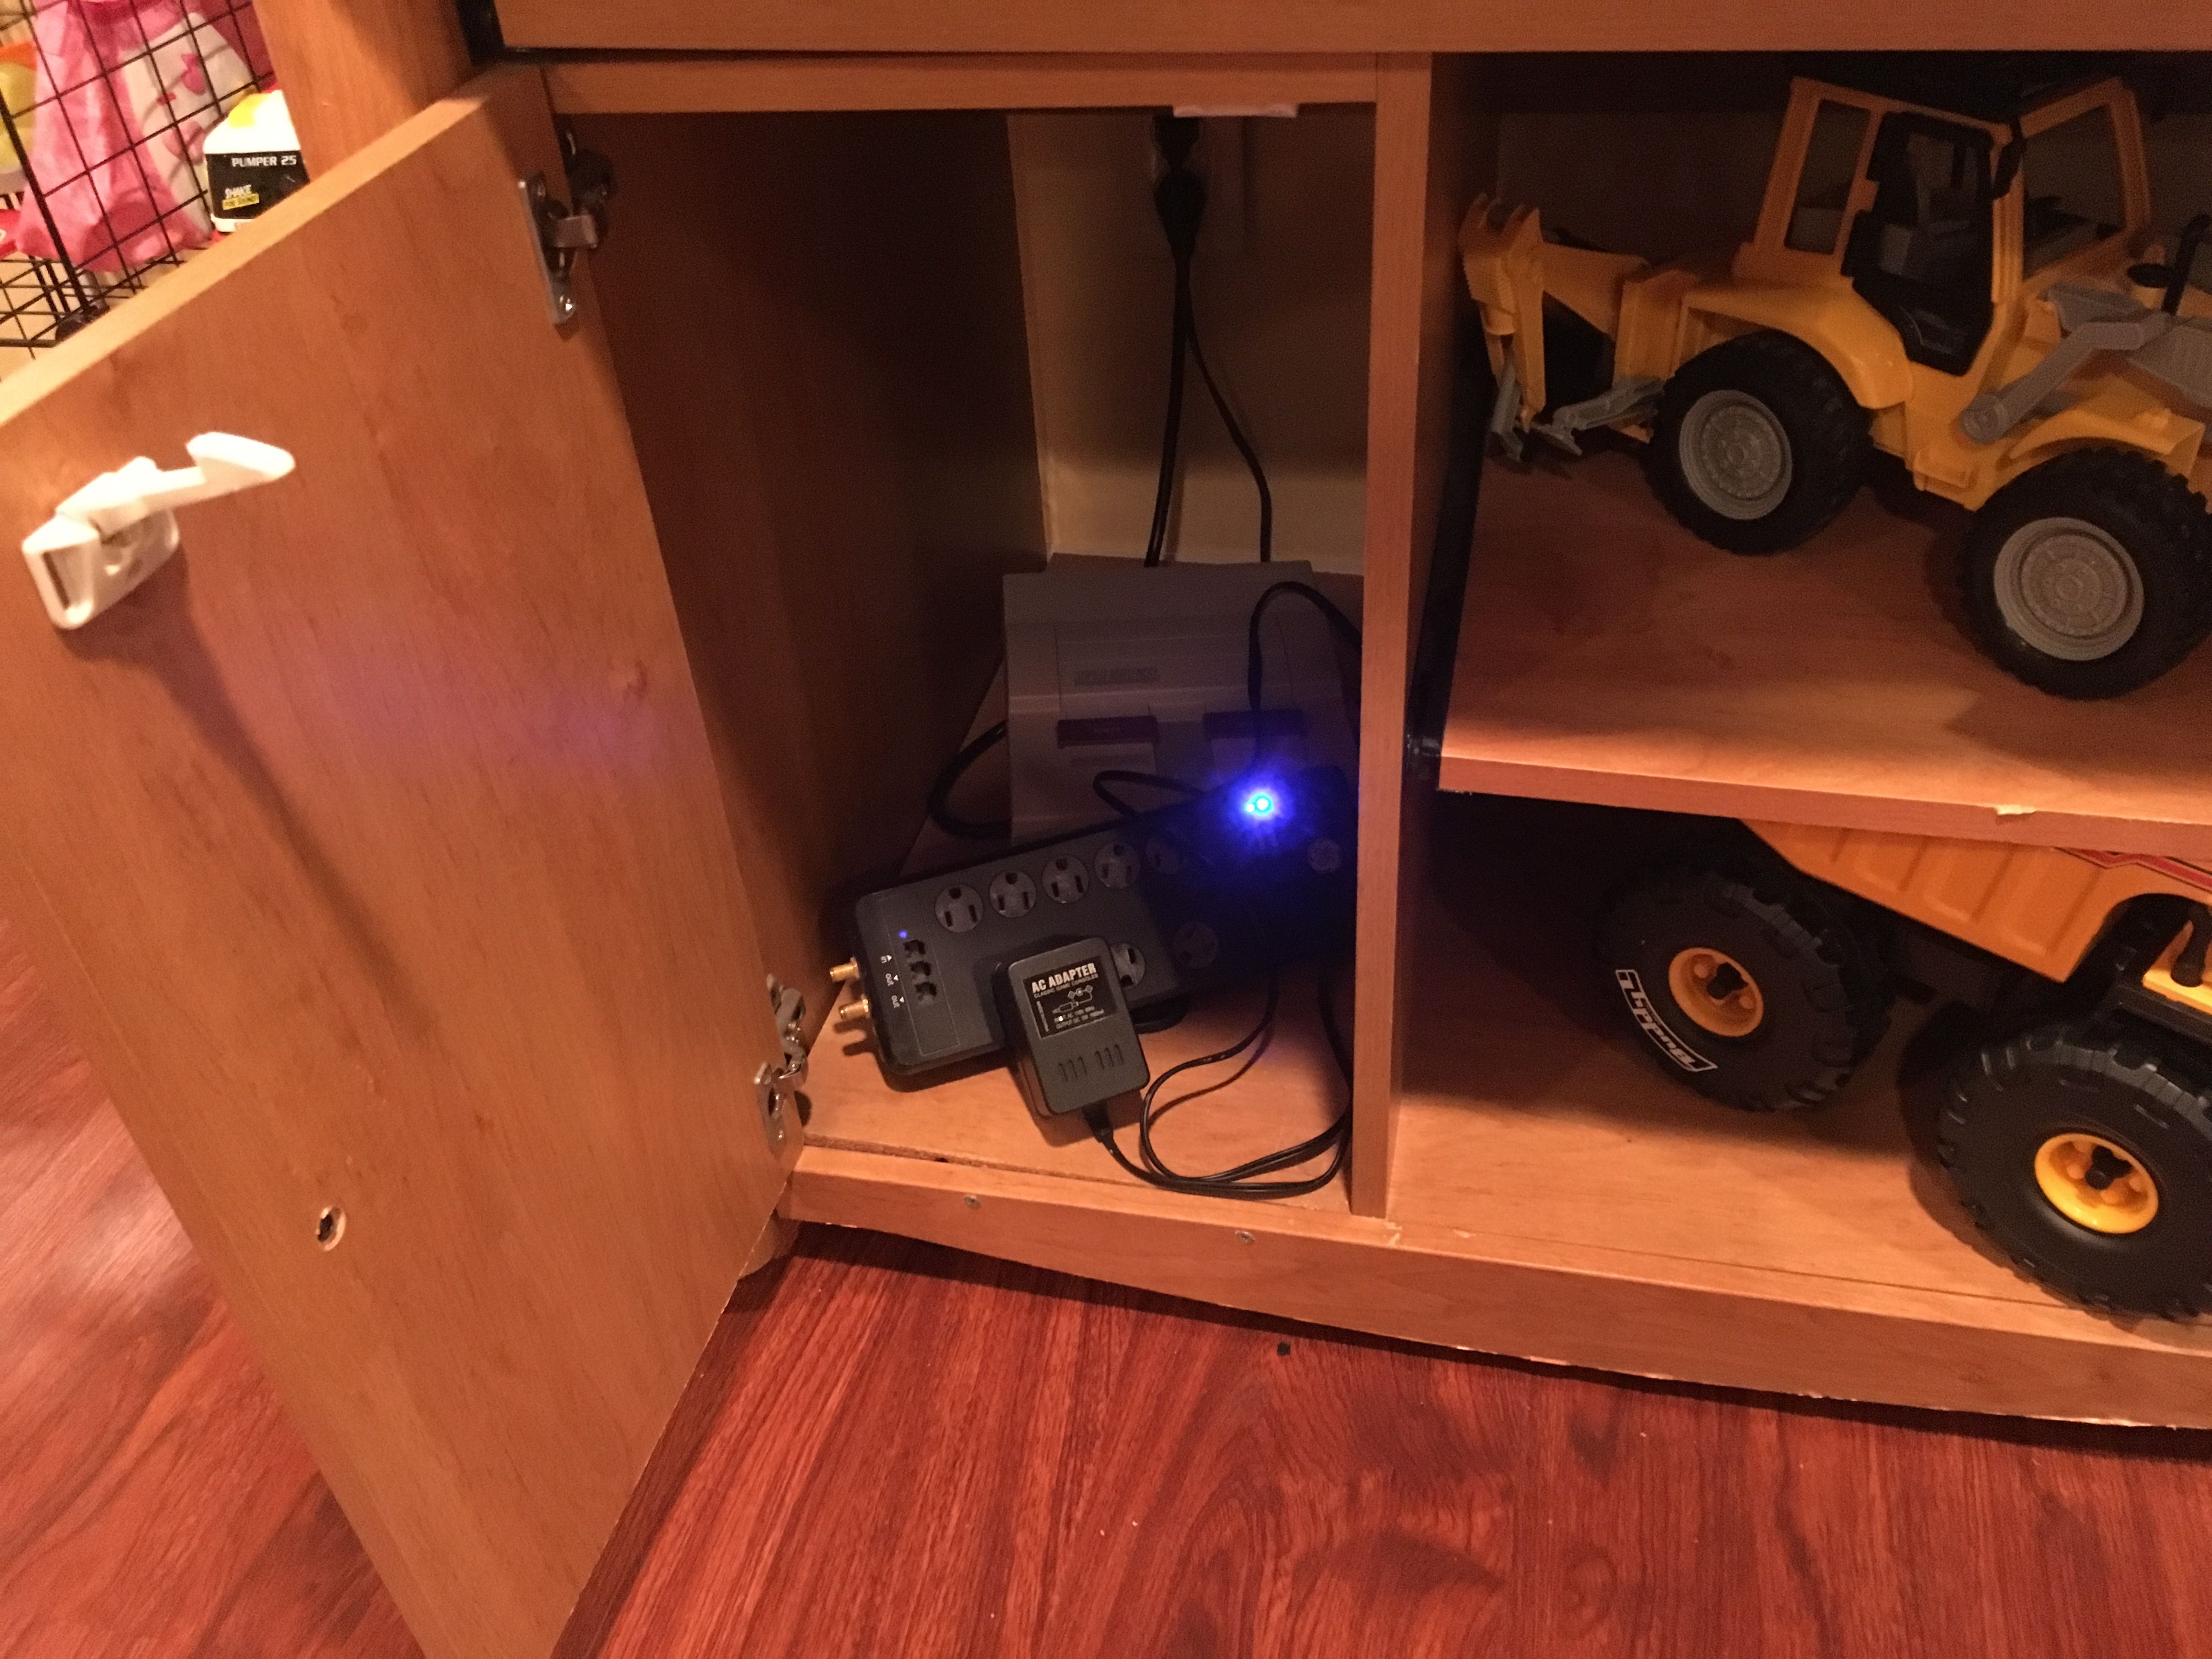
It’s a narrow space, but it’s also protected by a door!
Back to the other side, I started trying to come up with a good way to make some sort of small retro game setup functional while keeping everything out of reach from my mini-Galactus of a daughter. I had stuffed my power strip into this small cabinet here to keep it away from her, but then she figured out this door opens and started trying to play with it. I baby-proofed it rather quickly which got me thinking of maybe keeping a few smaller things in there locked away that can be busted out with ease when I want to play. Maybe just an NES and a SNES for the time being.
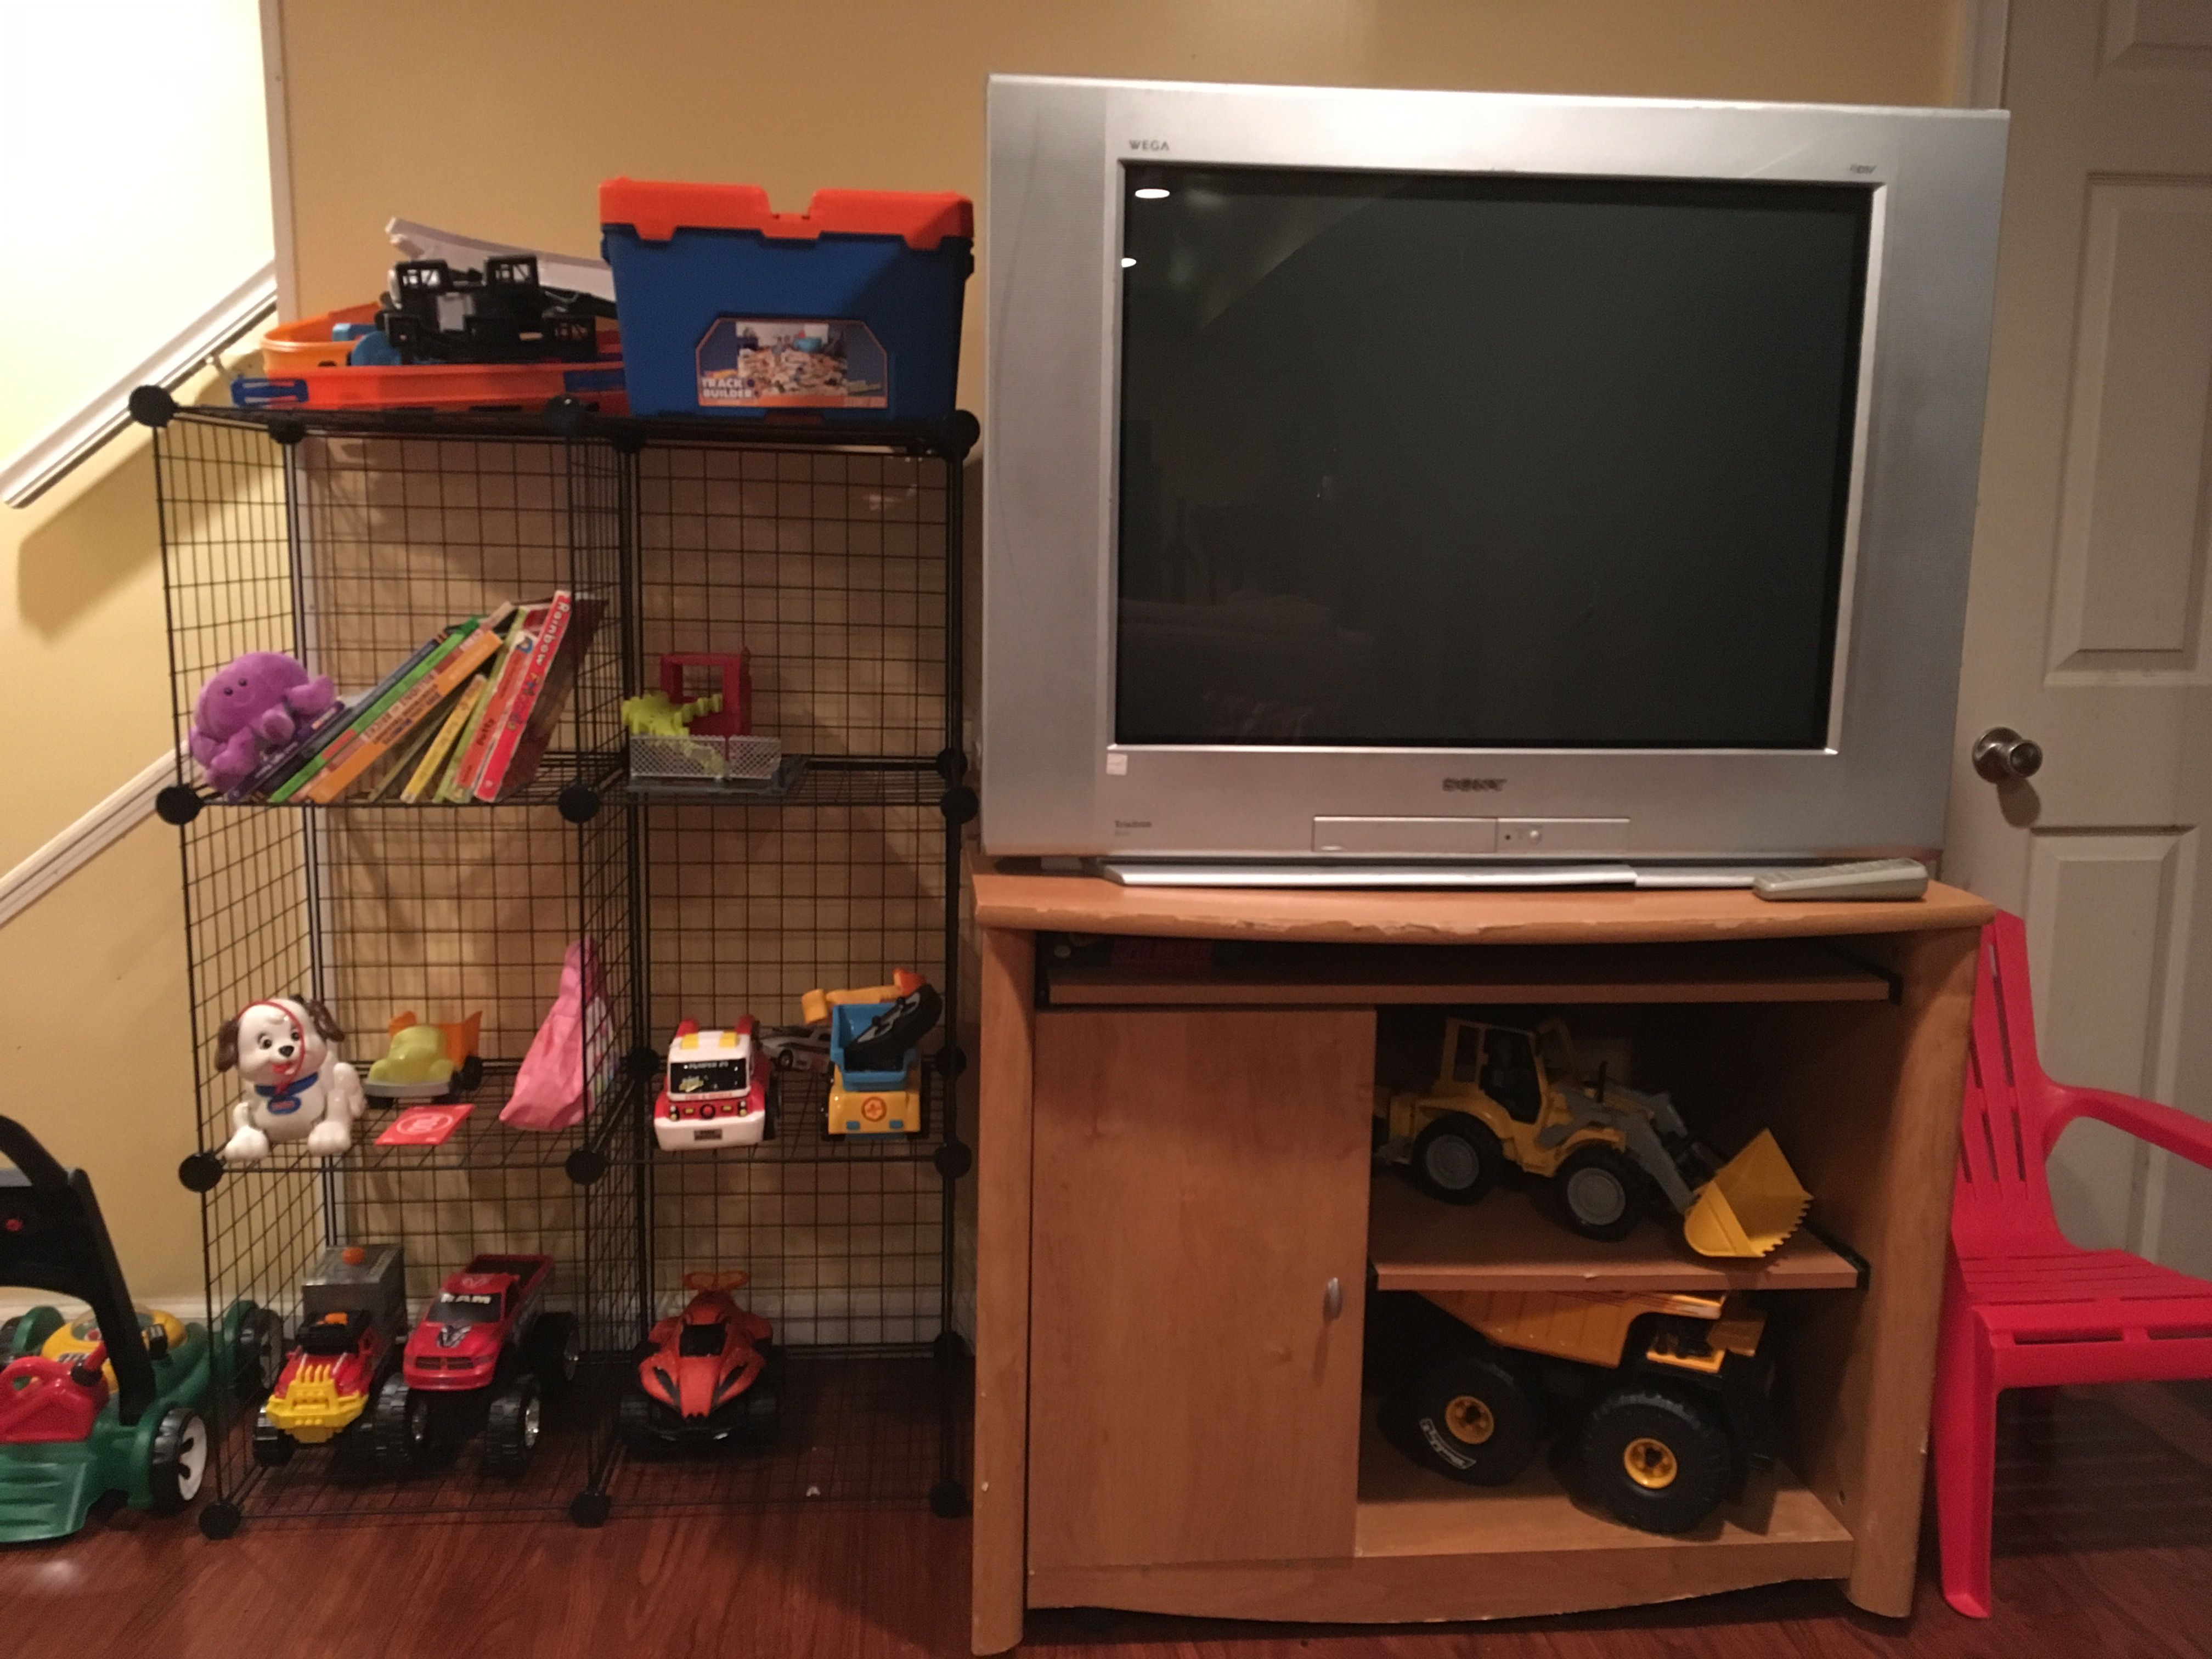
These wire shelves are great.
The long-term goal is going to be to use this set of wire shelves to house my various consoles on. When I posted my last game room update on the Stone Age Gamer Facebook page, a gentleman named Johan recommended these to me and I’m very happy with the result. Thanks Johan! I would up finding them on clearance at BJs for $10. I considered buying more than one, but I think this should be enough for what I’m eventually going to wind up doing. The cubes are wide enough to house most consoles, and I’ve got the flat surface at the top for some of the wider stuff like the original Xbox and maybe the Sega CD. In the meantime, they make an excellent place to store even more kid’s toys, of which there are many.
Not 1, but 2 sliding shelves!
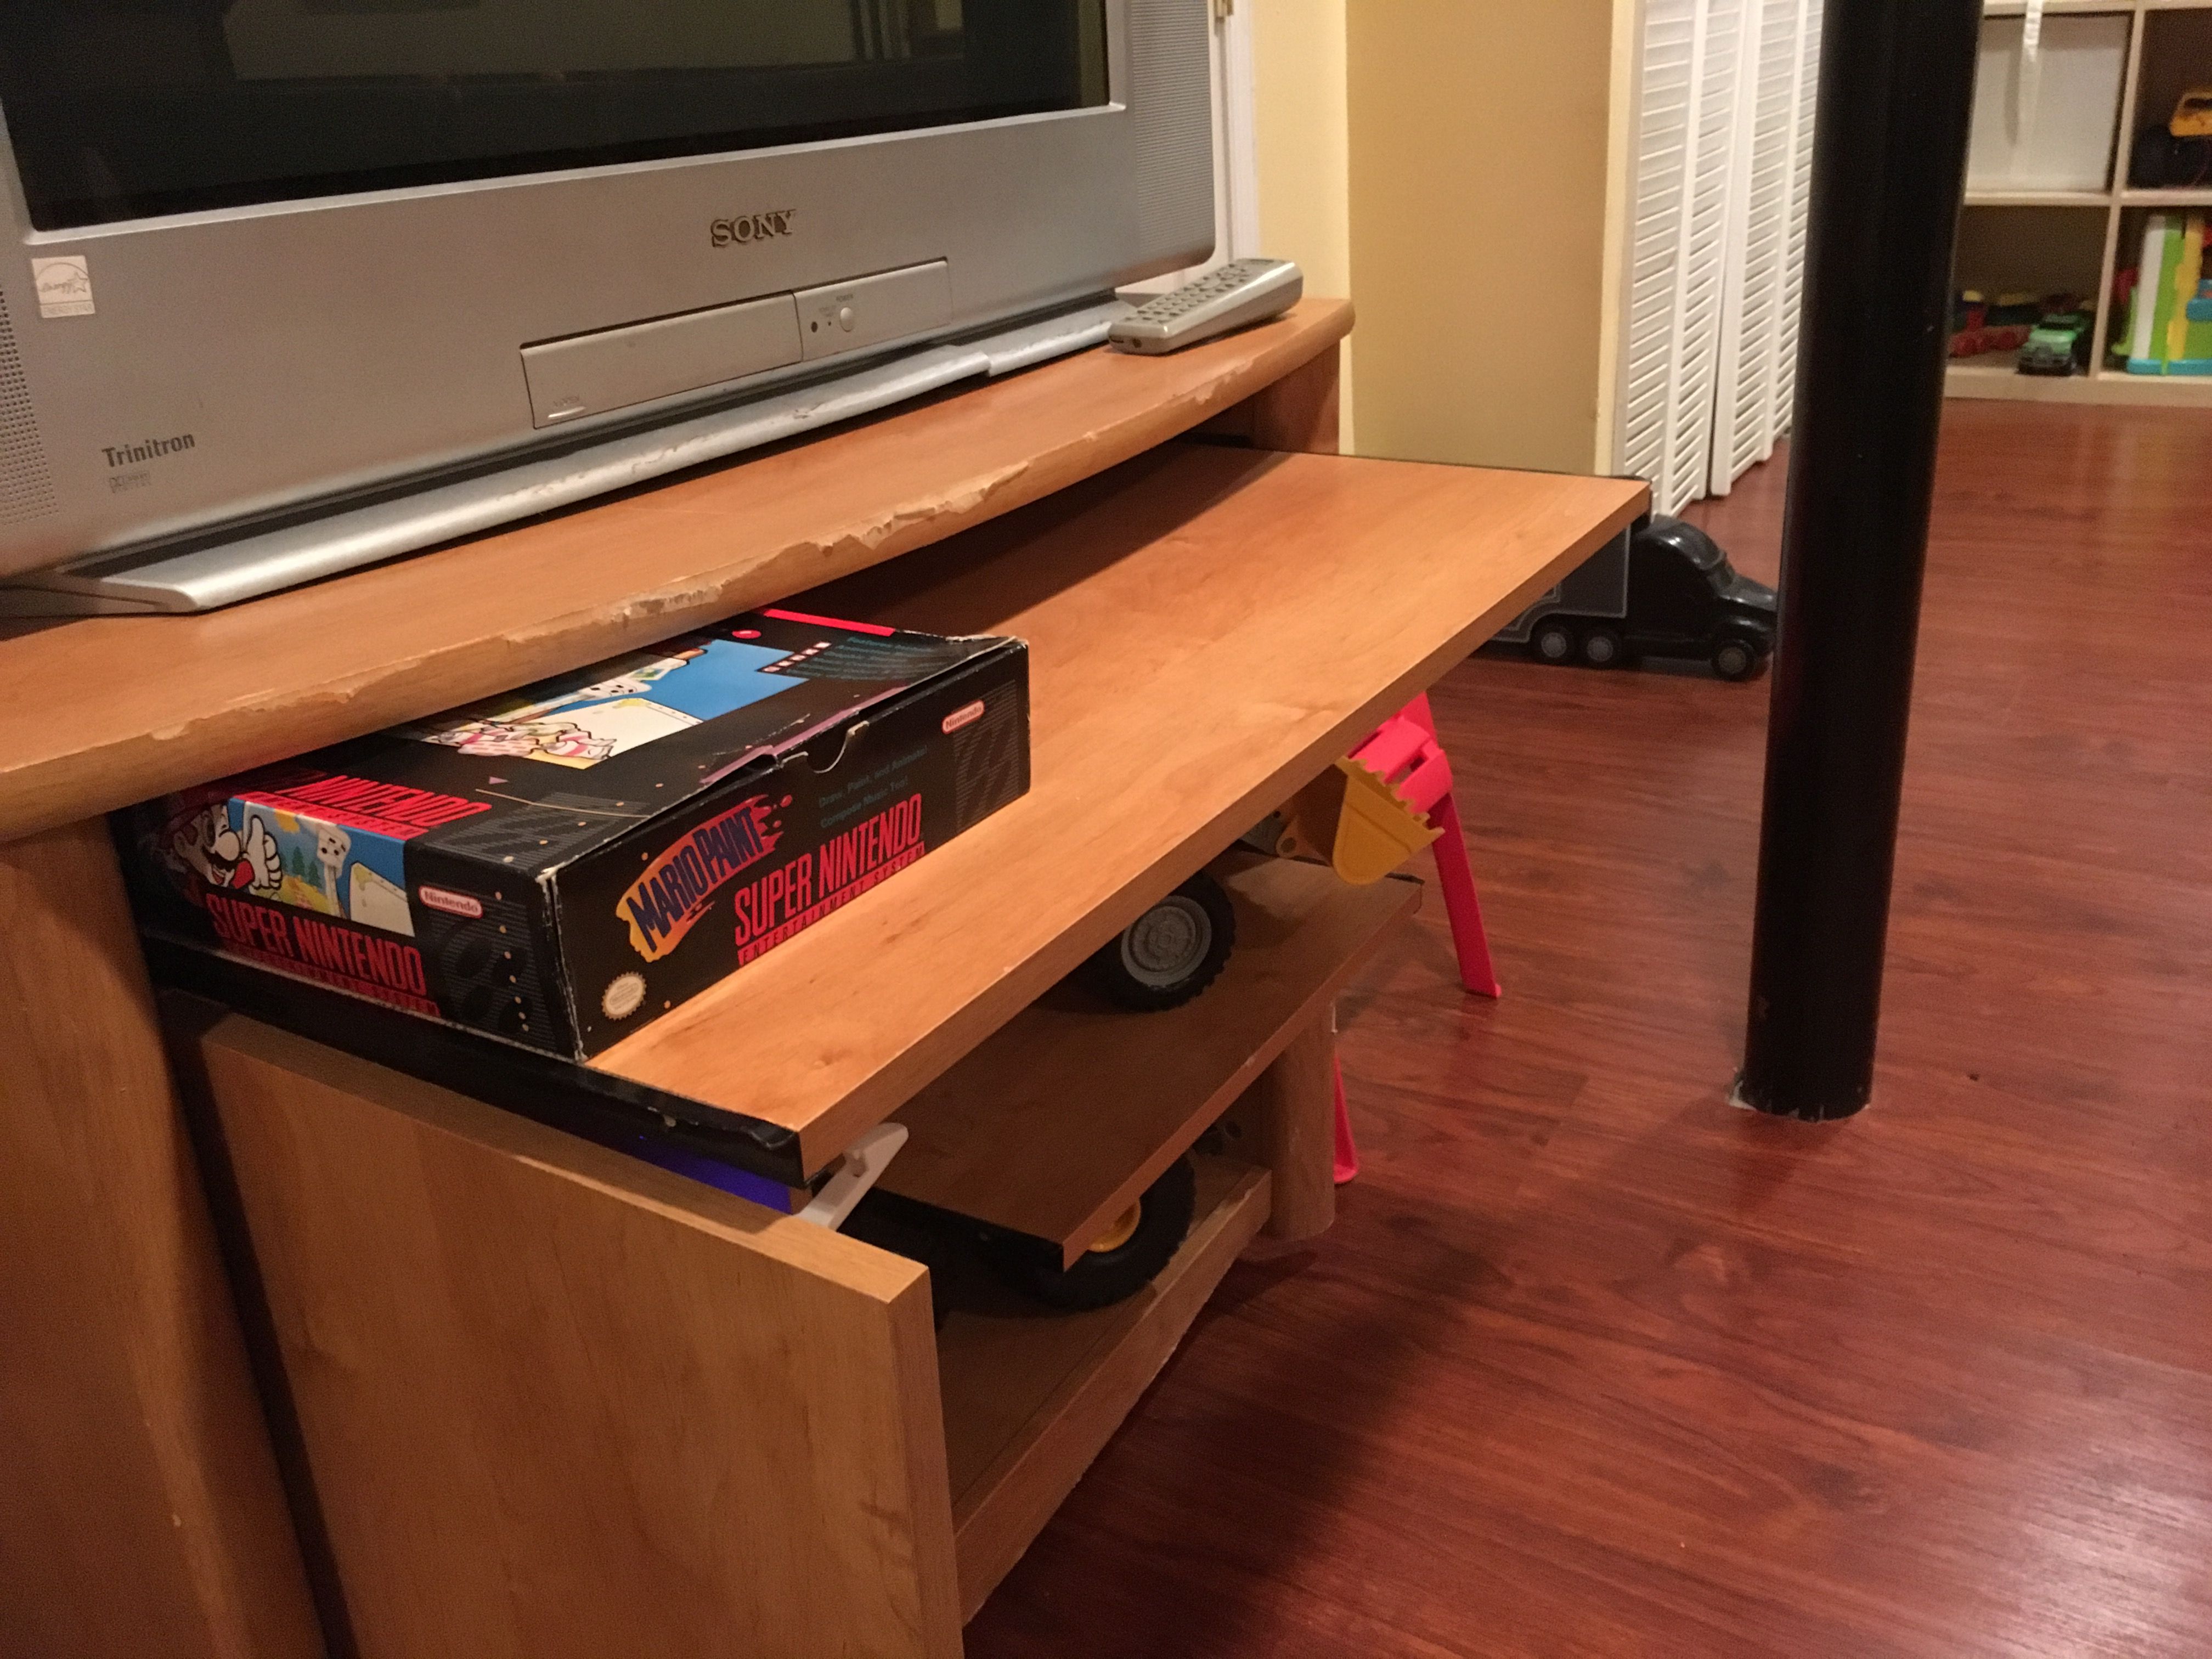
Anyway, for the same reason I can’t have proper game shelves set up, I can’t use these wire racks for game consoles because my daughter would eat them. (This kid loves chewing on cables!) so what I’d like to do is temporarily come up with a more modular solution. I’m thinking I can keep a few consoles boxed up with a couple of games and controllers in individual bins in the closet. Then, if say, I want to play my Saturn, all I have to do is grab the container with the Saturn in it, it will have all the wires I need, plug it in the AV spot in the front of the CRT, and boom. I’m ready to sit back on my couch and play. The TV stand has this cool pull-out tray on the front of it, so it’s perfect for this sort of plug and play scenario. I think this will make for a good compromise until the kids are old enough to know what they can and can’t mess with.
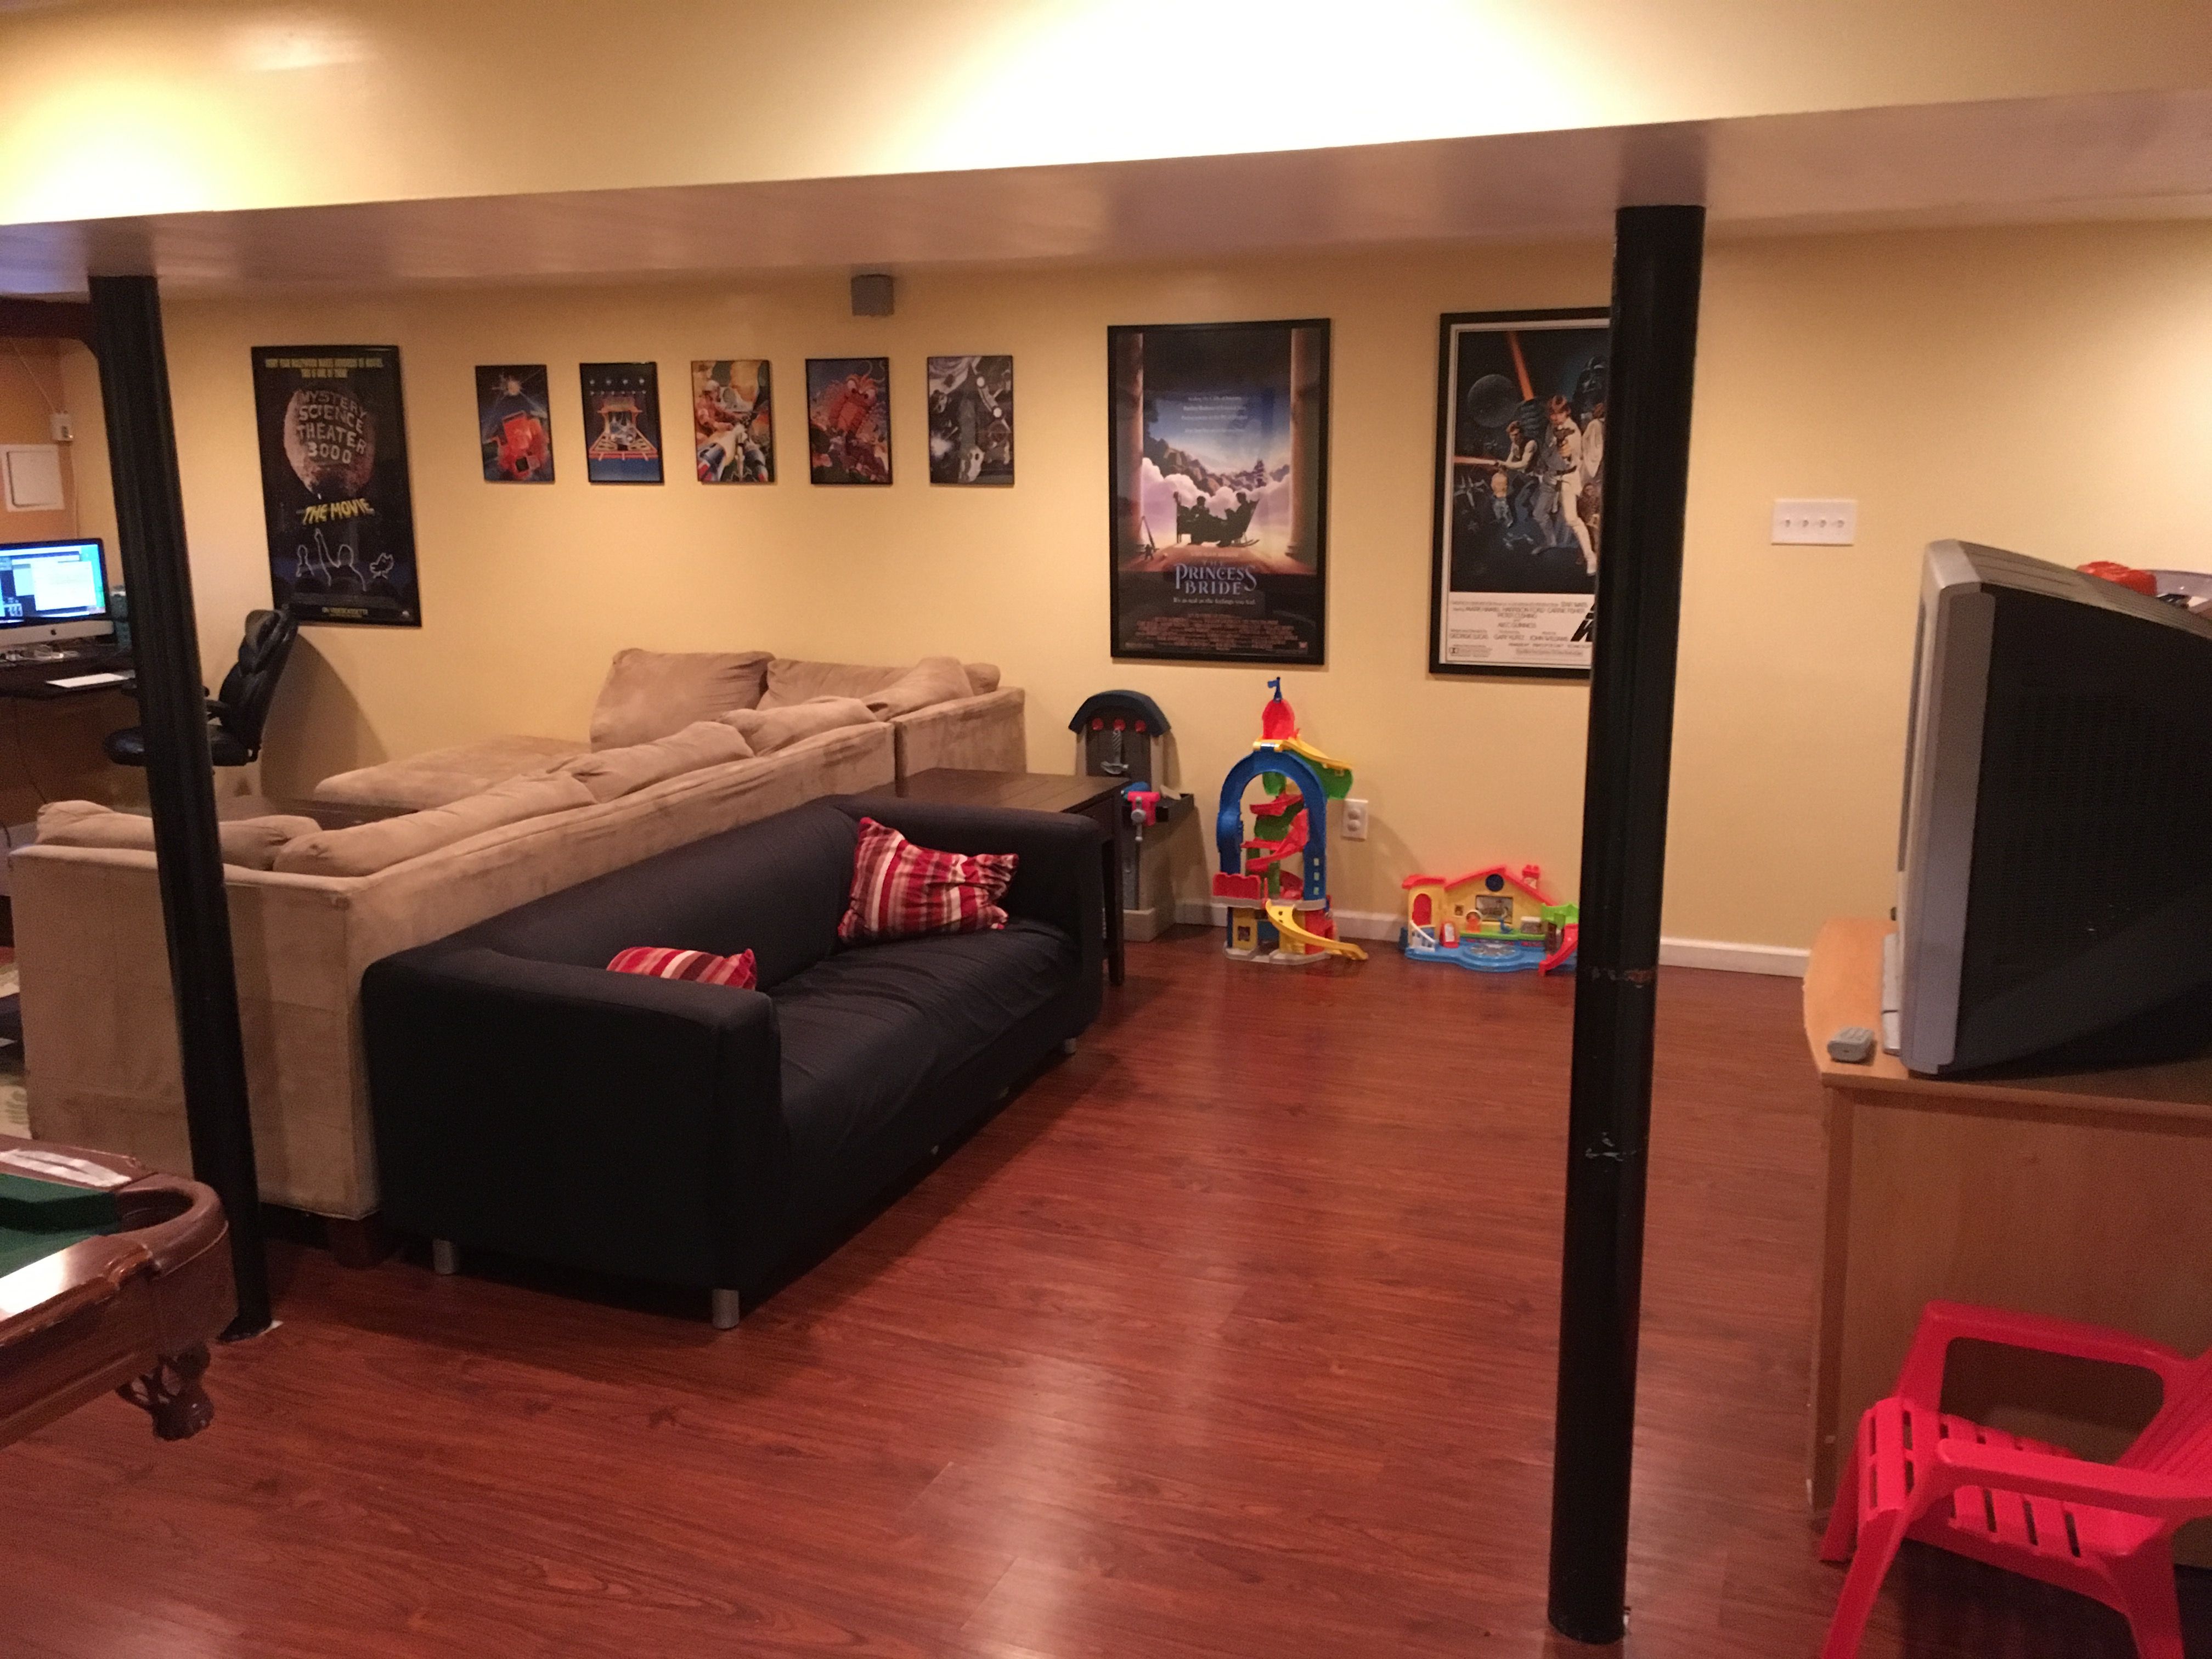
The space between the back of the tan couch and the light switch is eventually going to be all shelving, but this looks pretty nice for now.
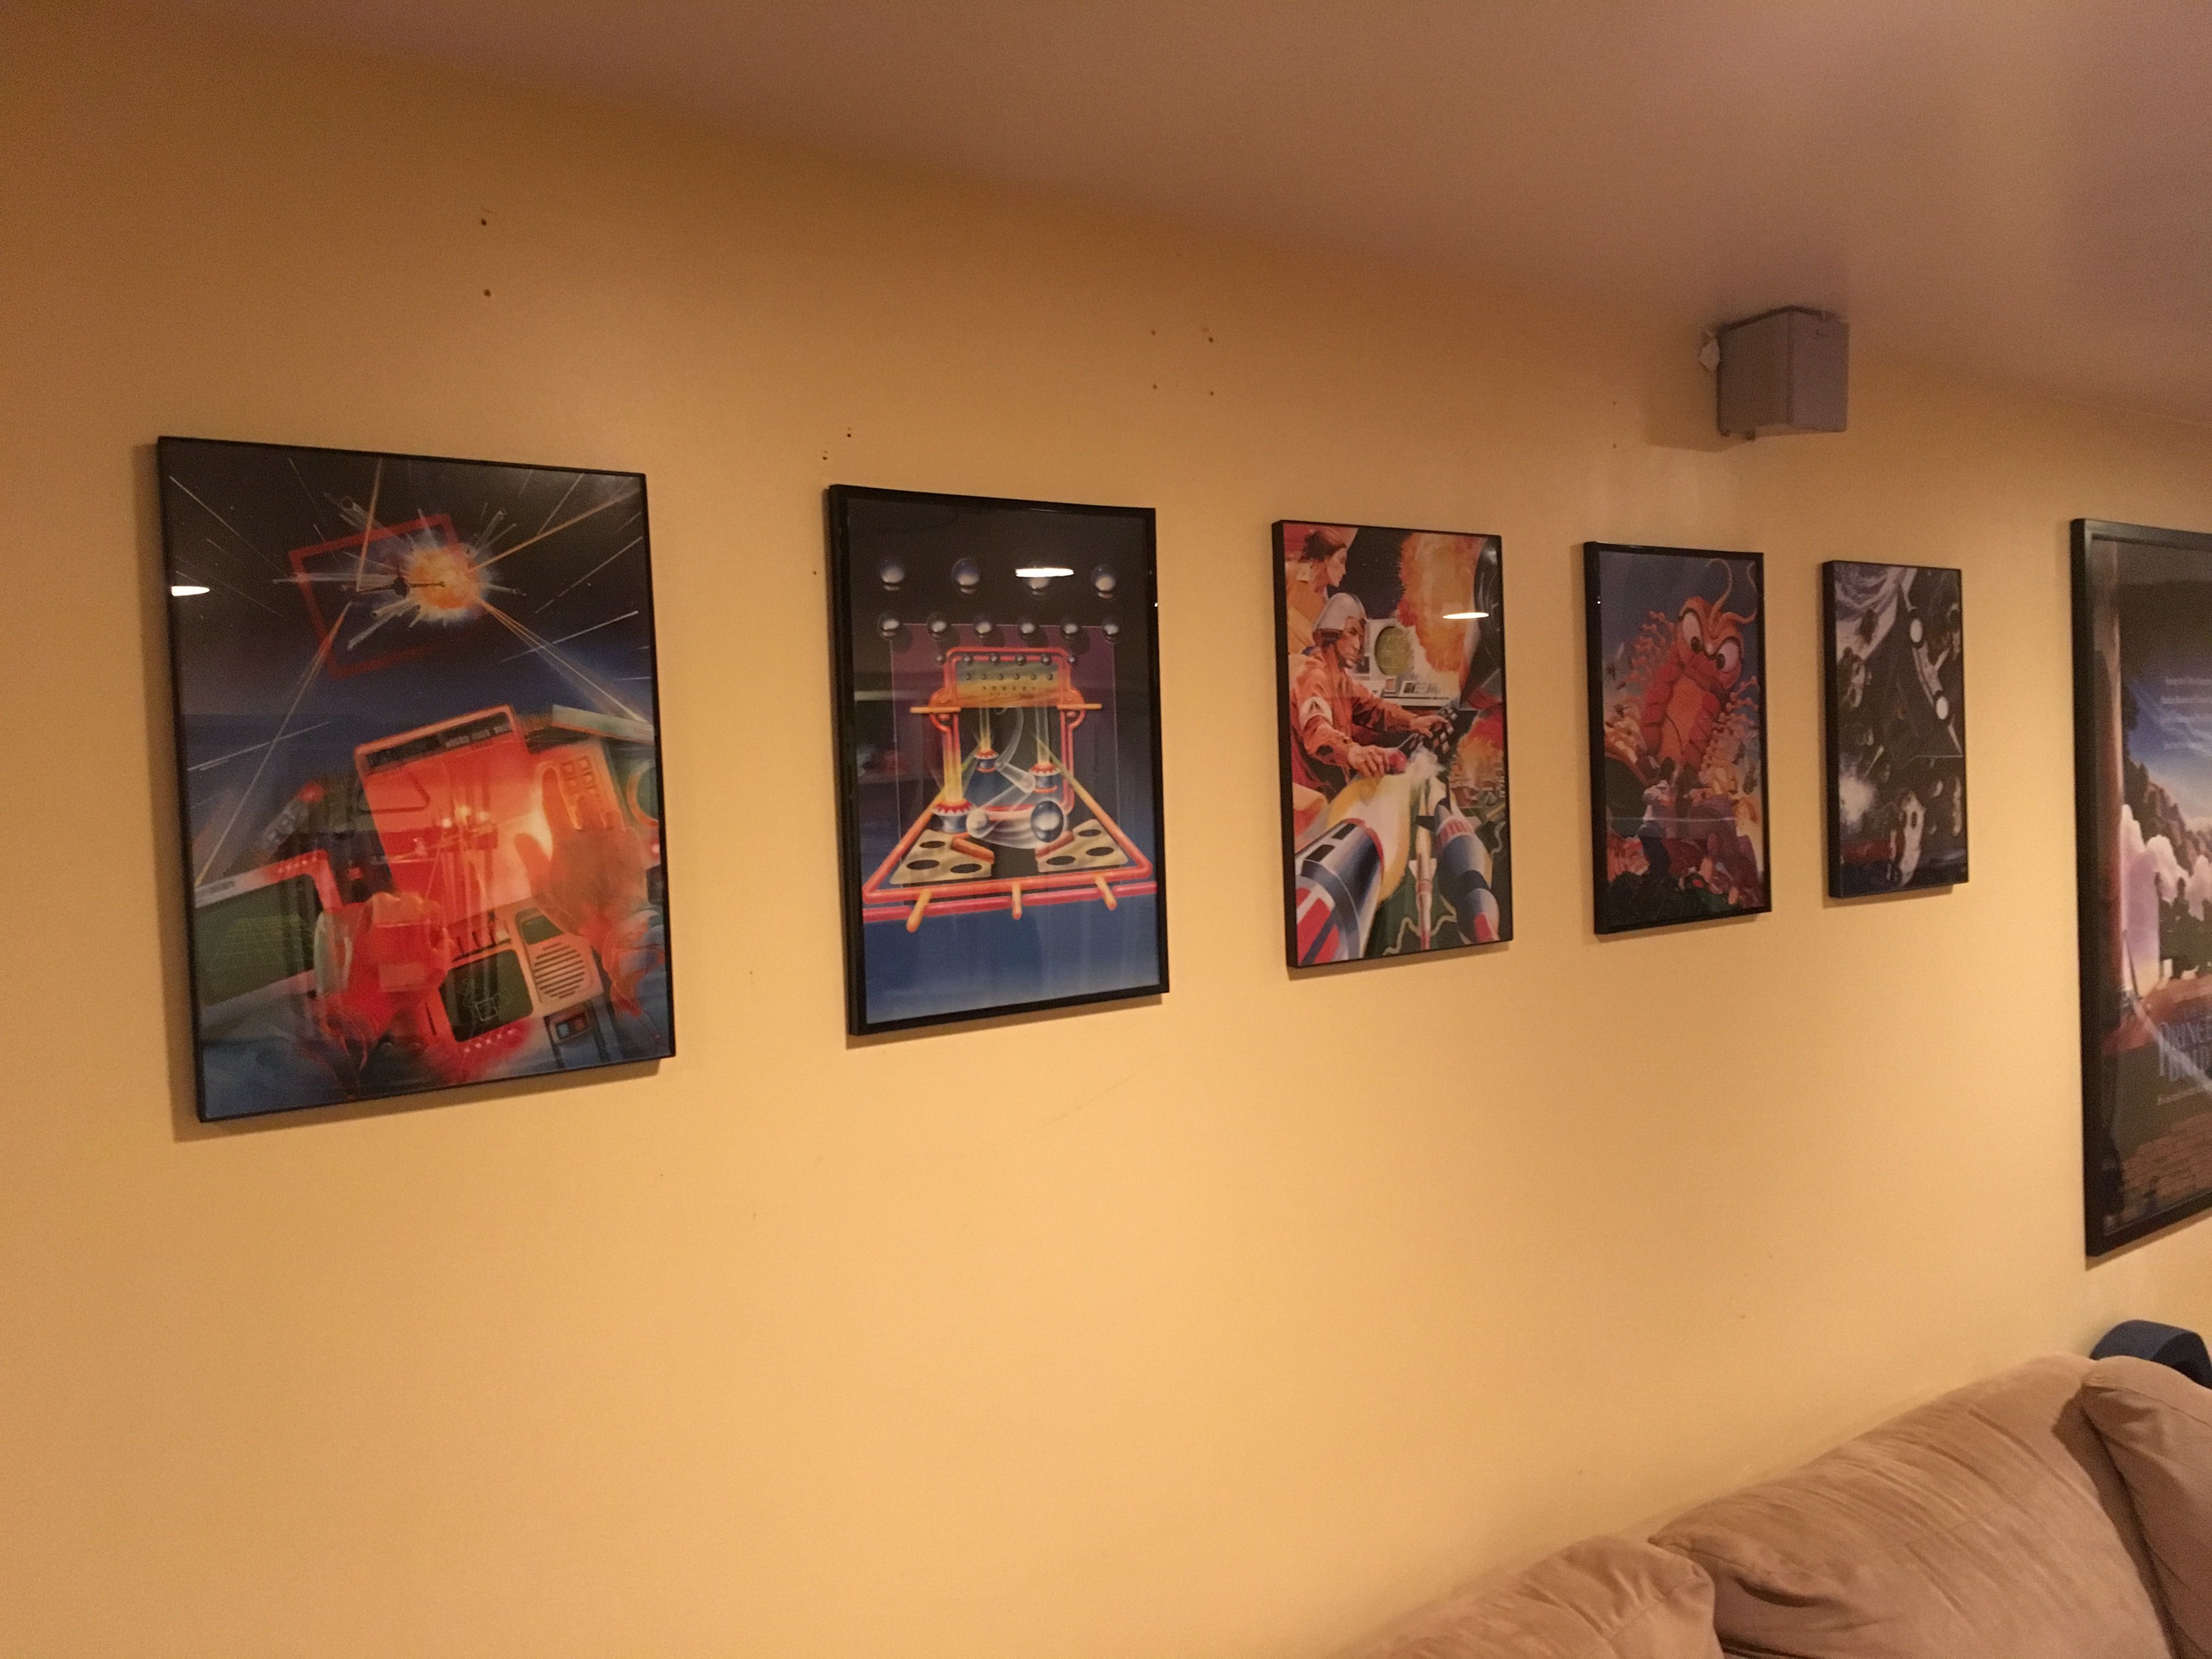
Now, onto the space for the shelves. Since I’m not doing the floor-to-ceiling shelves yet, and I don’t want to do the floating shelves yet either because I don’t want to divvy up my games until I have a better understanding of exactly how many shelves I’m going to have to work with, I decided to fill those walls with some cool pictures instead. I had some nice, big movie posters sitting around that go pretty perfectly in this big space here, but over the couch I decided to get some cheap frames from Michaels (They were buy 1 get one!) and frame up some of the posters from Tim Lapetino’s Art of Atari poster book. These guys look so nice here I’m actually considering rethinking my floating shelves idea to work around them. I would be genuinely bummed about taking them down once it comes time to hang up the game shelves, but I’m confident I can make it work. But that’s a problem for another day. For now, I think they look pretty fantastic where they are.
They’re so pretty…
So I guess the next step is going to be setting up my modular console storage idea. I think I’ll concentrate on surviving Thanksgiving and Christmas first.
The Game Room story so far:
Creating a Game Room: Part 7 – Two Steps Forward…
Creating a Game Room: Part 6 – Love (HDMI) Connection
Creating a Game Room: Part 5 – CRTs are Heavy
Creating a Game Room: Part 4 – Arcade Dreams
Creating a Game Room: Part 3 – Shelf-Satisfaction