32GB or Less
While most operating systems can format SD cards that are 32GB or less as FAT32, some do not do a proper job. We highly suggest of using the SD Association's Official SD Card Formatter. Here are instructions using this software:
- Download the latest version of SD Card Formatter from: https://www.sdcard.org/downloads/formatter/
- Unzip and install SD Card Formatter.
- Insert your SD card.
- Once installation is complete open SD Card Formatter.
- Your SD card should be listed at the top. Select it.
- Using the following settings:
- Check "Overwrite format"
- "CHS format size adjustment" should be left unchecked
- Volume Label can be whatever you want.
WARNING: Do not use a Volume Name that is the same as the OS folder name. This can cause the flash cart to think the OS does not exist.

- Click the "Format" button.

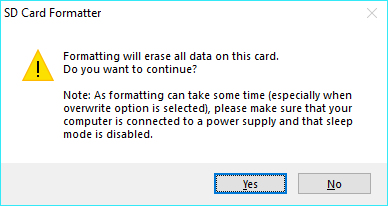
- You will then receive a confirmation warning you that all data on your SD card will be erased. Click YES.
- It may take quite awhile for the format to complete. Please do not remove the SD card until it has completed its formatting.
64GB or Larger
While some flash carts can handle exFAT or NTFS formatting, some require SD cards to be formatted with FAT32 even when they are 64GB or greater in size. Most operating systems will not allow you to do this. It requires special software such as RMPrepUSB to achieve this. If you are not using a Windows OS you may need to find another program to format 64GB or larger as FAT32. The following is instructions on achieving this using a Windows OS:
- Download the latest version of RMPrepUSB from: https://www.fosshub.com/RMPrepUSB.html
- Unzip and then install RMPrepUSB.
- Insert your SD card.
- Once installation has completed open RMPrepUSB.
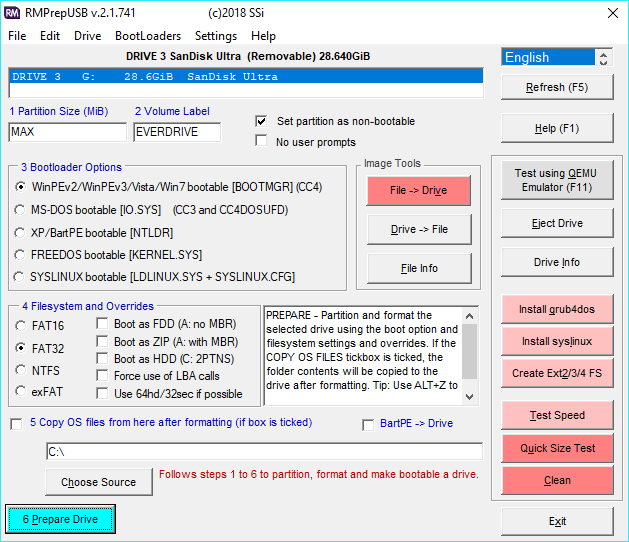
- Your SD card should be listed at the top. Select it.
- Check "Set partition as non-bootable".
- "No user prompts" can be left unchecked.
- Use the following settings:
- Partition Size: MAX
- Volume Label can be whatever you want.
WARNING: Do not use a Volume Name that is the same as the OS folder name. This can cause the flash cart to think the OS does not exist. - Bootloader Options: WinPEv2/WinPEv3/Vista/Win7 bootable
- Filesystem and Overrides: FAT32 (all overrides should be left unchecked)
- "Copy OS files from here after formatting (if box is checked)" and "BertPVE -> Drive" should be left unchecked.

- Click the blue "6 Prepare Drive" button at the bottom left corner.
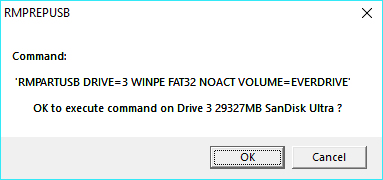
- You will get an Execute Command confirmation. Confirm it is indeed the correct drive/SD card you are formatting. Click OK.

- You will then receive a final confirmation warning you that all data on your SD card will be erased. Click OK.

- After some commands are run you will be brought back to RMPrepUSB. Your SD card is now properly formatted.

