Replacement Dreamcast Console Shell Overview
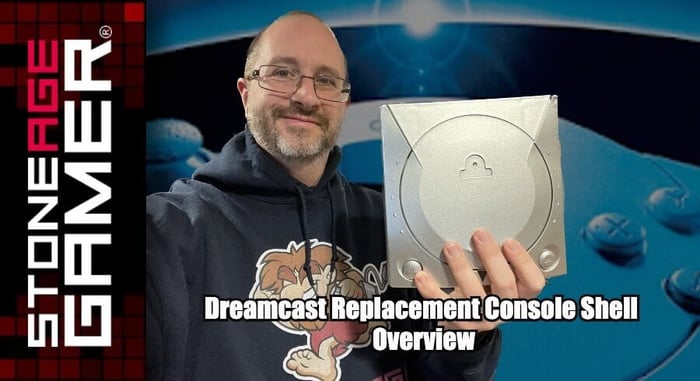
The Dreamcast is already a pretty cool-looking system, but you can make it even cooler with multicolored replacement shells! Here's how they work.
Grab yours here: https://sag.rocks/3FavDBw
Transcript of the video:
Hi, everyone. Kris from Stone Age Gamer here, and let's talk a little bit about the Dreamcast. This is an incredibly cool looking game system. But you know what? You can make it look even cooler. That's right. Like most consoles of a certain age, upgrades have become easier than ever. And that includes new console shelves like this snazzy, awesome silver one. How does it work? Let's take a look.
[00:00:26] Well, okay, here we are. This is the box that the Dreamcast shell comes in. This is the one that they sent to me to do this video with. And it is silver. I can see you have written right there. So pretty nice looking box. Retro is cool. I agree. Retro is cool. Let's see what's a six on the inside? Let's take a look at this gentleman here. Nothing else of note in the box. Nothing else at all in the box, actually. Go ahead and crack this open and see what the shell looks like without a Dreamcast in it. And surprise, it kind of looks like a dream guess. So this is a this is the silver one. This, I believe, is painted silver. So you got to be careful not to ding this one up because it's not like solid silver plastic in the silver painted. Obviously there's no spring here in the power, but this works just fine. Tada! There's the inside of it. Let's see. Here, hold this open. Okay. It's all yellow on the inside. That's neat. And okay, so it also has the shell for the modem right here. So I guess we'll be changing that too. Should be fun. So that's the basics of the shell right here. I'm going to go ahead and leave this off and we are going to grab my Dreamcast here. Where There you are.
[00:01:44] This is my slightly yellowed Sega Dreamcast. No, that's not a trick because this is all yellow. This is just a kind of funky looking hooray for white systems getting older, huh? All right, so what we're going to do is we're going to take this take this gentleman apart here, and we are going to try to swap the guts out nice and easy. Put one into the other. Now, I have if you've watched any of my other videos of me messing with this kind of stuff, I have actually opened a Dreamcast before, only once, and it was to install Mode back in our mode video that were released a while ago. So it's been a little while, but I think I can handle it. I don't think it's too complicated. So I'm going to go ahead and take this thing apart and get to work. Wish me luck.
[00:02:52] Okay, so that lid lifts right off, and it looks like that's just a pretty straightforward one. The one there. So if I wanted to go to tone, if I wanted to, to feel lazy about it and I just want to go let's have a two tone Dreamcast situation here today. There we go. Problem solved. I don't have to do any. The hard part that looks that doesn't look great. So we're going to go ahead and not do that. Although I got to say, maybe with the other colors, the like the clear blue or whatever, kind of like matching the controllers, because some of the controllers were too tone like that, that might be kind of cool. But for the sake of this video, we're going to go continue to take these guts out. We're going to unscrew everything and just kind of one right into the other. So here we go. I want to take a bow, right?
[00:03:43] Okay, I've taken the various bits off and I have unscrewed everything that I can see. So I've left the screws in there just to make sure that I don't lose them. And I'm going to go ahead and take a swing at seeing if this will just come out and go into the new one. So here goes. Nothing I want to take forever, right? Huh? I just had to come at it from a different angle. Okay, so we've got the base here and it just kind of comes right off. Neat. All right, we're going to move this over to the side. My old yellowy thing here. And I go ahead and drop this thing right in here and hopefully line it up exactly where it belongs. Want to take a bow? Right. Okay. I kind of had to take it apart piece by piece to put it back in here. But once I did, it seemed to go in really nicely. So now I just got to remember where all these screws went. Yikes.
[00:04:54] All right. So as you can see, I have a few extra screws here. Well, they're not really extras. I just don't remember where they went. But I think for the purposes of this video, it's okay. I am going to be taking the shell off and putting my original one back on later. So just for the interest of this, everything seems sturdy. So we're going to go ahead and move these aside and we're going to put the top on and then we're going to see if it all works. But regardless of that, we are sure going to look at how cool it looks because this is nice. Oh, boy. All right. Let me get these screws in and then we'll take a closer look at getting the the modem over there all fixed up. Here we go. All right. And there it is. There is a silver Dreamcast with the the the bits inside of it Looks pretty darn nice if I do say so myself. Next up is this shell, which seems pretty straightforward, right? We just got a couple of just two little screws here. Let's see how easy this this pops apart. Hopefully I don't wind up with extra screws here.
[00:06:06] And just again, I can't stress this enough. I am not the console service tech at Stone Age gamer. So if you send a system in to get modified, I will not be touching it. So have no fear. But also you. If you do this yourself and you wind up with a bunch of extra screws like probably don't do what I'm doing and just move forward. You probably want to make sure that all the screws you take out go back where they belong. Because even if they seem superfluous, I don't know. It strikes me as the kind of thing that if they were put there because they were important. So here we go. Let's see if this just kind of comes apart. Boy. Oh, there you go. Just pulling it the wrong way. All right, so we're just going to go ahead and stuff this right in here. And Tara. Okay. Yeah. There you go. It actually was kind of easy. You just got to be careful and persistent. So let's screw this back in. Attach it to our Dreamcast and see how it looks. All right. Moment of truth time. Go. And Snap's in the place. And there you have it. That's the silver Dreamcast looking All silver and Dreamcasty. You just got to get a little a Dreamcast thing there. If you really wanted to kind of yank it off of your old one, you could probably do that if you had the right tools. Or you can get replacement stickers to put that there. But either way, this pretty nice looking system.
[00:07:47] Replacement console shelss for the Sega Dreamcast are available now in stone age gamer dot com. Thanks for watching everybody. If you like what you saw here today, please follow comment Lycan subscribe and go down to the comments and let me know what you think those screws belong because, well, I'm going to need to put this thing back together. I'm going to take the Dreamcast out of here and put it back into here and hopefully I can figure out where all those screws went when I do. So either way. Thanks again for watching. From all of us here at Stone Age Gamer, keep playing games.


