Creating a Game Room: Part 22 - The Closet Conundrum
A nice place for the excess
And now… the closet.
This little closet has been both my savior and the bane of my existence ever since we moved into this house. On one hand, it’s just big enough to have handled safely storing my collection, but it’s also been so ridiculously stuffed that every time I wanted to get out a game or a controller it involved me digging out case after case just to find what I’m looking for. But that all changes now.
With the bulk of my collection out and on display, it’s time to rejigger this into the functional storage space I’ve always dreamed of.
The first step is cleaning out the excess. There’s stuff here that I care about enough to keep, but I don’t need regular access to. It’s also more or less attic safe, so I’m going through every stinking thing in these boxes and pulling out the stuff that I can imagine having any kind of use for, and everything else is being boxed up in the attic until I feel like selling it off.
Once that’s done, I’ll have a better picture of what I’m dealing with. And I can make a better home for all these games that I didn’t have room for on the floor shelves.
Now, we build.
The concept for the stuff out on the floor was to make it as pretty as possible. This stuff can look like a mess because it’s going in a closet! But first I was going to need shelves.
I’m not a very handy guy, but I feel confident in my ability to at least put together a couple sets of basic wooden shelves. All I needed was the wood itself to be cut since I don’t have the tools to do that part myself. So off to Home Depot I went.
I picked out the cheapest wood I could find (because I don’t need it to be pretty, just sturdy) and I found a person to cut it to my specs. Unfortunately, I was informed that they don’t cut wood for projects anymore. They’ll do a couple of cuts to help you get it in your car or something, but if you want wood cut, you’re on your own. Fortunately for me, I have a local friend with a woodshop in his garage, so I headed over there.
He even let me use the tools to cut the wood! It was a good time, and I didn’t lose any limbs.
Now that I had my pieces all together, it was time to assemble. The goal is to have 2 sets of shelves effectively creating a corner that I can use to fill up with games of various sizes. So, I cleared a space in my basement to the best of my ability, (making sure to leave plenty of children's toys out for me to trip on while I worked because clearly I’m an idiot), and got to building.
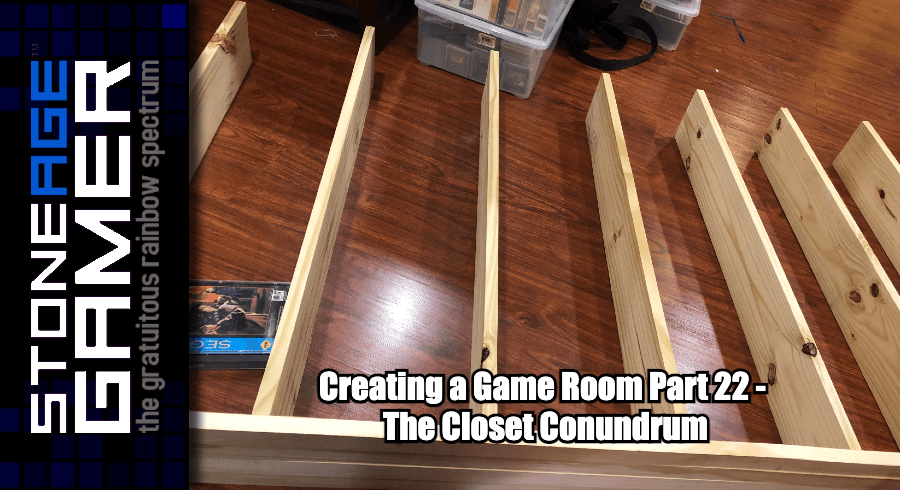
First, I laid out all the wood and became instantly aware how underprepared I was to do this. I could visualize what I wanted to go where in my head, but actually holding these things in place in a way that allowed me to screw them together was a bit tougher than I thought.
I wound up doing this wacky little balancing act for the first bunch of bits, and I used my coffee table a lot to keep things sturdy.
Eventually things started taking shape. I used a Sega CD case as a measuring tool so no matter what I’d always have enough room on any given shelf for something as tall as that.
With the first one complete, I worked it into the closet and it fit like a glove. Then I repeated the process for the second set.
And viola, shelves! But there was one last step before filling them up, and that’s a shelf liner. My friend who helped me cut the wood told me that these shelves are going to start seeping a bit of sap at some point, so I should go to the hardware store and get some sort of contact paper to line them with to protect the games. And whoo boy am I ever glad he told me that because that would have SUCKED to run into in a couple of years.
Now that they’re in place, it’s time to finally get these loose carts on some shelves. I left the top of each shelf pretty well open so I could fit the weird shaped things like 3DO boxes up there with no issue, and potentially stack some stuff on top if needed.
Then I started loading my 2600 carts at the bottom of one, those boxed N64 games that didn’t match the others, my extra boxed SNES games, and then I just sort of filled the rest with whatever else I could think of.
Sega Genesis proved to be a bit of an issue because I simply have too much of it, and I’m not overly attached to the bulk of it. I love having it, but as of now there isn’t anywhere to keep it all accessible, so I picked my favorites that aren’t out on the main floor and put the rest in a bin in the corner. The bins back here aren’t completely inaccessible or anything, but they’re kind of a pain. Thankfully the MegaSD exists so I don’t have a ton of need to get to these games other than the occasional nostalgic look at their packaging and whatnot.
So here’s the finished product. Pretty snazzy, right?
Storage Under the Stairs
Off in the back we have the rest of the Genesis games, a few other odds and ends, controllers I might need access to, weird stuff I set aside for videos, and then stuff for sale. I plan on refining this further to hopefully clear the floor entirely, but that’s going to take some work. I also put that old DVD rack I used to have next to the TV on the other side of this brick pillar thingy there. I’ll eventually replace that with some more useful custom shelves like the ones I just built, but for now, this is good enough.
Console Collection
The next step was the other side of this closet. It looks like 2 rooms, but this closet is actually one big connected area, and there’s this gigantic space that’s unfortunately not all that usable next to the water heater. This is where I’ve decided my consoles will go.
Years ago when I lived in Elmwood Park NJ, I had my collection organized in my basement there. I did a terrible job of it, and when my basement flooded I lost a bunch of cool stuff. But when I set that room up, I did so with these plastic shelves.
You can sort of see them behind all that stuff in this very old picture. Anyway, they have since been stored in my parents garage where they’ve been using a bunch of them, but the rest have been just sitting there, so I went and picked up a few to put in this corner. They fit like a glove. I lined up a couple of bins full of stuff I don’t need regular access to that still needed to be stored somewhere climate controlled, and then I started emptying my console bins onto these shelves. The end result makes me so happy.
I know it’s hard to see, but trust me when I say it’s pretty great. Ever since my days working at FuncoLand, one of my favorite things is seeing shelves just filled with consoles stacked on top of one another. No, I suppose I don’t actually need all these things, but they bring me so much joy! And isn't that the point?
This is especially great because sometimes I just want to play a system that isn’t hooked up. Sometimes I want to look at the weird stuff instead of the normal stuff I have out. They’re all perfectly accessible for the first time in my life, and I can’t accurately describe the joy that brings me.
I’ve been told that I should put up some sort of shield in case my water heater explodes, and I will certainly get around to that soon. But for now, this came out better than I could have imagined.
And there we have it. I’m almost done. At the very least, I’m at an excellent stopping point. This entire space is so much more usable than it’s ever been, and I couldn’t be happier. Now it’s time to refine and see if I can come up with a better solution to get these bins off the floor.
The Game Room story so far
Creating a Game Room: Part 23 - Filling in the Gaps
Creating a Game Room: Part 22 - The Closet Conundrum
Creating a Game Room: Part 21 - Decorating and Procrastinating
Creating a Game Room: Part 20 - Console Consolidation
Creating a Game Room: Part 19 - So Long, Temporary Solutions!
Creating a Game Room: Part 18 - And Everything Inbetween
Creating a Game Room: Part 17 - Atari to Xbox
Creating a Game Room: Part 16 - Making Nintendo Look Good
Creating a Game Room: Part 15 - Overdoing it on Organizing
Creating a Game Room: Part 14 - At Long Last, SHELVES
Creating a Game Room: Part 13 - Adventures in Consolidation
Creating a Game Room: Part 12 - On the Blink
Creating a Game Room: Part 11 - Reclamation at Last
Creating a Game Room: Part 10 - Paint it Black
Creating a Game Room: Part 9 - Inspiration From Above
Creating a Game Room: Part 8 - A Nice Place to Sit
Creating a Game Room: Part 7 - Two Steps Forward…
Creating a Game Room: Part 6 - Love (HDMI) Connection
Creating a Game Room: Part 5 - CRTs are Heavy
Creating a Game Room: Part 4 - Arcade Dreams
Creating a Game Room: Part 3 - Shelf-Satisfaction


